Does your WordPress site load in under a second? This one can despite running, for years, on one of the lower VPS tiers available at DigitalOcean thanks to Cloudflare. DigitalOcean’s server offerings are excellent for the price and I’ve always found the performance perfectly acceptable given what I’m paying each month. That said, Cloudflare offers a free CDN tier with just the right mix of features to be appealing and useful. No matter how good your server is you will always benefit from a CDN’s ability to cache content and get it physically closer to your audience. This post goes into detail about how to get the best possible performance from Cloudflare and WordPress by tweaking a few settings and installing a single plugin.
I have no association with Cloudflare and I’m not hear to sell it to you but for this post to make any sense you’ll need to have a WordPress site running through at least Cloudflare’s free CDN offering. If this sounds like you then lets continue.
To get started, install the Cloudflare plugin on your WordPress site. Once installed and activated, head on over to Cloudflare and ensure you’ve configured your site’s DNS entry to utilize Cloudflare as indicated by this icon:
Next, visit your Cloudflare settings page (located under your username) and find the API key section:
Click view API Key and copy the value shown.
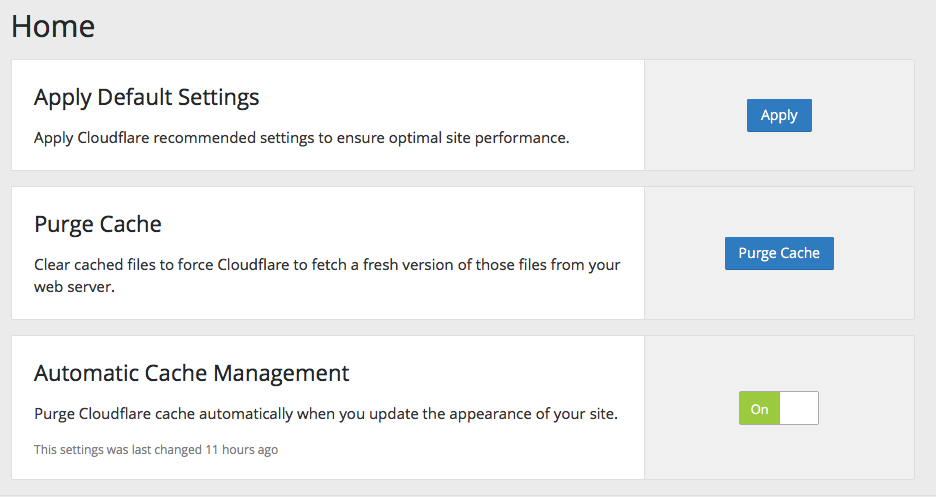
Return to your WordPress site and from the settings menu find Cloudflare. Enter in your email address and API key value. This will connect your WordPress site with your Cloudflare account allowing you to clear the cache when you post new content. Enable the “Automatic Cache Management” option, this is important for this to work. Your admin should look like this:
Next, click the Apply button for “Apply Default Settings.” This will configure a few options for you in Cloudflare that help make this all work.
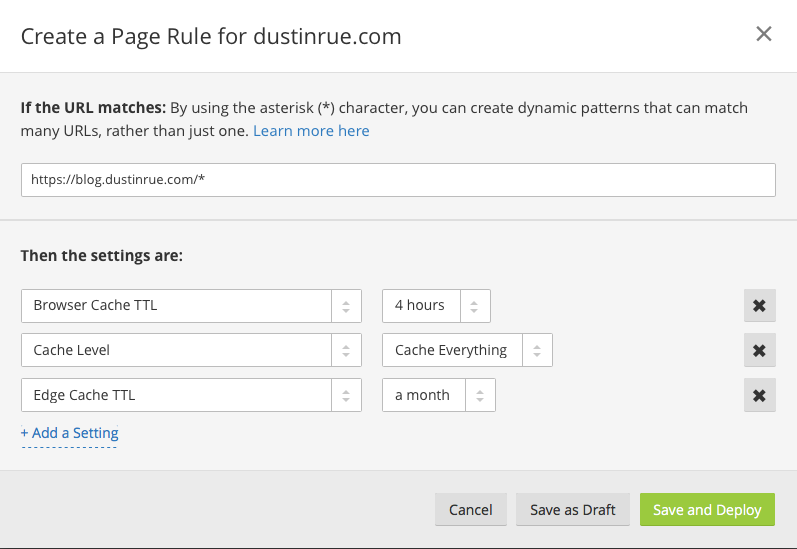
Now you can head over to Cloudflare to create one additional page rule. This page rule is what will really improve the load times of your site. By default, Cloudflare doesn’t cache HTML content regardless of the cache control headers a server sends. Create a page rule for your site that looks like this:
Notice that I set the Edge Cache TTL to a full month. It’s ok to do this because we’ll fully purge the Cloudflare cache whenever new content is posted. The last step is to ensure that your new page rule happens AFTER the rule the Cloudflare plugin created, like this:
If you’re using a paid tier you’ll want to follow Cloudflare’s support document as it’ll provide some additional page rules you can setup to improve your experience.
You’ve probably noticed that this caching method is very aggressive and since I’m using the free tier of Cloudflare I can’t create any page rules based on cookie values that would assist in busting through the cache if I’m signed in. If you have a paid tier of Cloudflare then you can easily create cookie base rules to avoid these issues. Here are the intermittent issues I noticed while testing this setup (all on mobile for some reason):
- Trouble signing in
- I had issues working on new posts
- The admin area in general was a bit broken
In all cases you can resolve these issues by purging the Cloudflare cache from their admin pages. If you continue to have issues double check that you’ve configured the “Cache Everything” rule as shown above. If you still have issues, you might have a plugin that prevents this from working and you’ll need to remove the “Cache Everything” rule.


