Flux, or FluxCD, is a “set of continuous and progressive delivery solutions for Kubernetes that are open and extensible” and is my preferred way to do “GitOps” in my Kubernetes clusters. I like Flux because it handles Helm extremely well (I’m a big fan of Helm) and allows me to have a simple fallback if something goes wrong. In this post, I will go through the process of installing flux, k3s that can be used for testing and then creating a Flux project that adopts Flux’s documented monorepo design. I have also published a copy of the work detailed here to Github so you can use as a working starter for your own project.
Continue readingTag: Kubernetes
Basic Umami Setup Guide
Some time ago I removed Google Analytics to avoid the tracking that came along with it and it all being tied to Google. I also wasn’t overly concerned about how much traffic my site got. I write here and if it helps someone then great but I’m not out here to play SEO games. Recently, however, I heard of a new self hosted option called Umami that claims to respect user privacy and is GDPR compliant. In this post I will go through how I set it up on the site.
Umami supports both PostgreSQL and MySQL. The installation resource I used, discussed below, defaults to PostgreSQL as the datastore and I opted to stick with that. PostgreSQL is definitely not a strong skill of mine and I struggled to get things running initially. Although I have PostgreSQL installed on a VM already for my Mastodon instance, I had to take some additional steps to get PostreSQL ready for Umami. After some trial and error I was able to get Umami running.
My installation of PostreSQL is done using the official postgres.org resources which you can read about at https://www.postgresql.org. In addition to having PostgreSQL itself installed as a service I also needed to install postgresql15-contrib in order to add pgcrypto support. pgcrypto support wasn’t something I found documented in the Umami setup guide but the software failed to start successfully without it and an additional step detailed below. Below is how I setup my user for Umami with all commands run as the postgres user or in psql. Some info was changed to be very generic, you should change it to suit your environment:
- cli:
createdb umami - psql:
CREATE ROLE umami WITH LOGIN PASSWORD 'password’; - psql:
GRANT ALL PRIVILEGES ON DATABASE umami TO umami; - psql:
\c umamito select the umami database - psql:
CREATE EXTENSION IF NOT EXISTS pgcrypto; - psql:
GRANT ALL PRIVILEGES ON SCHEMA public TO umami;
With the above steps taken care of you can continue on.
Since I am a big fan of using Kubernetes whenever I can, my Umami instance is installed into my k3s based Kubernetes cluster. For the installation of Umami I elected to use a Helm chart by Christian Huth which is available at https://github.com/christianhuth/helm-charts and worked quite well for my purposes. Follow Christian’s directions for adding the helm chart repository and read up on the available options. Below is the helm values I used for installation:
ingress:
  # -- Enable ingress record generation
  enabled: true
  # -- IngressClass that will be be used to implement the Ingress
  className: "nginx"
  annotations:
    cert-manager.io/cluster-issuer: letsencrypt-production
  # -- Additional annotations for the Ingress resource
  hosts:
    - host: umami.dustinrue.com
      paths:
        - path: /
          pathType: ImplementationSpecific
  # -- An array with the tls configuration
  tls:
    - secretName: umami-tls
      hosts:
        - umami.dustinrue.com

umami:
  # -- Disables users, teams, and websites settings page.
  cloudMode: ""
  # -- Disables the login page for the application
  disableLogin: ""
  # -- hostname under which Umami will be reached
  hostname: "0.0.0.0"

postgresql:
  # -- enable PostgreSQL™ subchart from Bitnami
  enabled: false

externalDatabase:
  type: postgresql

database:
  # -- Key in the existing secret containing the database url
  databaseUrlKey: "database-url"
  # -- use an existing secret containing the database url. If none given, we will generate the database url by using the other values. The password for the database has to be set using `.Values.postgresql.auth.password`, `.Values.mysql.auth.password` or `.Values.externalDatabase.auth.password`.
  existingSecret: "umami-database-url"
The notable changes I made from the default values provided is I enabled ingress and set my hostname for it as required. I also set cloudMode and diableLogin to empty so that these items were not disabled. Of particular note, leaving hostname at the default value is the correct option as setting it to my hostname broke the startup process. Next, I disabled the postgresql option. This disables the installation of PostgreSQL as a dependent chart since I already had PostreSQL running.
The last section is how I defined my database connection information. To do this, I created a secret using kubectl create secret generic umami-database-url -n umami and then edited the secret with kubectl edit secret umami-database-url -n umami. In the secret, I added a data section with base64 encoded string for “postgresql://umami:[email protected]:5432/umami”. The secret looks like this:
apiVersion: v1
data:
  database-url: cG9zdGdyZXNxbDovL3VtYW1pOnBhc3N3b3JkQDEwLjAuMC4xOjU0MzIvdW1hbWk=
kind: Secret
metadata:
  name: umami-database-url
  namespace: umami
type: Opaque
Umami was then installed into my cluster using helm install -f umami-values.yaml -n umami umami christianhuth/umami which brought it up. After a bit of effort on the part of Umami to initialize the database I was ready to login using the default username/password of admin/umami.
I setup a new site in Umami per the official directions and grabbed some information that is required for site setup from the tracking code page.
Configuring WordPress
Configuring WordPress to send data to Umami was very simple. I added the integrate-umami plugin to my installation, activated the plugin and then went to the settings page to input the information I grabbed earlier. My settings page looks like this:

With this information saved, the tracking code is now inserted into all pages of the site and data is sent to Umami.
Setting up Umami was a bit cumbersome for me initially but that was mostly because I am unfamiliar with PostgreSQL in general and the inline documentation for the Helm chart is not very clear. After some trial and error I was able to get my installation working and I am now able to track at least some metrics for this site. In fact, Umami allows me to share a public URL for others to use. The stats for this site is available at https://umami.dustinrue.com/share/GadqqMiFCU8cSC7U/Blog.
TIL: This plugin for helm exists to fix left behind resources
If you have an older Kubernetes cluster with older Helm based software installs and you aren’t paying attention, it can be easy to leave some resources in a state that are impossible to update or remove. This is because of APIs that have been deprecated and then removed. While facing this issue today, I found this Helm plugin exists which can help resolve the problem – https://github.com/helm/helm-mapkubeapis
My Essential Kubernetes Services
For the past few years I have been using Kubernetes to host a number of services including custom code, WordPress and all manner of other publicly available projects. In this time I have come to rely on a few, what I call, base services that make the experience of running software in Kubernetes just a bit nicer. In this post I’m going to go through what base services I install and a bit on why.
All of the services listed below are installed using helm. I consider Helm the only method for managing applications running in a Kubernetes cluster. Nothing else is able to manage software as well as helm. If a service I want to run in Kubernetes doesn’t have a helm chart I will create one for it.
Almost every Kubernetes setup I use needs to actually service requests from users and this is almost always done using the Ingress system. My preferred ingress controller is the community maintained ingress-nginx. Do not confuse this controller with nginx-ingress, which is put out by nginx.com. I prefer this fully open source controller for its straight forward feature set and configuration system. It has a large number of features and works equally well in both home lab and cloud environments. As an Nginx user anyway I find the configuration very familiar. To install ingress-nginx, I add their repo using helm repo add ingress-nginx https://kubernetes.github.io/ingress-nginx. You will find additional information at https://kubernetes.github.io/ingress-nginx/deploy/.
SSL is all but a necessity these days and I have found no better way than to use cert-manager in the cluster. Nearly all of my use cases allow for the usage of a cluster wide, DNS based resolver that allows me to get SSL certs for resources that are not yet publicly accessible or are internal only. By leveraging DNS services from AWS or Cloudflare (or any supported DNS provider) I am able to automatically create and update certificates with very little intervention. To install cert-manager I use the the official helm chart provided by the project using helm repo add jetstack https://charts.jetstack.io. Additional installation directions are available at https://cert-manager.io/docs/installation/helm/.
Speaking of DNS, in clusters where I need to have DNS records pointed towards the cluster I use external-dns. This service looks for ingress entries and manages records in your DNS provider pointing the desired hostname towards your cluster or its external load balancer. I install external-dns using the helm chart by Bitnami. Learn more at https://github.com/bitnami/charts.
Getting logs out of a production cluster is important and assuming you have some place to accept the logs, you won’t generally do better than using fluent-bit. Installation and configuration of fluent-bit is highly dependent on what your logging system is so I recommend reading their documentation on how to get going. Fluent-bit is quite popular and it is usually easy to find examples for whatever your logging system is.
Used by a number of other services, metrics-server gathers basic utilization data from pods and nodes in your cluster. This service is so essential many small Kubernetes systems, like k3s, automatically install this service. I install this service again using Bitnami’s charts available at https://github.com/bitnami/charts.
For managed Kubernetes instances in public clouds I find cluster-autoscaler to be an essential service. When configured correctly, and when combined with metrics-server and properly configured resource settings, cluster-autoscaler will automatically add and remove worker nodes. Information about how to add the cluster-autoscaler helm chart can be found at https://github.com/kubernetes/autoscaler/tree/master/charts/cluster-autoscaler.
These services make Kubernetes much easier and automatic and for that reason I find them to be essential in almost every cluster. What services do you find essential?
Colima, Kubernetes and Helm Chart Testing
If you find yourself in the business of creating and testing Helm charts, or you simply want to try one out, then Colima with its built in Kubernetes functionality may be for you. In this post I am going to walk through how to quickly get going with Colima’s Kubernetes integration and an ingress controller for basic Helm chart testing.
I assume you already have Colima and Helm installed and are familiar with the tools and Kubernetes itself. If this is you then continue reading!
For this post I am using Colima 0.4.4, k3s v1.23.6+k3s1, helm 3.9.3 and ingress-nginx 4.2.0. I often find myself creating Helm charts and I want to test my modifications locally before committing my changes. Once in a while I also want to quickly test an available helm chart without messing up an existing Kubernetes installation. In these cases I will create a Colima instance with Kubernetes enabled and install my preferred ingress controller, nginx-ingress.
To get started, ensure that no other colima instances are running using colima list followed by a colima stop <name of profile> for any running instances. You should also ensure that there are no other services running on your system that are opening ports, especially 80, 443 and 3306. This helps ensure your test instance doesn’t interfere with any existing colima instances or other services. Then, issue colima start helm-test --kubernetes -m4 to start a colima instance with 4GB memory and Kubernetes enabled. Once colima has finished creating the instance you can add the ingress-nginx helm repository if you don’t already have it with helm repo add ingress-nginx https://kubernetes.github.io/ingress-nginx followed by helm repo update. You can now install ingress-nginx using helm install -n ingress-nginx --create-namespace --set controller.ingressClassResource.default=true ingress-nginx ingress-nginx/ingress-nginx. This command will install ingress-nginx and set it as the default ingress class for the cluster. At this point you have basic installation of Kubernetes with an ingress controller which will allow you to test most Helm charts.
As a test, you could now create a brand new helm chart with helm create nginx. Edit the resulting values.yaml file and enable ingress then install the chart into your new test cluster. You should see that it is able to download and install the default nginx image and create the proper ingress rule automatically. For my test I used helm install -n default nginx .. Before long you should see this as an ingress record:
kubectl get ingress nginx
NAME    CLASS   HOSTS                 ADDRESS        PORTS   AGE
nginx   nginx   chart-example.local   192.168.5.15   80      54s
Despite what the Address column says, the chart is now available at 127.0.0.1. Create a hosts entry and you will be able to get the default nginx page.
Of course, you can use or test other charts too. Here I will install bitnami’s MySQL chart with the following settings in a yaml file
## MySQL Authentication parameters
##
auth:
  ## MySQL root password
  ## ref: https://github.com/bitnami/bitnami-docker-mysql#setting-the-root-password-on-first-run
  ##
  rootPassword: "password"
  ## MySQL custom user and database
  ## ref: https://github.com/bitnami/bitnami-docker-mysql/blob/master/README.md#creating-a-database-on-first-run
  ## ref: https://github.com/bitnami/bitnami-docker-mysql/blob/master/README.md#creating-a-database-user-on-first-run
  ##
  database: "blog"
  username: "wordpress"
  password: "password"
##
primary:
  persistence:
    ## If true, use a Persistent Volume Claim, If false, use emptyDir
    ##
    enabled: false
  service:
    ## @param primary.service.type MySQL Primary K8s service type
    ##
    type: LoadBalancer
##
secondary:
  ## Number of MySQL Secondary replicas to deploy
  ##
  replicaCount: 0
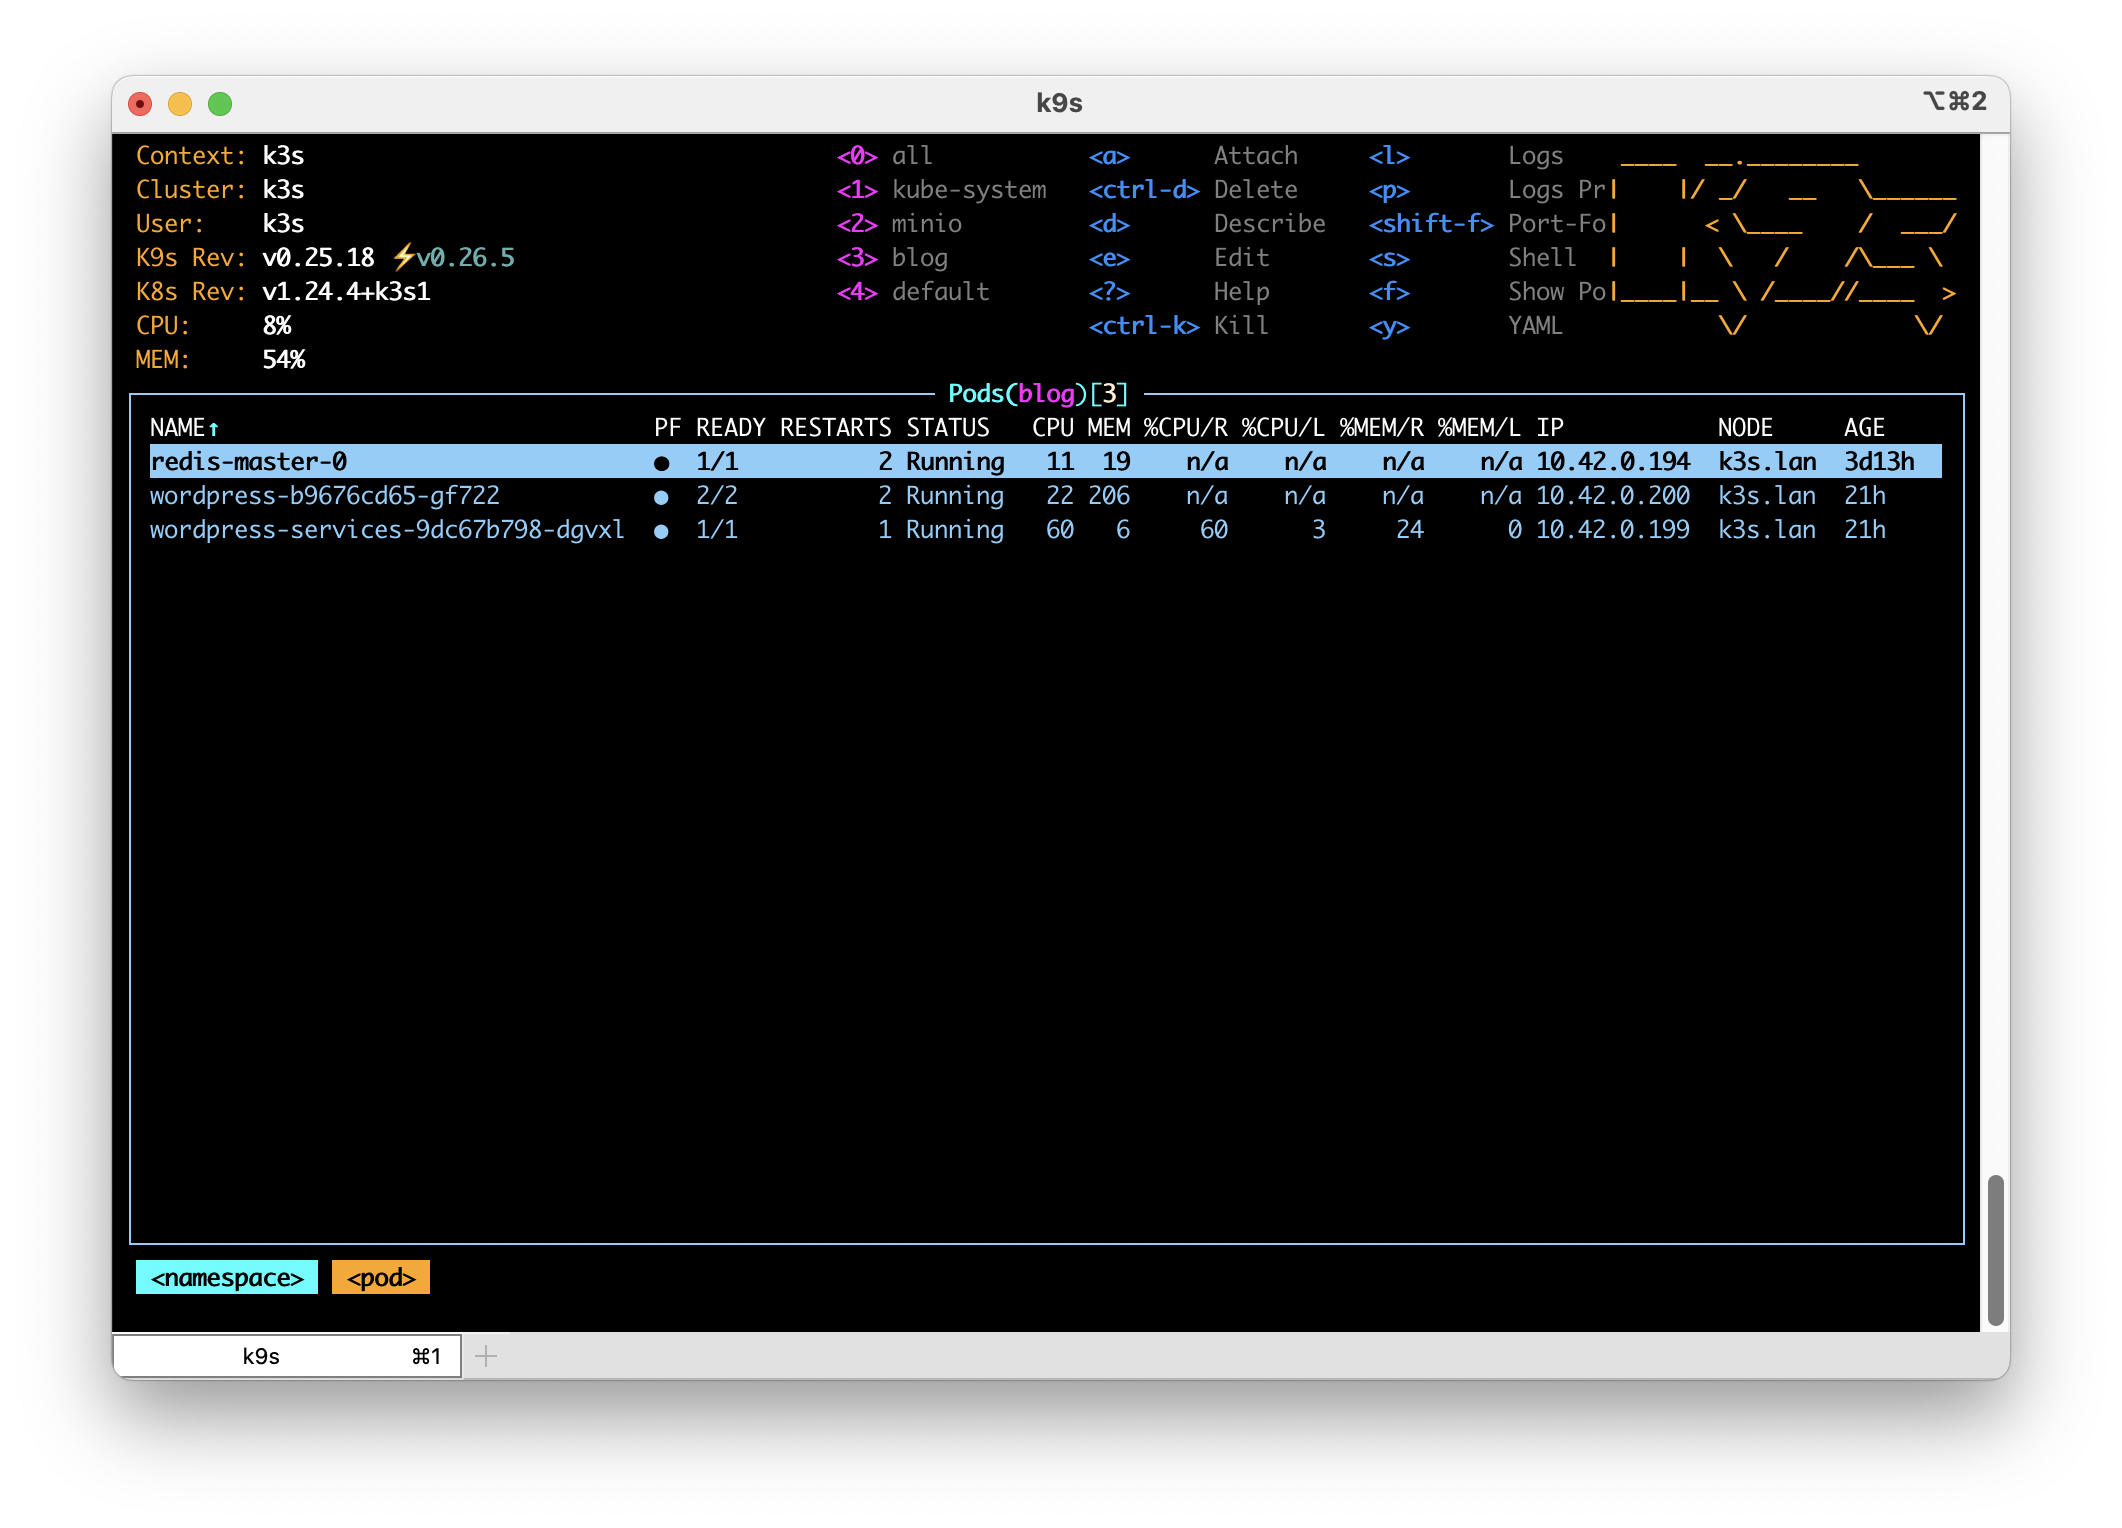
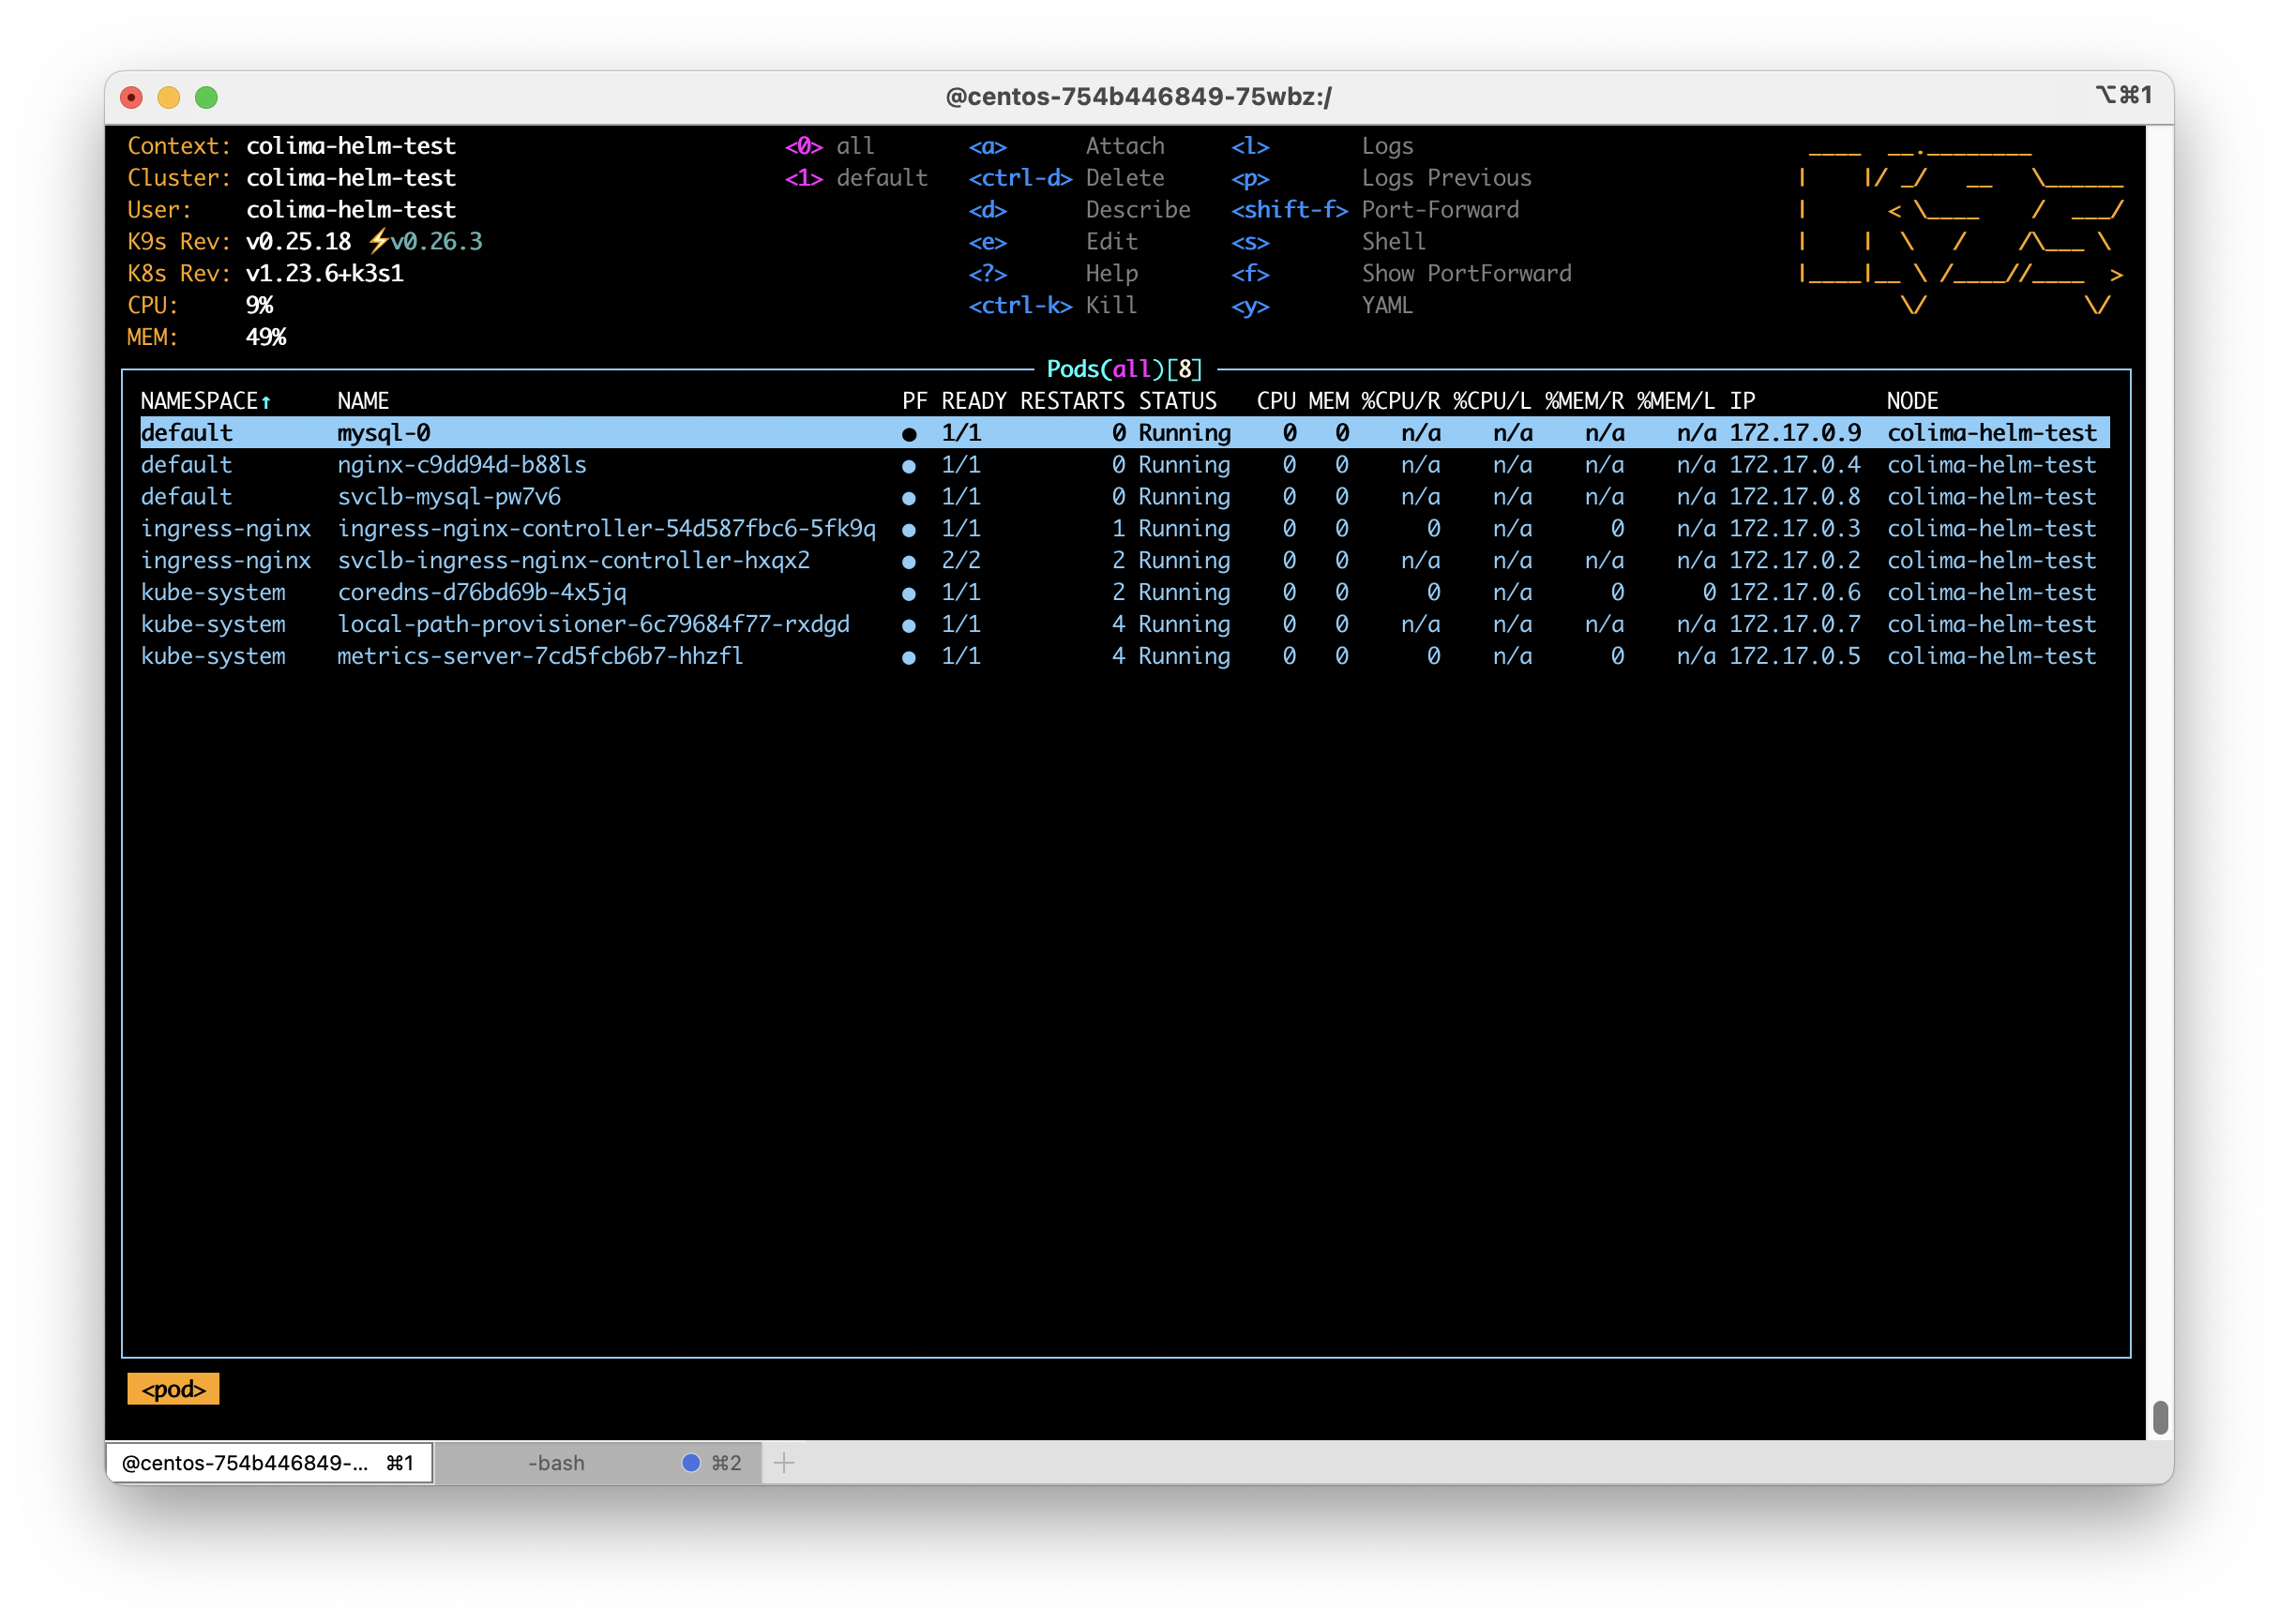
I install the bitnami repo using helm repo add https://charts.bitnami.com/bitnami followed by helm repo update to ensure I have the latest info. To install a copy of MySQL with my settings file I use helm install -f mysql.yaml mysql bitnami/mysql. After a short while MySQL will be installed and also available on localhost through k3s’ built in LoadBalancer system. Notice in the mysql.yml file I specified I asked the chart to install the primary instance of MySQL with a LoadBalancer based service instead of the default ClusterIP.
When you are finished testing a simple colima delete helm-test will remove your testing environment and free up resources.
Hopefully you see now how quickly and easily you can get going with Colima and its Kubernetes integration to get a local Kubernetes cluster up and running for testing. The Kubernetes integration Colima uses is very capable and well suited to learning and testing. Enjoy!
What’s in my home lab
For nearly as long as I’ve been using Linux I have had some system on my home network that is acting as a server or test bed for various pieces of software or services. In the beginning this system might be my DHCP and NAT gateway, later it might be a file server but over the years I have almost always had some sort system running that acted as a server of some kind. These systems would often be configured using the same operating system that I was using in the workplace and running similar services where it made sense. This has always given me a way to practice upgrades, service configuration changes and just be as familiar with things as I possibly could.
As I’ve moved along in my career, the services I deal with have gotten more complex and what I want running at home as grown more complex to match. Although my home lab pales in comparison to what others have done I thought it would still be fun to go through what I have running.
Hardware
Like a lot of people, the majority of the hardware I’m running is older hardware that isn’t well suited for daily use. Some of the hardware is stuff I got free, some of it is hardware previously used to run Windows and so on. Unlike what seems to be most home lab enthusiasts, I like to keep things as basic as possible. If a consumer grade device is capable of delivering what I need at home then I will happily stick to that.
On the network side, my home is serviced with cable based Internet. This goes into an ISP provided Arris cable modem and immediately behind this is a Google WiFi access point. Nothing elaborate here, just a “basic” WiFi router handles all DHCP and NAT for my entire network and does a fine job with it. After the WiFi router is a Cisco 3560g 10/100/1000 switch. This sixteen year old managed switch does support a lot of useful features but most of my network is just sitting on VLAN 1 as I don’t have a lot of need for segmenting my network. Attached to the switch are two additional Google WiFi access points, numerous IoT devices, phones, laptops and the like.
Also attached to the switch are, of course, items that I consider part of the home lab. This includes a 2011 HP Compaq 8200 Elite Small Form Factor PC, an Intel i5-3470 based system built around 2012 and a Raspberry Pi 4. The HP system has a number of HDD and SSD drives, 24GB memory, a single gigabit ethernet port and hosts a number of virtual machines. The built Intel i5-3470 system has 16GB memory, a set of three 2TB HDDs and a single SSD for hosting the OS. The Pi4 is a 4GB model with an external SSD attached.
Operating Systems
Base operating system on the HP is Proxmox 7. This excellent operating system is best describe as being similar to VMware ESXi. It allows you to host as many Virtual Machines as your hardware will support, can be clustered and even migrate VMs between cluster nodes. Proxmox is definitely a happy medium between having a single system and being a full on cloud like OpenStack. I can effectively achieve a lot of a cloud stack would provide but with greater simplicity. Although I can create VMs and manually install operating systems, I have created a number of templates to make creating VMs quicker and easier. The code for building the templates is at https://github.com/dustinrue/proxmox-packer.
On the Intel i5-3470 based system is TrueNAS Core. This system acts as a Samba based file store for the entire home network including remote Apple Time Machine support, NFS for Proxmox and iSCSI for Kubernetes. TrueNAS Core is an excellent choice for creating a NAS. Although it is capable of more, I stick just to just the basic file serving functionality and don’t get into any of the extra plugins or services it can provide.
The Raspberry Pi 4 is running the 64bit version of Pi OS. Although it is a beta release it has proven to work well enough.
Software and Services
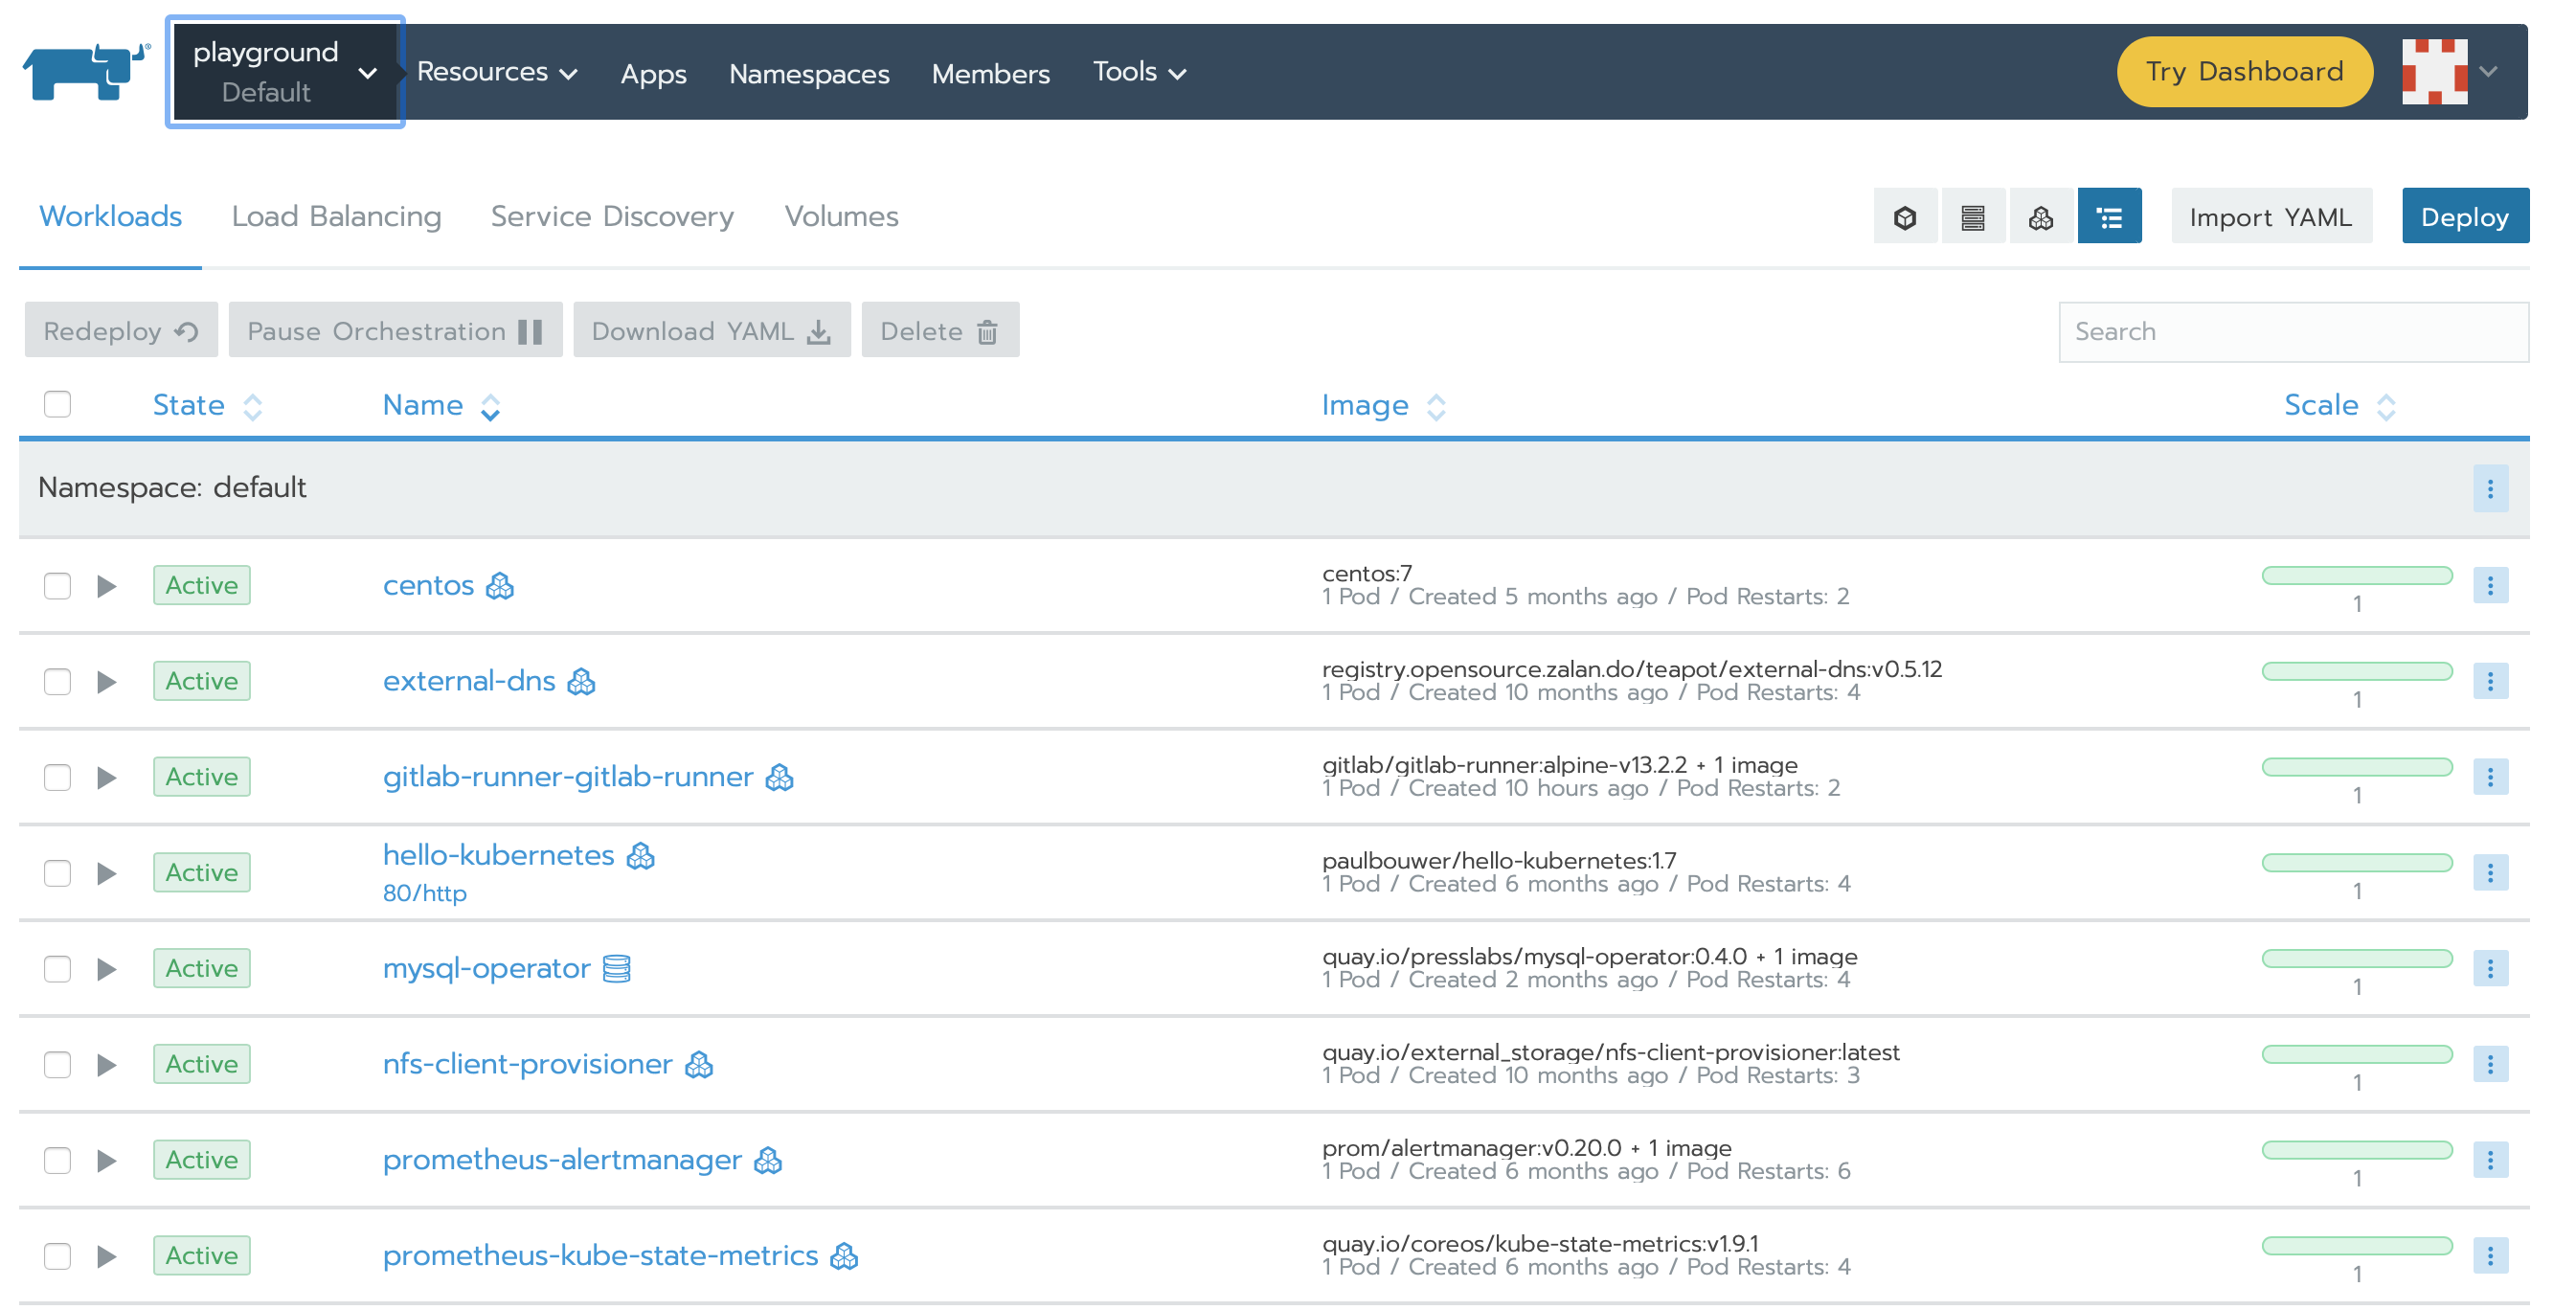
The Proxmox system hosts a number of virtual machines. These virtual machines provide:
- Wireguard based VPN
- Gitlab
- MariaDB
- Home Assistant
- Plex Media Server
- Next Cloud
- k3s for Kubernetes
- Utility VMs for things like creating Pi OS images, running Docker and more
Kubernetes
On top of Proxmox I also run k3s to provide Kubernetes. Kubernetes allows me to run software and test Helm charts that I’m working on. My Kubernetes cluster consists of a single amd64 based VM running on Proxmox and the Pi4 to give me a true arm64 node. In Kubernetes I have installed:
- cert-manager for SSL certifications. This is configured against my DNS provider to validate certificates.
- ingress-nginx for ingress. I do not deploy Traefik on k3s but prefer to use ingress-nginx. I’m more familiar with its configuration and have good luck with it.
- democratic-csi for storage. This package is able to provide on demand storage for pods that ask for it using iSCSI to the TrueNAS system. It is able to automatically create new storage pools and share them using iSCSI.
- gitlab-runner for Gitlab runner. This provides my Gitlab server with the ability to do CI/CD work.
I don’t currently use Kubernetes at home for anything other than short term testing of software and Helm charts. Of everything in my home lab Kubernetes is the most “lab” part of it where I do most of my development of Helm charts and do basic testing of software. Having a Pi4 in the cluster really helps with ensuring charts are targeting operating systems and architectures properly. It also helps me validate that Docker images I am building do work properly across different architectures.
Personal Workstation
My daily driver is currently an i7 Mac mini. This is, of course, running macOS and includes all of the usual tools and utilities I need. I detailed some time ago the software I use at https://dustinrue.com/2020/03/whats-on-my-computer-march-2020-edition/.
Finishing Up
As you can see, I have a fairly modest home lab setup but it provides me with exactly what I need to provide the services I actually use on a daily basis as well as provide a place to test software and try things out. Although there is a limited set of items I run continuously I can easily use this for testing more advanced setups if I need to.
Rancher, CentOS 8 and iSCSI
As I continue to mess around with various ways of installing and running Kubernetes in my home lab using Rancher I keep coming up with different ways to solve similar problems. Each time I set it up using different host OSs I learn a bit more which my primary goal. The latest iteration uses CentOS 8 and allows for iSCSI based persistent storage to work properly. I want to use CentOS 8 because it includes a newer kernel required for doing buildx based multi-arch builds. In this post, I’d like to go through the process of setting up CentOS 8 with Docker and what utilities to install to support NFS and iSCSI based persistent storage so that it works properly with Rancher.
Continue readingRundeck on Kubernetes
Updated Feb 2023 to remove the use of the incubator chart which has gone dead and replace it with something else. It also updates information about the persistent storage CSI I am using.
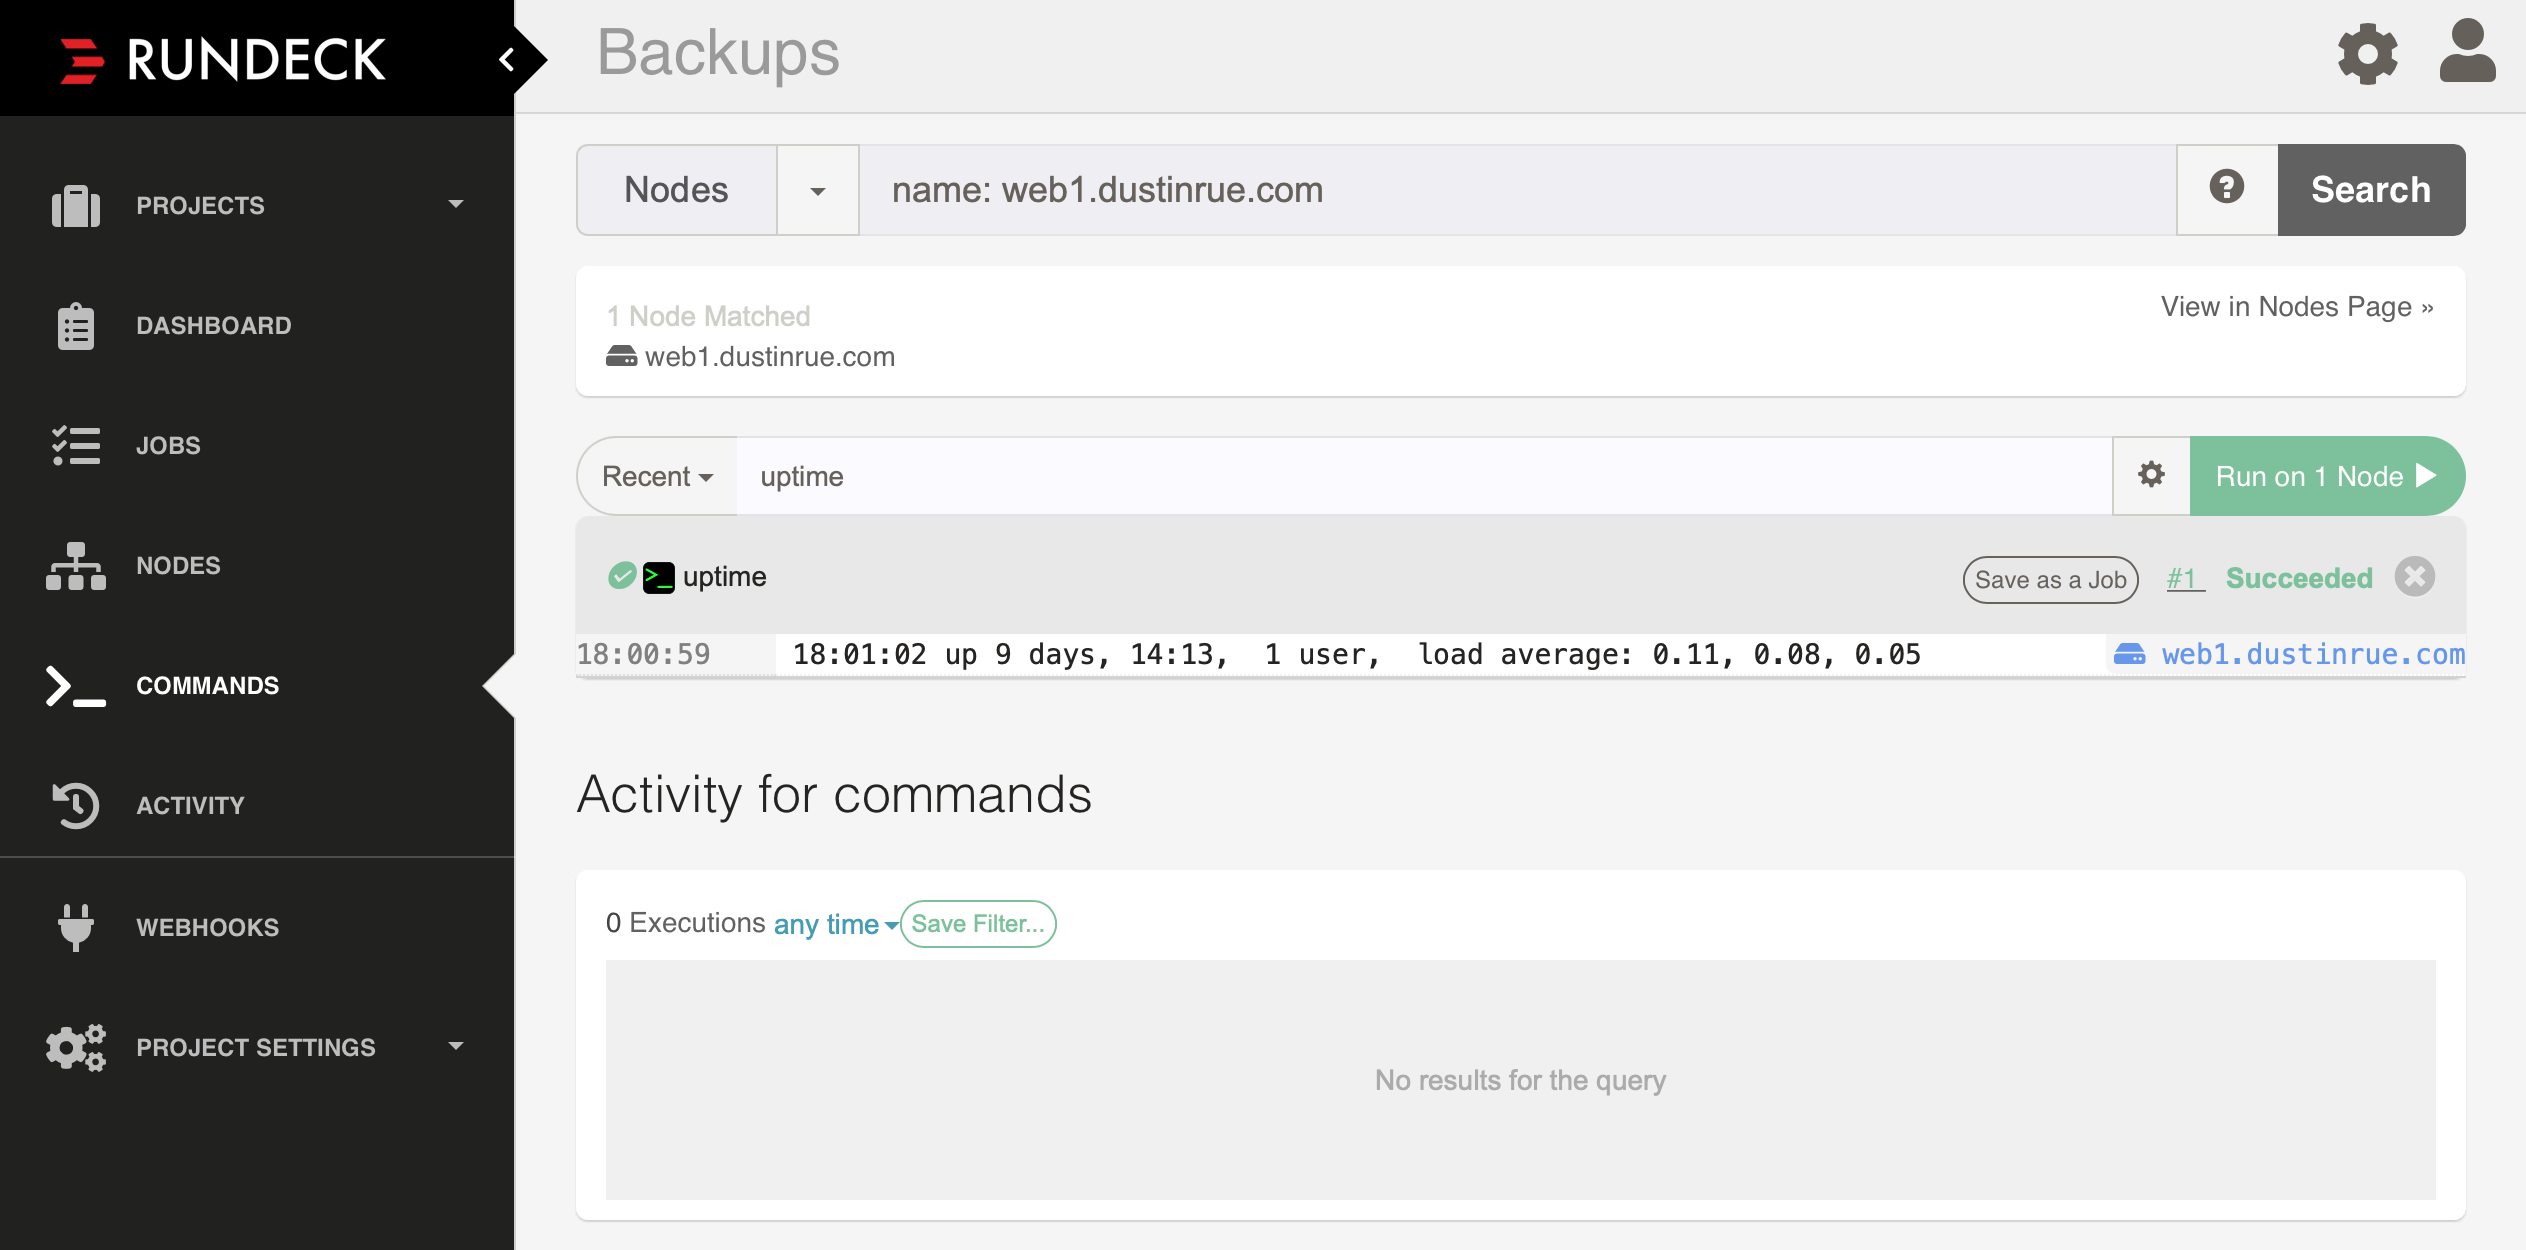
In this post I’m going to review how I installed Rundeck on Kubernetes and then configured a node source. I’ll cover the installation of Rundeck using an available helm chart, configuration of persistent storage, ingress, node definitions and key storage. In a later post I’ll discuss how I setup a backup job to perform a backup of the server hosting this site.
For this to work you must have a Kubernetes cluster that allows for ingress and persistent storage. In my cluster I am using nginx-ingress-controller for ingress and democratic-csi. The democratic-csi-iscsi is connected to my TrueNAS Core server and creates iSCSI based storage volumes. It is set as my default storage class. You will also need helm 3 installed.
With the prerequisites out of the way we can get started. First, add the helm chart repository by following the directions on located at https://github.com/EugenMayer/helm-charts/tree/main/charts/rundeck. Once added, perform the following to get the values file so we can edit it:
helm show values eugenmayer/rundeck > rundeck.yamlContinue reading
Multiple Architecture Docker Image Builds Using Gitlab and K3s
Arm processors, used in Raspberry Pi’s and maybe even in a future Mac, are gaining in popularity due to their reduced cost and improved power efficiency over more traditional x86 offerings. As Arm processor adoption accelerates the need for Docker images that support both x86 and Arm will become more and more a necessity. Luckily, recent releases of Docker are capable of building images for multiple architectures. In this post I will cover one way to achieve this by combining a recent release of Gitlab (12+), k3s and the buildx plugin for Docker.
I am taking inspiration for this post from two places. First, this excellent writeup was a great help in getting things start – https://dev.to/jdrouet/multi-arch-images-with-docker-152f. This post was also instrumental in getting this going – https://medium.com/@artur.klauser/building-multi-architecture-docker-images-with-buildx-27d80f7e2408.
I assume you already have a working installation of Gitlab with the container registry configured. Optionally, you can use Docker Hub but I won’t cover that in detail. Using Docker Hub involves changing the repository URL and then logging into Docker Hub. You will also need some system available capable of running k3s that is using at least Linux 4.15+. For this you can use either Ubuntu 18.04+ or CentOS 8. There may be other options but I know these two will work. The kernel version is a hard requirement and is something that caused me some headache. If I had just RTFM I could have saved myself some time. For my setup I installed k3s onto a CentOS 8 VM and then connected it to Gitlab. For information on how to setup k3s and connecting it to Gitlab please see this post.
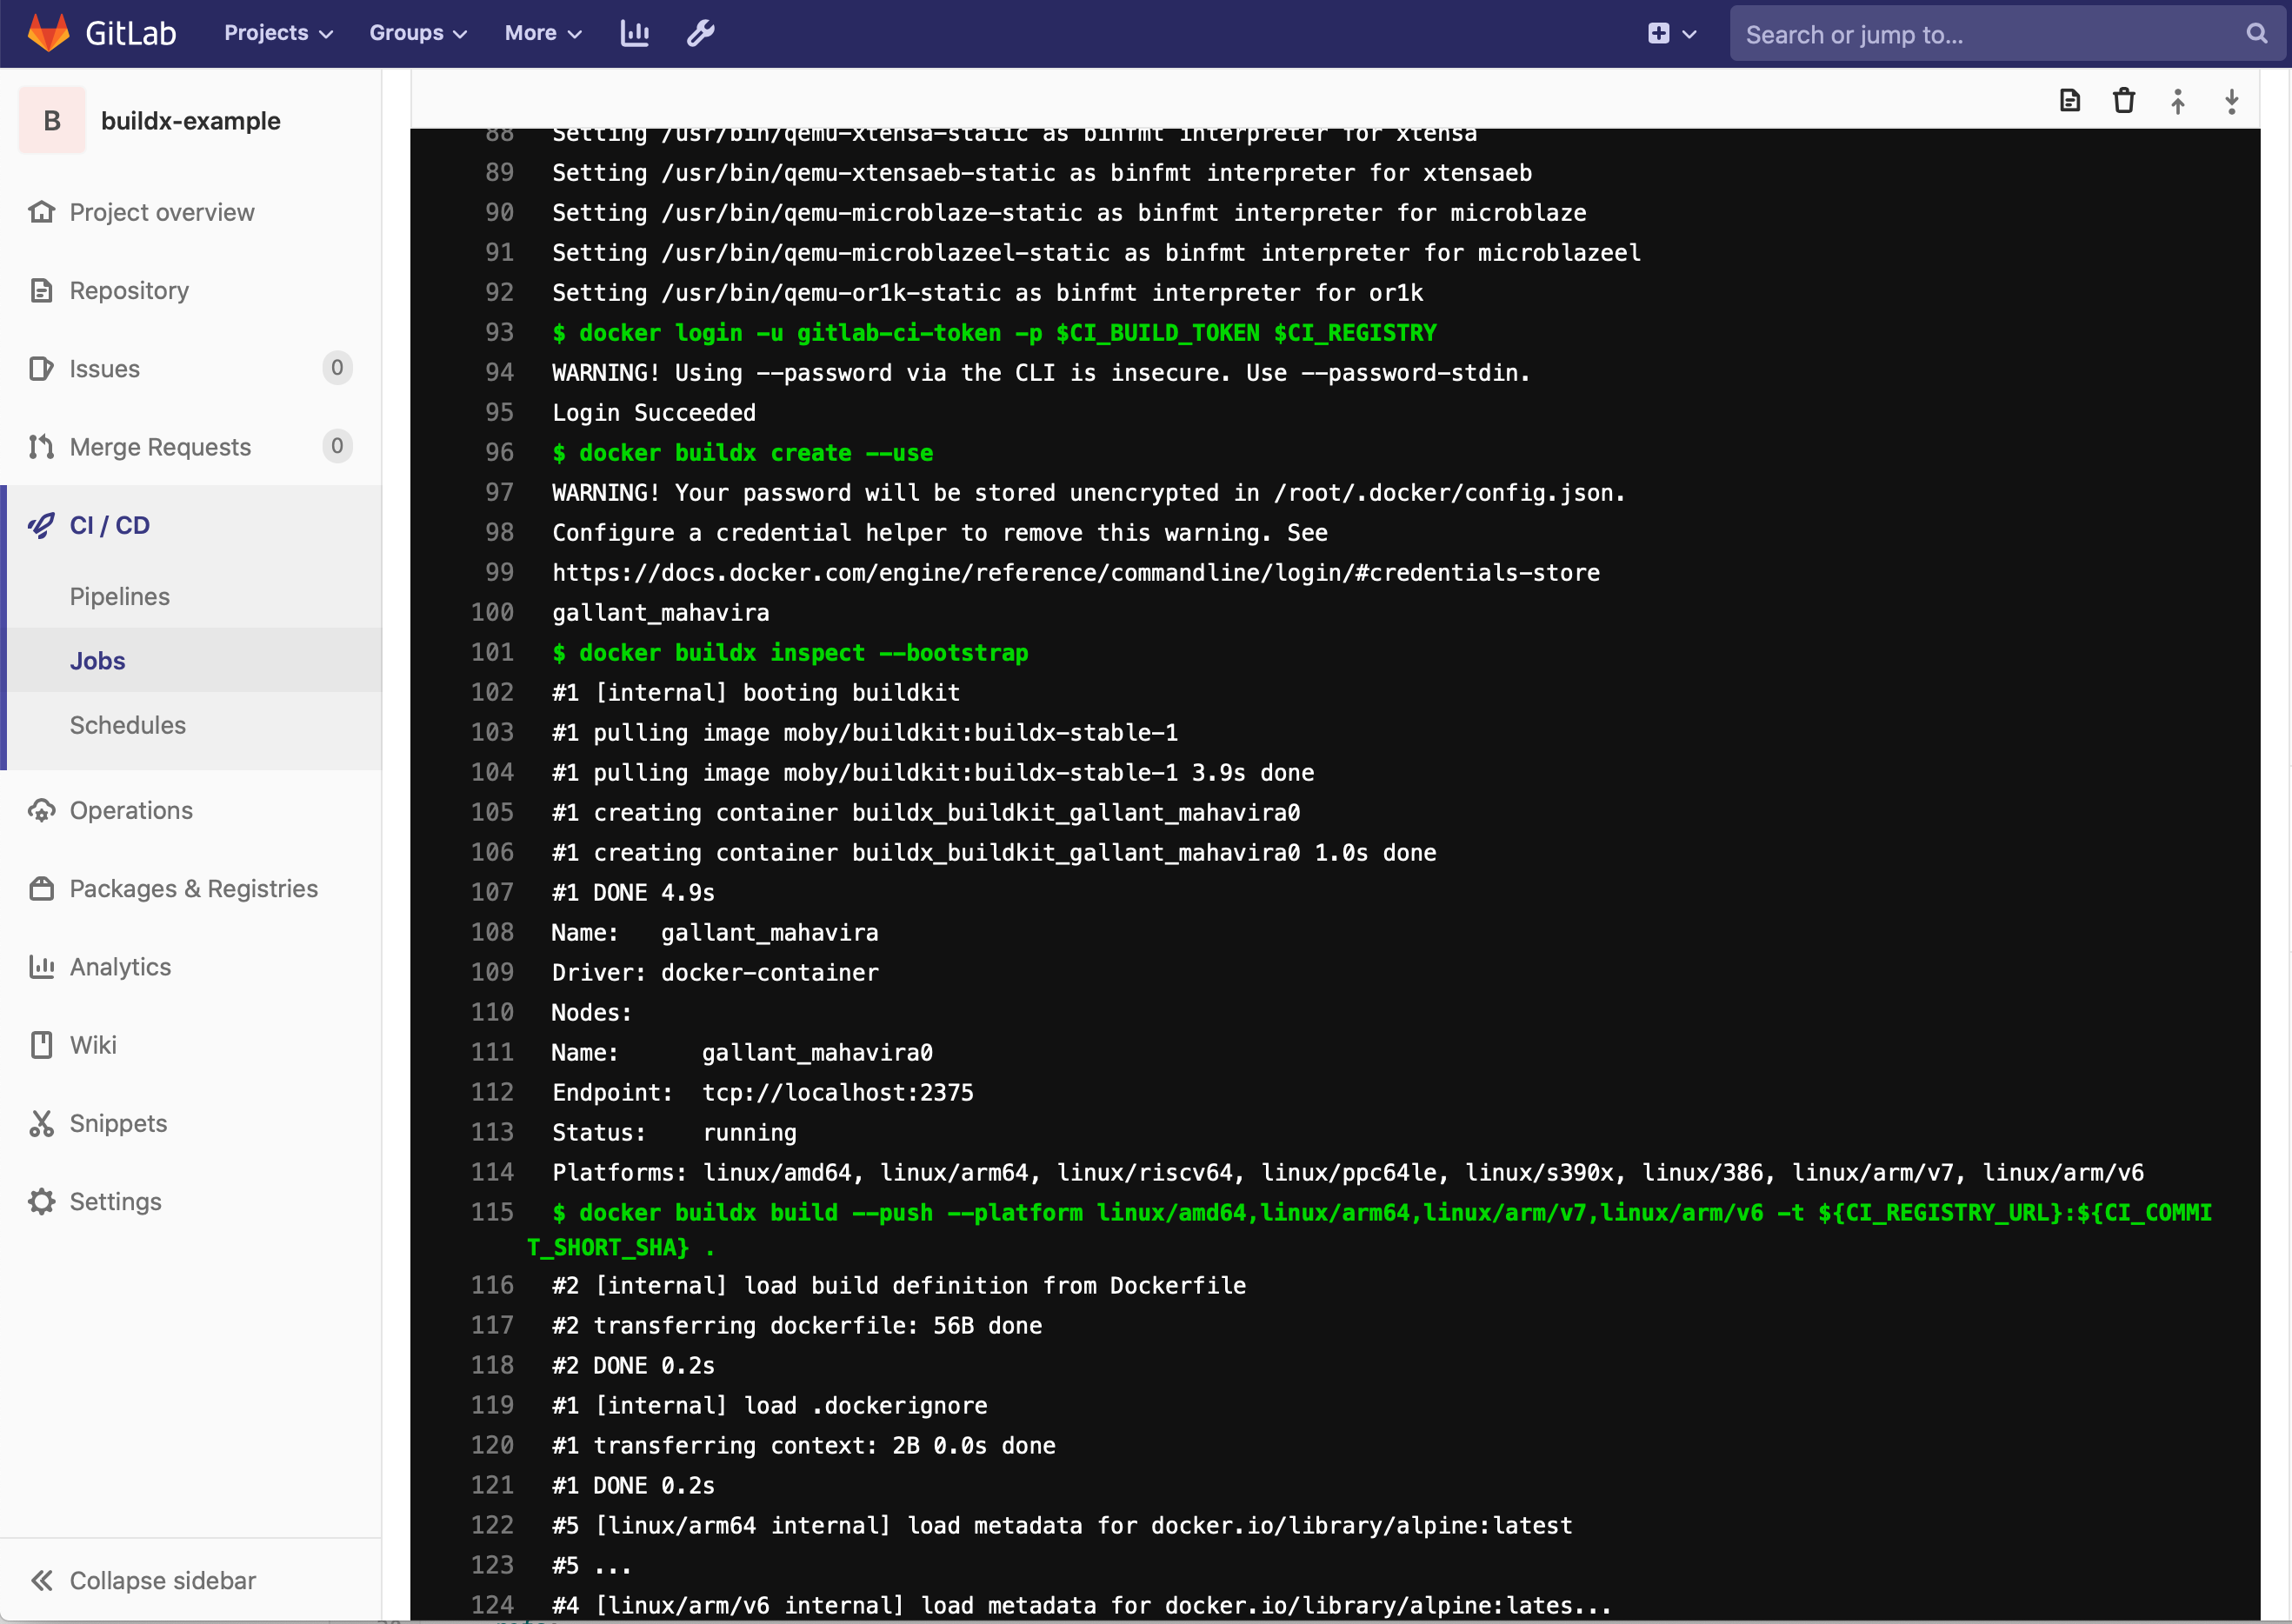
Once you are running k3s on a system with a supported kernel you can start building multi-arch images using buildx. I have created an example project available at https://github.com/dustinrue/buildx-example that you can import into Gitlab to get you started. This example project targets a runner tagged as kubernetes to perform the build. Here is a breakdown of what the .gitlab-ci.yml file is doing:
- Installs buildx from GitHub (https://github.com/docker/buildx) as a Docker cli plugin
- Registers qemu binaries to emulate whatever platform you request
- Builds the images for the requested platforms
- Pushes resulting images up to the Gitlab Docker Registry
Unlike the linked to posts I also had to add in a docker buildx inspect --bootstrap to make things work properly. Without this the new context was never active and the builds would fail.
The example .gitlab-ci.yml builds multiple architectures. You can request what architectures to build using the --platform flag. This command, docker buildx build --push --platform linux/amd64,linux/arm64,linux/arm/v7,linux/arm/v6 -t ${CI_REGISTRY_URL}:${CI_COMMIT_SHORT_SHA} . will cause images to be build for the listed architectures. If you need a list of available architectures you can target you can add docker buildx ls right before the build command to see a list of supported architectures.
Once the build has completed you can validate everything using docker manifest inspect. Most likely you will need to enable experimental features for your client. Your command will look similar to this DOCKER_CLI_EXPERIMENTAL=enabled docker manifest inspect <REGISTRY_URL>/drue/buildx-example:9ae6e4fb. Be sure to replace the path to the image with your image. Your output will look similar to this if everything worked properly:
{
   "schemaVersion": 2,
   "mediaType": "application/vnd.docker.distribution.manifest.list.v2+json",
   "manifests": [
      {
         "mediaType": "application/vnd.docker.distribution.manifest.v2+json",
         "size": 527,
         "digest": "sha256:611e6c65d9b4da5ce9f2b1cd0922f7cf8b5ef78b8f7d6d7c02f793c97251ce6b",
         "platform": {
            "architecture": "amd64",
            "os": "linux"
         }
      },
      {
         "mediaType": "application/vnd.docker.distribution.manifest.v2+json",
         "size": 527,
         "digest": "sha256:6a85417fda08d90b7e3e58630e5281a6737703651270fa59e99fdc8c50a0d2e5",
         "platform": {
            "architecture": "arm64",
            "os": "linux"
         }
      },
      {
         "mediaType": "application/vnd.docker.distribution.manifest.v2+json",
         "size": 527,
         "digest": "sha256:30c58a067e691c51e91b801348905a724c59fecead96e645693b561456c0a1a8",
         "platform": {
            "architecture": "arm",
            "os": "linux",
            "variant": "v7"
         }
      },
      {
         "mediaType": "application/vnd.docker.distribution.manifest.v2+json",
         "size": 527,
         "digest": "sha256:3243e1f1e55934547d74803804fe3d595f121dd7f09b7c87053384d516c1816a",
         "platform": {
            "architecture": "arm",
            "os": "linux",
            "variant": "v6"
         }
      }
   ]
}
You should see multiple architectures listed.
I hope this is enough to get you up and running building multi-arch Docker images. If you have any questions please open an issue on Github and I’ll try to get it answered.
Going Deeper With Proxmox Cloud-Init
Not too long ago I wrote about using Packer to build VM templates for Proxmox and created a Github project with the files. In the end I provided basic information on how to setup cloud-init within the Proxmox GUI. This time we’re going to dive a bit deeper into using cloud-init within Proxmox and customize it as needed.
First, lets quickly cover what cloud-init is. Cloud-init is a system for configuring an operating system on first boot. It is always used on cloud based systems like AWS, Azure, OpenStack and can be used on non-cloud based systems like Proxmox, VirtualBox or any system where you can present the info as a CD-ROM. Using cloud-init you can pass in instance meta-data information, network configuration and user information. As part of the user information you can also provide commands to be run. It is the ability to run commands on initial boot that we’re going to tap into.
Out of the box, Proxmox provides a basic cloud-init system that you can enable through the web interface that works well if all you need is to create a user with an SSH key and configure the network. But if you want to customize it you will need to ensure you have snippets enabled and visit the cli of your Proxmox system.
Continue reading