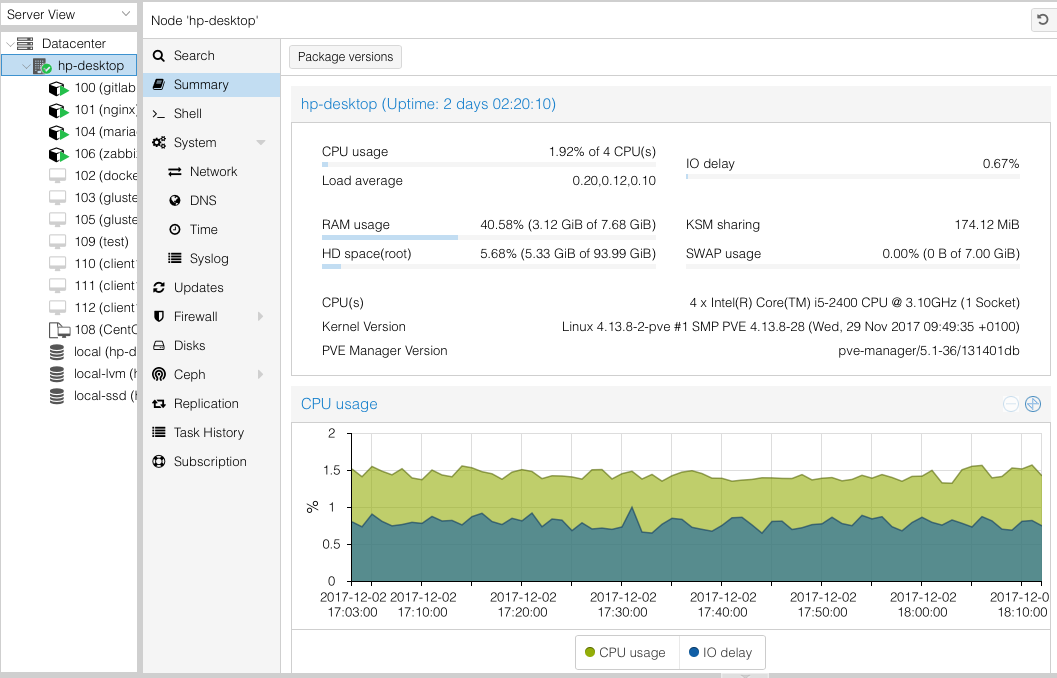
This post is really a small collection of thoughts about Proxmox when used in a home lab situation and home labs in general. I was originally going to post this to Mastodon only but it didn’t fit in a single post.

A lot of people (at least what I see on reddit) build Proxmox systems with shared file systems like ceph, even for home lab use. While I understand what shared file systems can do they also have steeper HW requirements and honestly the benefits are rather limited. If your purpose for using shared file systems is to learn about them, then go for it as it is a great thing to understand. Outside of learning, I prefer and have had great luck with keeping things as simple as I can while still getting something that is useful and versatile. Additionally, I also avoid the use of ZFS because running it properly requires more memory, memory I’d prefer to give to my VMs.

For that reason, my Proxmox cluster consists of two systems with a Raspberry Pi acting as a qdevice for quorum. Each system has a single spinning drive for the Proxmox OS and then a single SSD for all of the VMs that live on that node. I then have another physical system providing network based shared storage for content like ISO files and backups, things that truly need to be shared between the Proxmox cluster nodes. This setup gives me a blend of excellent VM performance because the disks are local and speedy, shared file space where it matters for ISOs and backups while maintaining one of the best features of Proxmox, live migration. Yes, live migration of VMs is still possible even when the underlying file system is not shared between systems, it’s just a lot slower of a process because data must be transferred over the network during a migration.

One of the benefits of using a file system like ceph is that you can distribute files across your systems in the event a system or disk fails. You have some redundancy there but regardless of redundancy you still need to have actual backups. To cover for this, I have regular backups taken of important VMs and separate backup tasks specifically for databases. For anything that has files, like Plex or Nextcloud, that data comes from my TrueNAS system using a network file system like NFS or Samba. Again, local storage for speed and shared storage where it really matters.

This setup gives me a lot of the benefits without a ton of overhead which helps me keep costs down. Each Proxmox node, while clustered, still work more or less independently of each other. I can recover from issues by restoring a backup to either node or recover databases quickly and easily. I don’t ever have to debug shared file system issues and any file system issues I do face are localized to the affected node. In the event of a severe issue, recovery is simplified because I can remove the replace the bad drive and simply restore any affected VMs on that node. The HA features of Proxmox are very good and I encourage their use when it makes sense, but you can avoid their complexity and maintenance and still have a reliable home lab that is easy and straight forward to live with.

One of the challenges or points of friction for me using Proxmox in my home lab has been integrating Ansible with it more cleanly. The issue is I have traditionally maintained my inventory file manually which is a bit of a hassle. Part of the issue is that Proxmox doesn’t really expose a lot of metadata about the VMs you have running to things like tagging don’t actually exist. Despite that I set out to get a basic, dynamically generated inventory system that will work against my Proxmox installation to make the process at least a bit smoother.

For some time, Ansible has supported the idea of dynamic inventory. This type of inventory will query a backend to build out an inventory that is compliant with Ansible. Proxmox, having an API, has a dynamic inventory plugin available from the community. In this post I will showcase how I got started with a basic Proxmox dynamic inventory.

When I set out I had a few requirements. First, I really don’t have a naming convention of my VMs that makes any sense in DNS. Some systems have a fully qualified domain but most do not. The ones that do have fully qualified domain name wouldn’t actually be available over ssh on the IP resolved for that domain. To get around this, I wanted to be able to map the host name in Proxmox to its internal IP address. By default, the dynamic inventory plugin will set ansible_host to the name of the VM. For this I had to provide a compose entry to set the ansible_host which you’ll see below. This feature is made possible because I always install the qemu guest agent.

The second requirement is that ssh connection info was dynamic as well because I use a number of different operating systems. Since all of my systems use cloud-init I am able to set the ssh username to the ciuser value thus ensuring I always know what the ssh user is regardless of the operating system used.

Here is my dynamic inventory file:

plugin: community.general.proxmox
validate_certs: false
want_facts: true
compose:
  ansible_host: proxmox_agent_interfaces[1]["ip-addresses"][0].split('/')[0]
  ansible_user: proxmox_ciuser

I placed this information into inventory/inventory.proxmox.yaml. Most of the entries are self-explanatory but I will go through what the compose section is doing.

The first item in the compose section is setting the ansible_host. When the inventory plugin gathers information from Proxmox it will gather the assigned IP addresses as determined using the Qemu Guest Agent. In all cases that I could see, the first IP address will be localhost and the second one will always be the primary interface in the system. With information known, I was able to create the jinja2 template to grab the correct IP address and strip the netmask off of it.

The next line is setting the ansible_user by just copying the proxmox_ciuser value. With these two variables set, Ansible will use that username when connecting to the host at its internal IP address. Since the systems were brought up using cloud-init, my ssh key is already present on all of the machines and the connection works without much fuss.

To support this configuration, here is my ansible.cfg:

[defaults]
inventory = ./inventory
fact_caching_connection = .cache
retry_files_enabled = False
host_key_checking = False
forks = 5
fact_caching = jsonfile

[inventory]
cache = True
cache_plugin = jsonfile

[ssh_connection]
pipelining = True
ssh_args = -F ssh_config

This configuration is setting a few options for me related to how to find the inventory, where to cache inventory information and where to cache facts about remote machines. Caching this info greatly speeds up your Ansible runs and I recommend it. The ssh_args value allows me to specify some additional ssh connection info.

In addition to the above configuration files, there are environment variables that are set on my system. These variables define where to find the Proxmox API, what user to connect with and the password. The environment variables are defined on the dynamic inventory plugin page but here is what my variables look like:

PROXMOX_PASSWORD=[redacted]
PROXMOX_URL=https://[redacted]:8006/
PROXMOX_INVALID_CERT=True
PROXMOX_USERNAME=root@pam
PROXMOX_USER=root@pam

The user/username value is duplicated because some other tools rely on PROXMOX_USERNAME instead of PROXMOX_USER.

And that’s it! With this configured I am able to target all of my running hosts by targeting “proxmox_all_running”. For example, ansible proxmox_all_running -m ping will ping all running machines across my Proxmox cluster.

For nearly as long as I’ve been using Linux I have had some system on my home network that is acting as a server or test bed for various pieces of software or services. In the beginning this system might be my DHCP and NAT gateway, later it might be a file server but over the years I have almost always had some sort system running that acted as a server of some kind. These systems would often be configured using the same operating system that I was using in the workplace and running similar services where it made sense. This has always given me a way to practice upgrades, service configuration changes and just be as familiar with things as I possibly could.

As I’ve moved along in my career, the services I deal with have gotten more complex and what I want running at home as grown more complex to match. Although my home lab pales in comparison to what others have done I thought it would still be fun to go through what I have running.

Hardware

Like a lot of people, the majority of the hardware I’m running is older hardware that isn’t well suited for daily use. Some of the hardware is stuff I got free, some of it is hardware previously used to run Windows and so on. Unlike what seems to be most home lab enthusiasts, I like to keep things as basic as possible. If a consumer grade device is capable of delivering what I need at home then I will happily stick to that.

On the network side, my home is serviced with cable based Internet. This goes into an ISP provided Arris cable modem and immediately behind this is a Google WiFi access point. Nothing elaborate here, just a “basic” WiFi router handles all DHCP and NAT for my entire network and does a fine job with it. After the WiFi router is a Cisco 3560g 10/100/1000 switch. This sixteen year old managed switch does support a lot of useful features but most of my network is just sitting on VLAN 1 as I don’t have a lot of need for segmenting my network. Attached to the switch are two additional Google WiFi access points, numerous IoT devices, phones, laptops and the like.

Also attached to the switch are, of course, items that I consider part of the home lab. This includes a 2011 HP Compaq 8200 Elite Small Form Factor PC, an Intel i5-3470 based system built around 2012 and a Raspberry Pi 4. The HP system has a number of HDD and SSD drives, 24GB memory, a single gigabit ethernet port and hosts a number of virtual machines. The built Intel i5-3470 system has 16GB memory, a set of three 2TB HDDs and a single SSD for hosting the OS. The Pi4 is a 4GB model with an external SSD attached.

Operating Systems

Base operating system on the HP is Proxmox 7. This excellent operating system is best describe as being similar to VMware ESXi. It allows you to host as many Virtual Machines as your hardware will support, can be clustered and even migrate VMs between cluster nodes. Proxmox is definitely a happy medium between having a single system and being a full on cloud like OpenStack. I can effectively achieve a lot of a cloud stack would provide but with greater simplicity. Although I can create VMs and manually install operating systems, I have created a number of templates to make creating VMs quicker and easier. The code for building the templates is at https://github.com/dustinrue/proxmox-packer.

On the Intel i5-3470 based system is TrueNAS Core. This system acts as a Samba based file store for the entire home network including remote Apple Time Machine support, NFS for Proxmox and iSCSI for Kubernetes. TrueNAS Core is an excellent choice for creating a NAS. Although it is capable of more, I stick just to just the basic file serving functionality and don’t get into any of the extra plugins or services it can provide.

The Raspberry Pi 4 is running the 64bit version of Pi OS. Although it is a beta release it has proven to work well enough.

Software and Services

The Proxmox system hosts a number of virtual machines. These virtual machines provide:

Kubernetes

On top of Proxmox I also run k3s to provide Kubernetes. Kubernetes allows me to run software and test Helm charts that I’m working on. My Kubernetes cluster consists of a single amd64 based VM running on Proxmox and the Pi4 to give me a true arm64 node. In Kubernetes I have installed:

  • cert-manager for SSL certifications. This is configured against my DNS provider to validate certificates.
  • ingress-nginx for ingress. I do not deploy Traefik on k3s but prefer to use ingress-nginx. I’m more familiar with its configuration and have good luck with it.
  • democratic-csi for storage. This package is able to provide on demand storage for pods that ask for it using iSCSI to the TrueNAS system. It is able to automatically create new storage pools and share them using iSCSI.
  • gitlab-runner for Gitlab runner. This provides my Gitlab server with the ability to do CI/CD work.

I don’t currently use Kubernetes at home for anything other than short term testing of software and Helm charts. Of everything in my home lab Kubernetes is the most “lab” part of it where I do most of my development of Helm charts and do basic testing of software. Having a Pi4 in the cluster really helps with ensuring charts are targeting operating systems and architectures properly. It also helps me validate that Docker images I am building do work properly across different architectures.

Personal Workstation

My daily driver is currently an i7 Mac mini. This is, of course, running macOS and includes all of the usual tools and utilities I need. I detailed some time ago the software I use at https://dustinrue.com/2020/03/whats-on-my-computer-march-2020-edition/.

Finishing Up

As you can see, I have a fairly modest home lab setup but it provides me with exactly what I need to provide the services I actually use on a daily basis as well as provide a place to test software and try things out. Although there is a limited set of items I run continuously I can easily use this for testing more advanced setups if I need to.

Not too long ago I wrote about using Packer to build VM templates for Proxmox and created a Github project with the files. In the end I provided basic information on how to setup cloud-init within the Proxmox GUI. This time we’re going to dive a bit deeper into using cloud-init within Proxmox and customize it as needed.

First, lets quickly cover what cloud-init is. Cloud-init is a system for configuring an operating system on first boot. It is always used on cloud based systems like AWS, Azure, OpenStack and can be used on non-cloud based systems like Proxmox, VirtualBox or any system where you can present the info as a CD-ROM. Using cloud-init you can pass in instance meta-data information, network configuration and user information. As part of the user information you can also provide commands to be run. It is the ability to run commands on initial boot that we’re going to tap into.

Out of the box, Proxmox provides a basic cloud-init system that you can enable through the web interface that works well if all you need is to create a user with an SSH key and configure the network. But if you want to customize it you will need to ensure you have snippets enabled and visit the cli of your Proxmox system.

Continue reading

A while back I took the time to learn a bit of OpenStack’s Disk Image Builder. Recently I decided to give Packer a try to build templates for Proxmox and I decided to release the results as a Github repo. You can find the repo at https://github.com/dustinrue/proxmox-packer. The project allows you to build a mostly empty CentOS 7 or CentOS 8 template for Proxmox. You can further customize the image by expanding the provisioner section of the packer.json files.

I was recently introduced to a superb piece of software called Proxmox. Proxmox is a virtualization environment not unlike VMware ESXi. Capable of running full KVM based virtual machines or lightweight LXC based guests, Proxmox has proven to be the perfect solution for a home lab setup. Installing Proxmox is no different than installing any other Linux distribution and with minimal effort can be clustered together to form a system capable of migrating a guest from one host to another. With the right hardware you can even perform live migrations. Although Proxmox supports and is capable a lot more than I need it satisfies my desire to have a more “enterprise” like way to virtualize hardware in my home.

Proxmox is free with support plans available. If I were to use it anywhere other than at home I’d definitely play for the support subscription as it allows you to get access to the proper update repositories as well as, obviously, support. Without the support subscription your Proxmox is basically part of a testing repo meaning you get faster access to updates but also updates that are less tested.

In the coming weeks I’ll detail a bit more how I’m using Proxmox, how to setup KVM or LXC based hosts and provision them using Ansible.