For a number of years I have self-hosted a few things out of my house. This has always meant that I need a way to allow public access to resources hosted on my home lab. In the past this has meant having a single system on my network that could act as a sort of gateway to everything else. This system runs Nginx and a number of vhost configurations to route traffic to the correct VM running whatever it is I’m looking for.
For this to work, I have to insert port forwards into my router so that traffic destined for port 80 or 443 is forwarded to the Nginx proxy. In addition to this, I have to run a script on the proxy that checks my current public IP address and if it has changed, update a DNS record within Cloudflare. This has served me well for years but I have always wondered if there was another option.
As it turns out, there is and it is called Cloudflare Tunnels. As someone who has used Cloudflare for years as a free CDN in front of my blog, I was super happy when Cloudflare made most of their Zero Trust functionality free for small users. Their Zero Trust platform consists of a number of elements but today I’m going to concentrate on just the Tunnel piece.
With the sudden increase in interest in Mastodon as a social media platform I decided to play around with the software and running it myself. Even though I don’t plan on running it on my own any time soon and am totally happy throwing money at some instance admins (which you should consider doing https://hub.fosstodon.org/support/), I thought it would be a fun exercise. Anyway, once I had the software running I needed a way to get it accessible to the public. This is where I turned to Cloudflare Tunnels.
Of course, for any of this to work you will need a Cloudflare account with a domain configured (which is free…and I am in no way connected with Cloudflare other than I am a customer). A Cloudflare tunnel works using an agent running on a host inside of your internal network that is then authenticated with your Cloudflare account. Creating the tunnel is simple:
- Sign into your Cloudflare account
- Click Zero Trust
- Access and then Tunnels
- Click the Create Tunnel button
- Give the tunnel a name and click Save
- Choose your operating system from the list and then paste in the commands you see. If you are using a Raspberry Pi you may need to get the latest release from https://github.com/cloudflare/cloudflared/releases. Once installed use the second command for if you have an existing installation of cloudflared. Advanced users can simply add the tunnel themselves.
- Once cloudflared is running on your system it will show up as connected
- Click Next
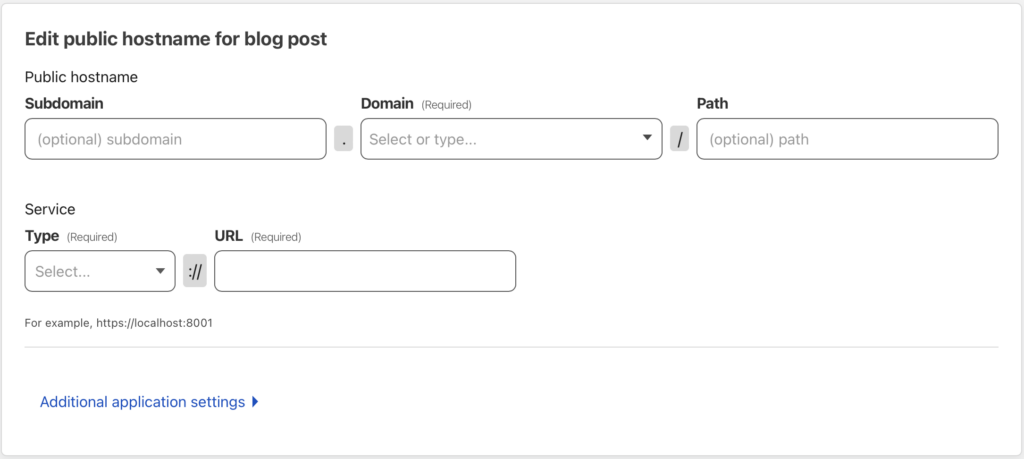
On the next screen you will be given the option to connect a hostname to the tunnel. For this post I will describe how I setup access to my mastodon.dustinrue.com instance. You will be presented with the following screen:
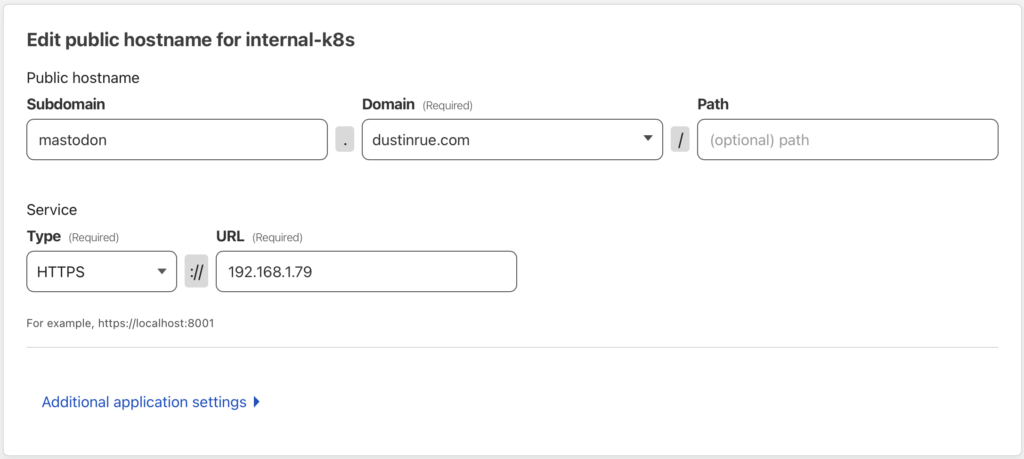
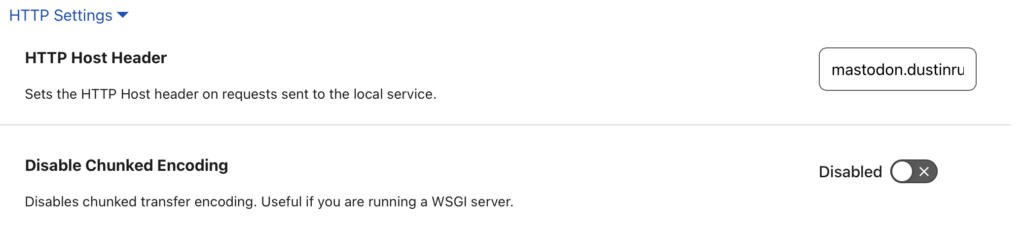
Since I am using an SSL service type, I need to specify the name to send as part of the request so that the ingress controller knows what resources is being accessed. Also, although I do use cert-manager I didn’t setup a TLS record for cert-manager to use so it just applied a self-signed cert. This is fine in this case because the public will see the certificate that Cloudflare provides, not what my k3s cluster has. For these reasons, my TLS section is configured like this:

In addition to the TLS settings, the regular HTTP section also needs some attention. For this, my settings look like this:
From here, click Save. Cloudflare will insert the correct DNS record for your domain and the connection from the public to your resource will be made. If everything is configured correctly then you will be able to access your resource at the subdomain you provided. Remember that all of the same rules apply here, everything in the path needs to be aware of whatever vhost you are using. The trick here is that there are no port forwards in your router and there is a protected path between Cloudflare into your home network, your home network remains unexposed to the public.
I hope this quick guide is enough to get you going on using Cloudflare tunnels. In a future post I will describe how to use the same system but for SSH connections. This is a powerful tool when combined with Cloudflare Zero Trust because it allows you to define who is allowed to access systems. Zero Trust can also be used to protect specific routes on a site (or the entire site) if you want. For my blog, I use Zero Trust to protect the admin and login pages.