Updated Feb 2023 to remove the use of the incubator chart which has gone dead and replace it with something else. It also updates information about the persistent storage CSI I am using.
In this post I’m going to review how I installed Rundeck on Kubernetes and then configured a node source. I’ll cover the installation of Rundeck using an available helm chart, configuration of persistent storage, ingress, node definitions and key storage. In a later post I’ll discuss how I setup a backup job to perform a backup of the server hosting this site.
For this to work you must have a Kubernetes cluster that allows for ingress and persistent storage. In my cluster I am using nginx-ingress-controller for ingress and democratic-csi. The democratic-csi-iscsi is connected to my TrueNAS Core server and creates iSCSI based storage volumes. It is set as my default storage class. You will also need helm 3 installed.
With the prerequisites out of the way we can get started. First, add the helm chart repository by following the directions on located at https://github.com/EugenMayer/helm-charts/tree/main/charts/rundeck. Once added, perform the following to get the values file so we can edit it:
helm show values eugenmayer/rundeck > rundeck.yaml
In the rundeck.yaml file I customized a few of the values as described in Eugen’s README for all sections that make sense. My completed rundeck.yaml file looks like this:
image:
  # see https://hub.docker.com/r/rundeck/rundeck/tags
  tag: 4.8.0
# This must be the domain you reach your rundeck with. It is used to configure the grails URL and avoid CSP issues
# @see https://github.com/rundeck/rundeck/issues/4417
externUrl: https://rundeck.dustinrue.com

executionLogs:
  claim:
    enabled: true
    # required - set this
    storageClass: freenas-iscsi-csi
    accessMode: ReadWriteOnce
    size: 1G

data:
  claim:
    enabled: true
    # required - set this
    storageClass: freenas-iscsi-csi
    accessMode: ReadWriteOnce
    size: 1G

addons:
  claim:
    enabled: true
    # required - set this
    storageClass: freenas-iscsi-csi
    accessMode: ReadWriteOnce
    size: 1G

plugins:
  claim:
    enabled: true
    # required - set this
    storageClass: freenas-iscsi-csi
    accessMode: ReadWriteOnce
    size: 1G

ingress:
  enabled: true
  className: nginx
  annotations: {}
    # kubernetes.io/ingress.class: nginx
    # kubernetes.io/tls-acme: "true"
  hosts:
    - host: rundeck.dustinrue.com
      paths:
        - path: /
          pathType: ImplementationSpecific
  tls:
    - secretName: rundeck-tls
      hosts:
        - rundeck.dustinrue.com

# Enable nginx and nginx-service and deployment. If you handle CORS and ssl using your ingress, disable this
# and use the rundeck-backend service as upstream
nginx:
  enabled: true

rundeck:

  # Name of the secret containing SSH files to mount under /home/rundeck/.ssh
  sshSecrets: "ssh-key-secret"
persistence:
  enabled: true
  claim:
    create: true
  # storageClass:
  accessMode: ReadWriteOnce
  size: 1Gi
You may need to modify this section to fit your setup.
Next I setup my ingress. I plan to use http://rundeck.test (at least for this tutorial) so my ingress section looks like this:
ingress:
  enabled: true
  paths:
    - /
  hosts:
    - rundeck.test
And that’s it. I have now customized all of the values I want to customize for my Rundeck installation. I applied this to my cluster using helm install -f rundeck.yaml -n rundeck rundeck eugenmayer/rundeck.
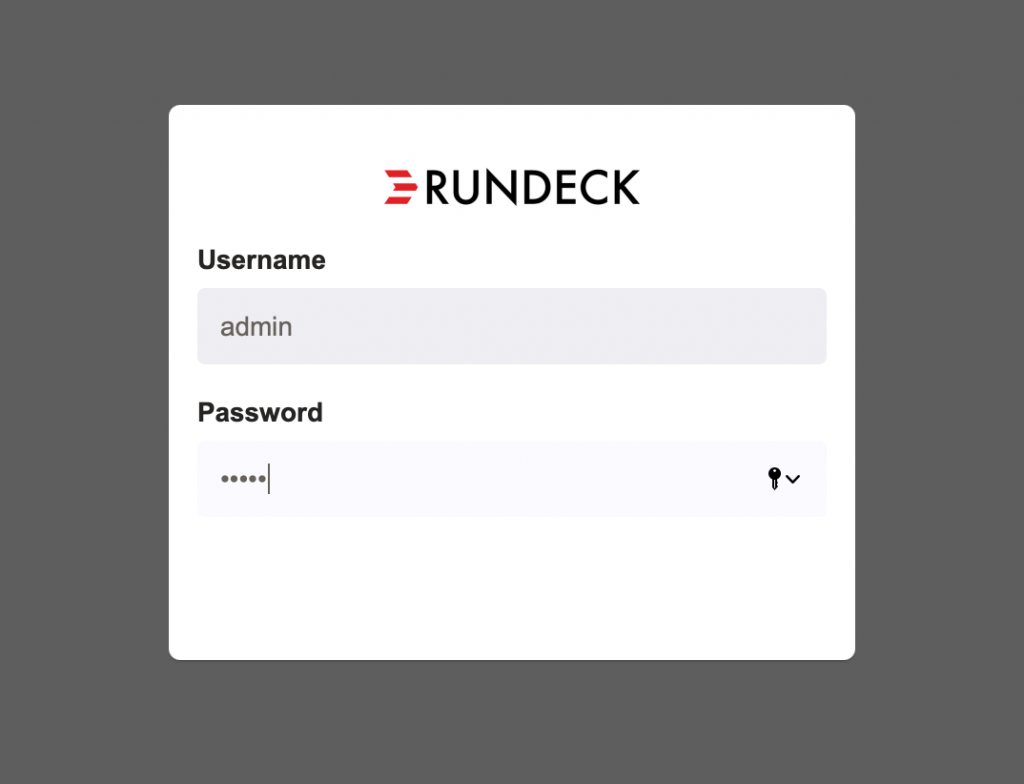
It takes some time for Rundeck to initialize so be patient. Once it is ready you can access it at the URL you specified. Eventually you should be presented with the login screen. You can login with user information you specified per Eugen’s chart README.
You will then be presented with an informational page for Rundeck. With initial sign in complete I got started by creating a new project, defining nodes, ssh keys and then a job. The first thing I did was generate an ssh key that Rundeck will use and stored in Rundeck’s Key Storage system. Generating the ssh key looks like this:
ssh-keygen -m PEM -f ~/.ssh/rundeck
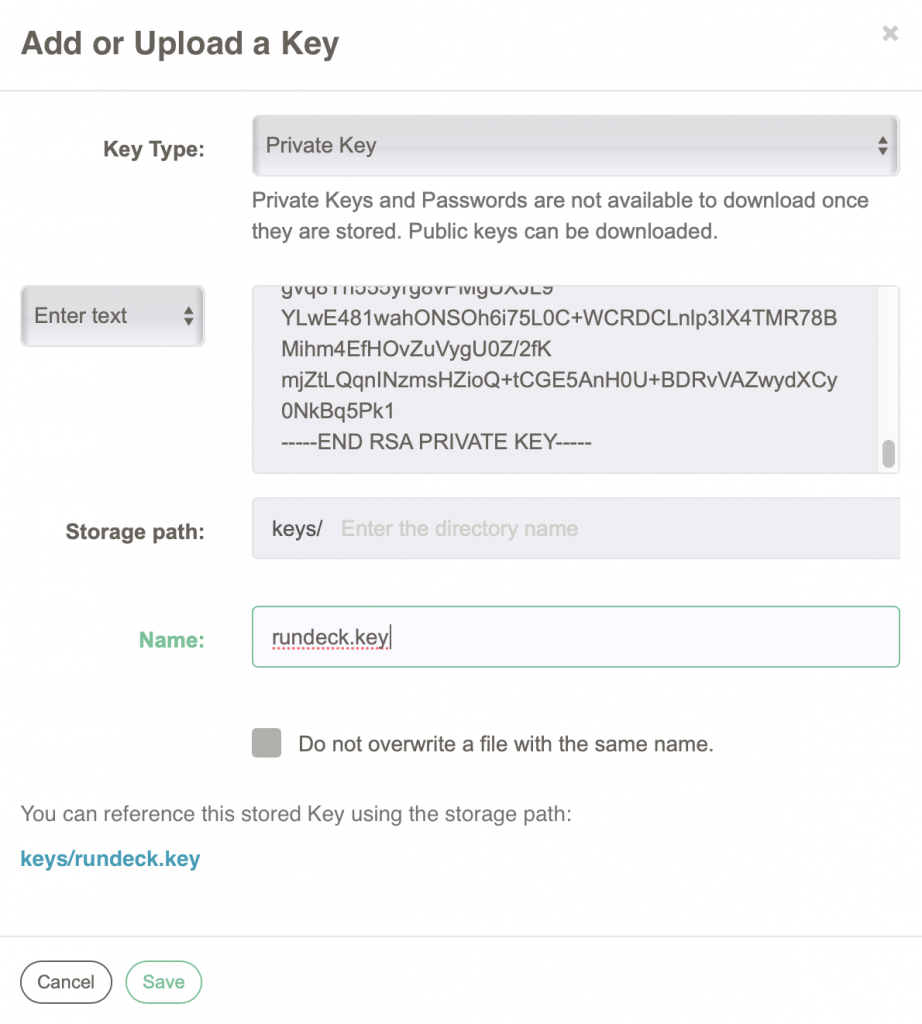
I then copied the contents of the resulting rundeck.pub file into the .ssh/authorized_keys on my target servers. This way Rundeck will be able to ssh directly to the target machines. I also copied the contents of ~/.ssh/rundeck to the Key Storage system under the gear menu. I entered the private key contents into the form and gave it a name. The form looks like this:
I clicked save. I can now create a project and define nodes for the project. To create a project I returned to the home page and clicked New Project. I only entered a name and description for the project and clicked Create. After clicking Create Rundeck will take you directly to the node source creation page. On this page I defined how to get node information for the project. After clicking Add new Node Source I selected the File option. I then filled out the form, which looks like this:
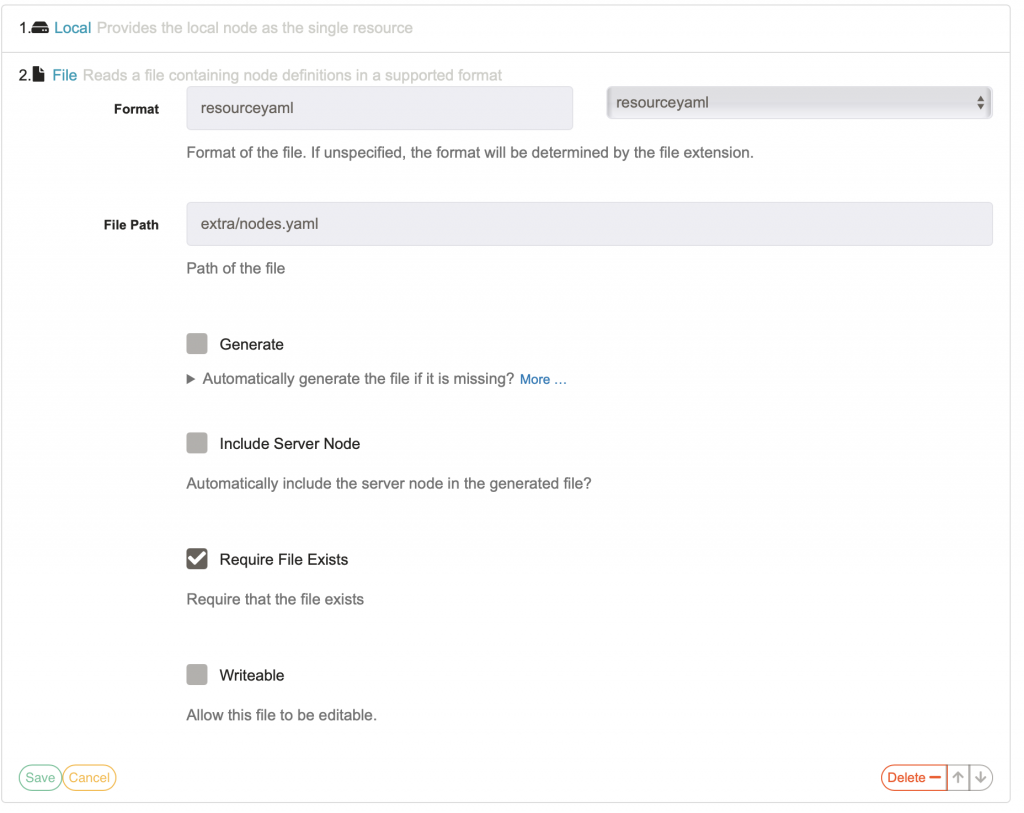
The File Path is specific to this type of installation. Remember in the rundeck.yaml file how I specified a value for extraConfigSecret called rundeck-extras? The extra directory will contain information stored in the Secret called rundeck-extras and will be mounted as files (if the Secret is created properly). From here, I clicked save and then save again to finalize the new Node Source. I can now browse to the Nodes screen and browse the nodes I have added:
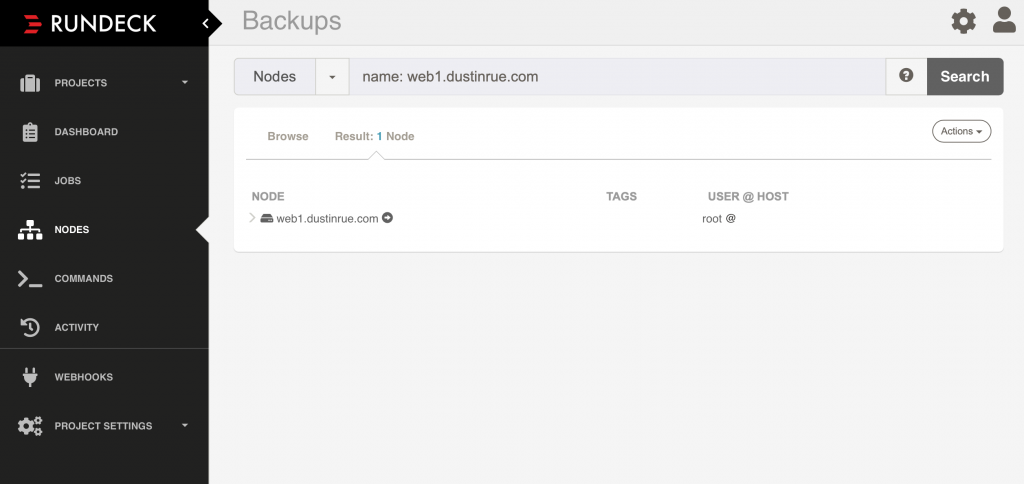
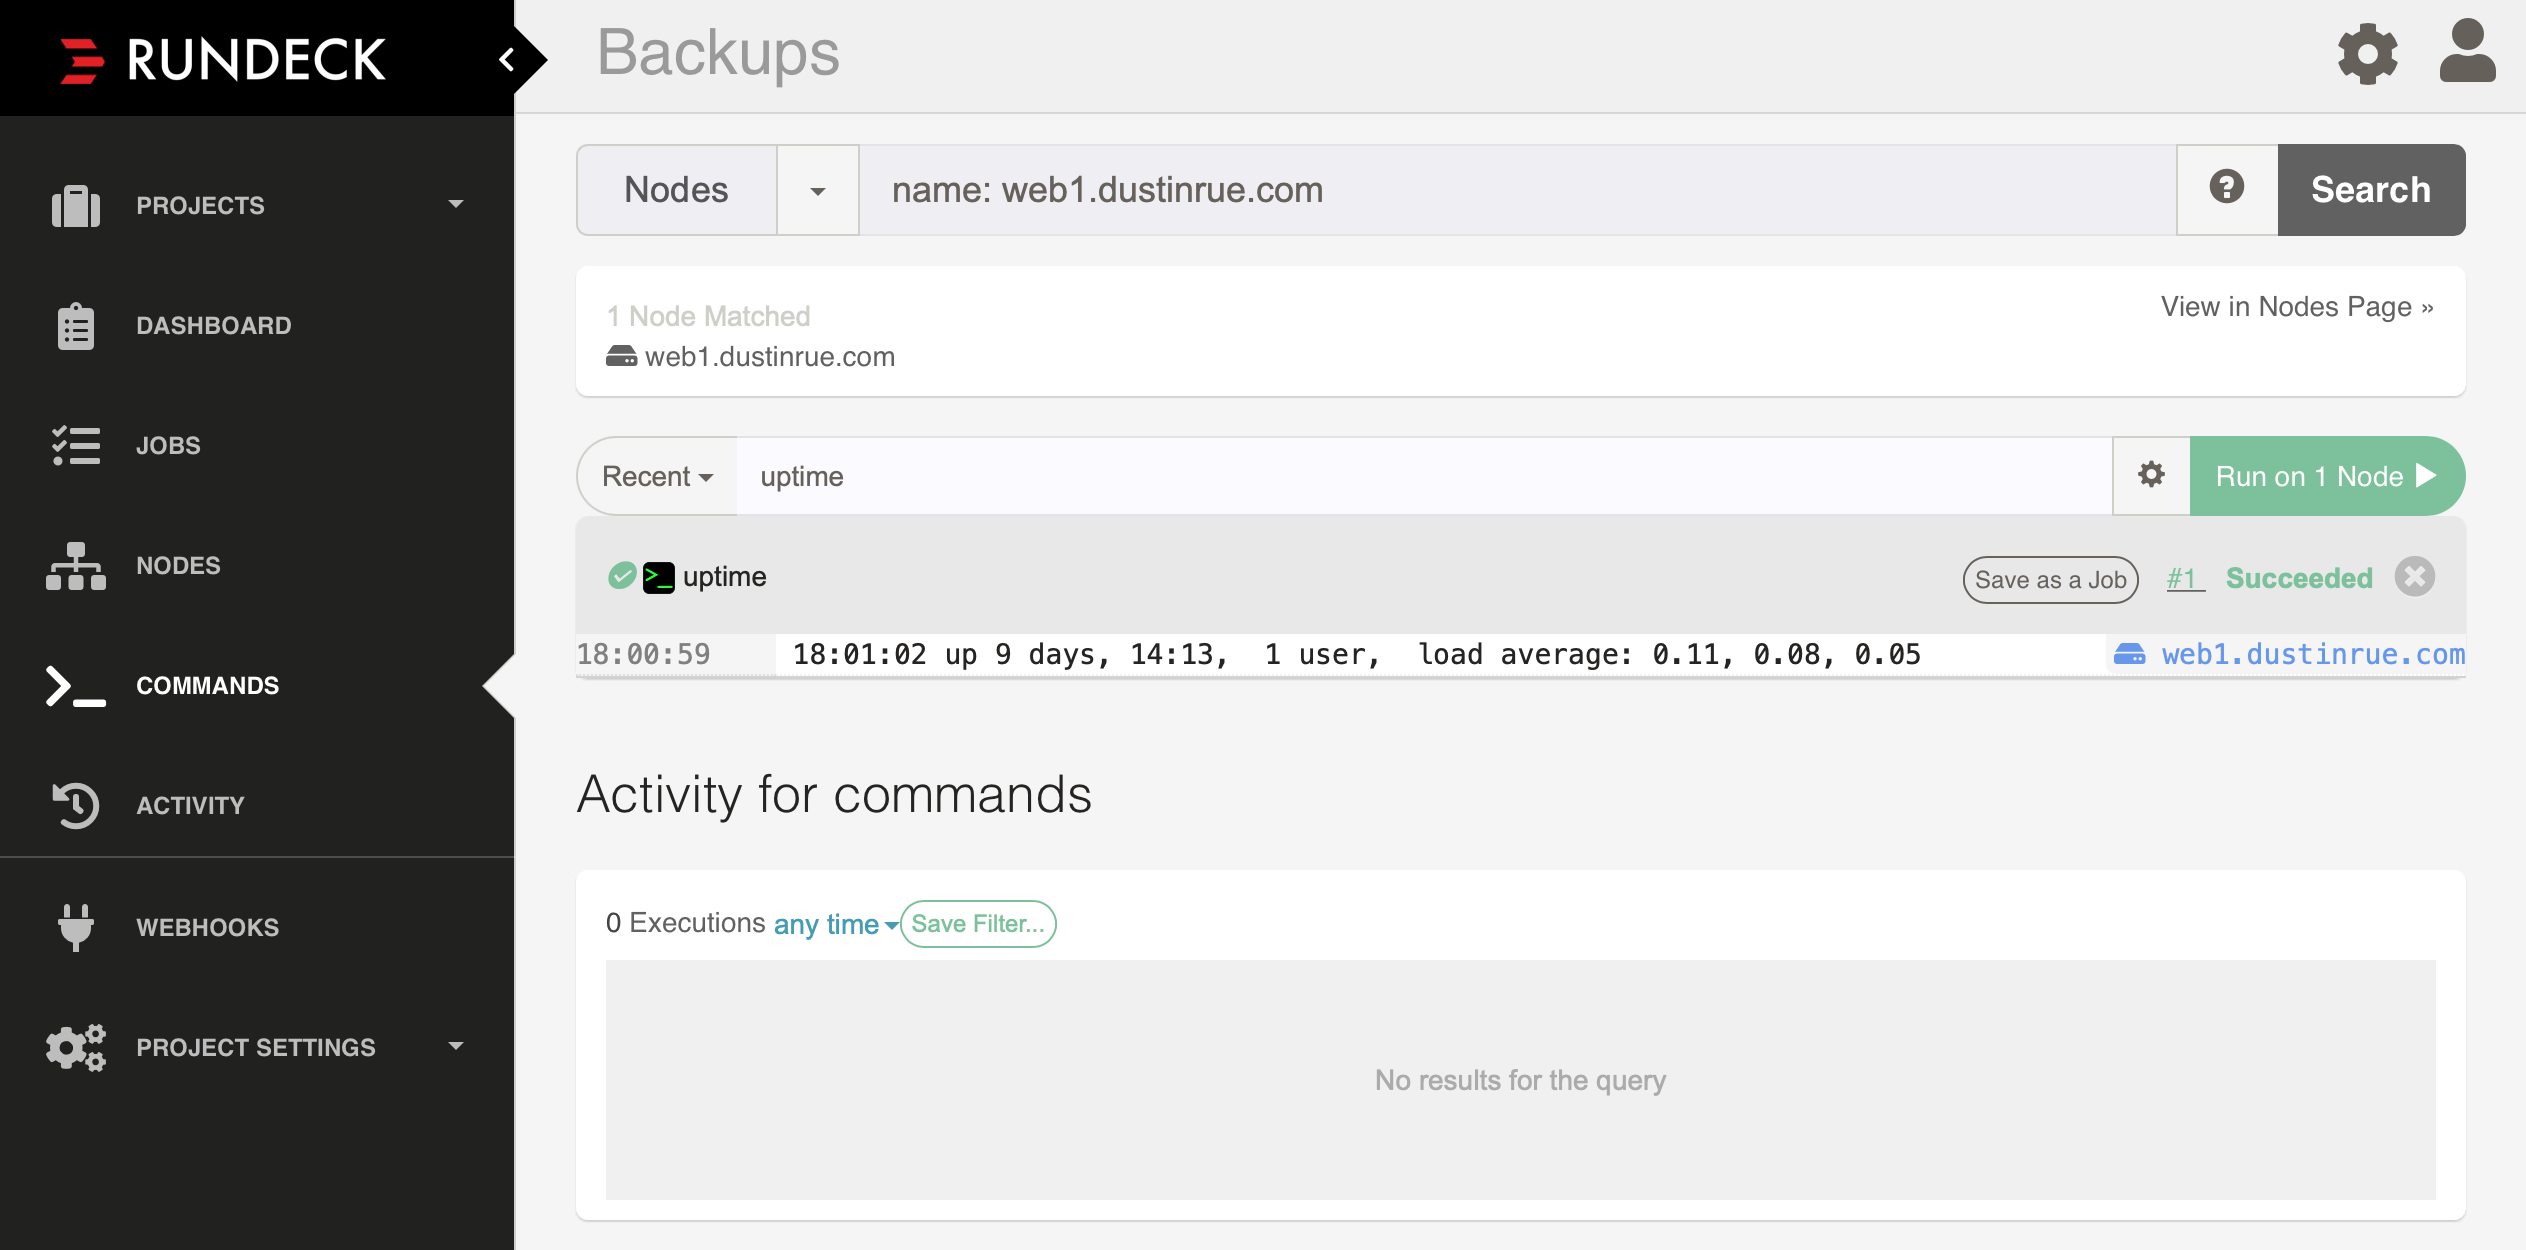
To validate that Rundeck is able to communicate with the new node I clicked the Actions menu and chose to run a command on the one host. The output looked like this:
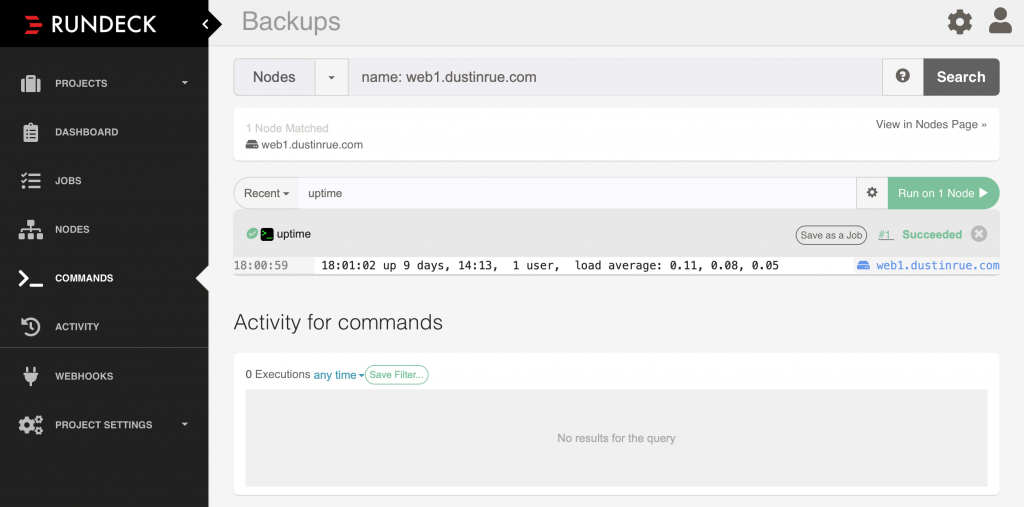
Excellent! From here to continue on to creating jobs to be performed against the target servers. In a future post I’ll detail how I created a job to perform a backup of the server hosting this site on a routine basis.