For nearly as long as I’ve been using Linux I have had some system on my home network that is acting as a server or test bed for various pieces of software or services. In the beginning this system might be my DHCP and NAT gateway, later it might be a file server but over the years I have almost always had some sort system running that acted as a server of some kind. These systems would often be configured using the same operating system that I was using in the workplace and running similar services where it made sense. This has always given me a way to practice upgrades, service configuration changes and just be as familiar with things as I possibly could.

As I’ve moved along in my career, the services I deal with have gotten more complex and what I want running at home as grown more complex to match. Although my home lab pales in comparison to what others have done I thought it would still be fun to go through what I have running.

Hardware

Like a lot of people, the majority of the hardware I’m running is older hardware that isn’t well suited for daily use. Some of the hardware is stuff I got free, some of it is hardware previously used to run Windows and so on. Unlike what seems to be most home lab enthusiasts, I like to keep things as basic as possible. If a consumer grade device is capable of delivering what I need at home then I will happily stick to that.

On the network side, my home is serviced with cable based Internet. This goes into an ISP provided Arris cable modem and immediately behind this is a Google WiFi access point. Nothing elaborate here, just a “basic” WiFi router handles all DHCP and NAT for my entire network and does a fine job with it. After the WiFi router is a Cisco 3560g 10/100/1000 switch. This sixteen year old managed switch does support a lot of useful features but most of my network is just sitting on VLAN 1 as I don’t have a lot of need for segmenting my network. Attached to the switch are two additional Google WiFi access points, numerous IoT devices, phones, laptops and the like.

Also attached to the switch are, of course, items that I consider part of the home lab. This includes a 2011 HP Compaq 8200 Elite Small Form Factor PC, an Intel i5-3470 based system built around 2012 and a Raspberry Pi 4. The HP system has a number of HDD and SSD drives, 24GB memory, a single gigabit ethernet port and hosts a number of virtual machines. The built Intel i5-3470 system has 16GB memory, a set of three 2TB HDDs and a single SSD for hosting the OS. The Pi4 is a 4GB model with an external SSD attached.

Operating Systems

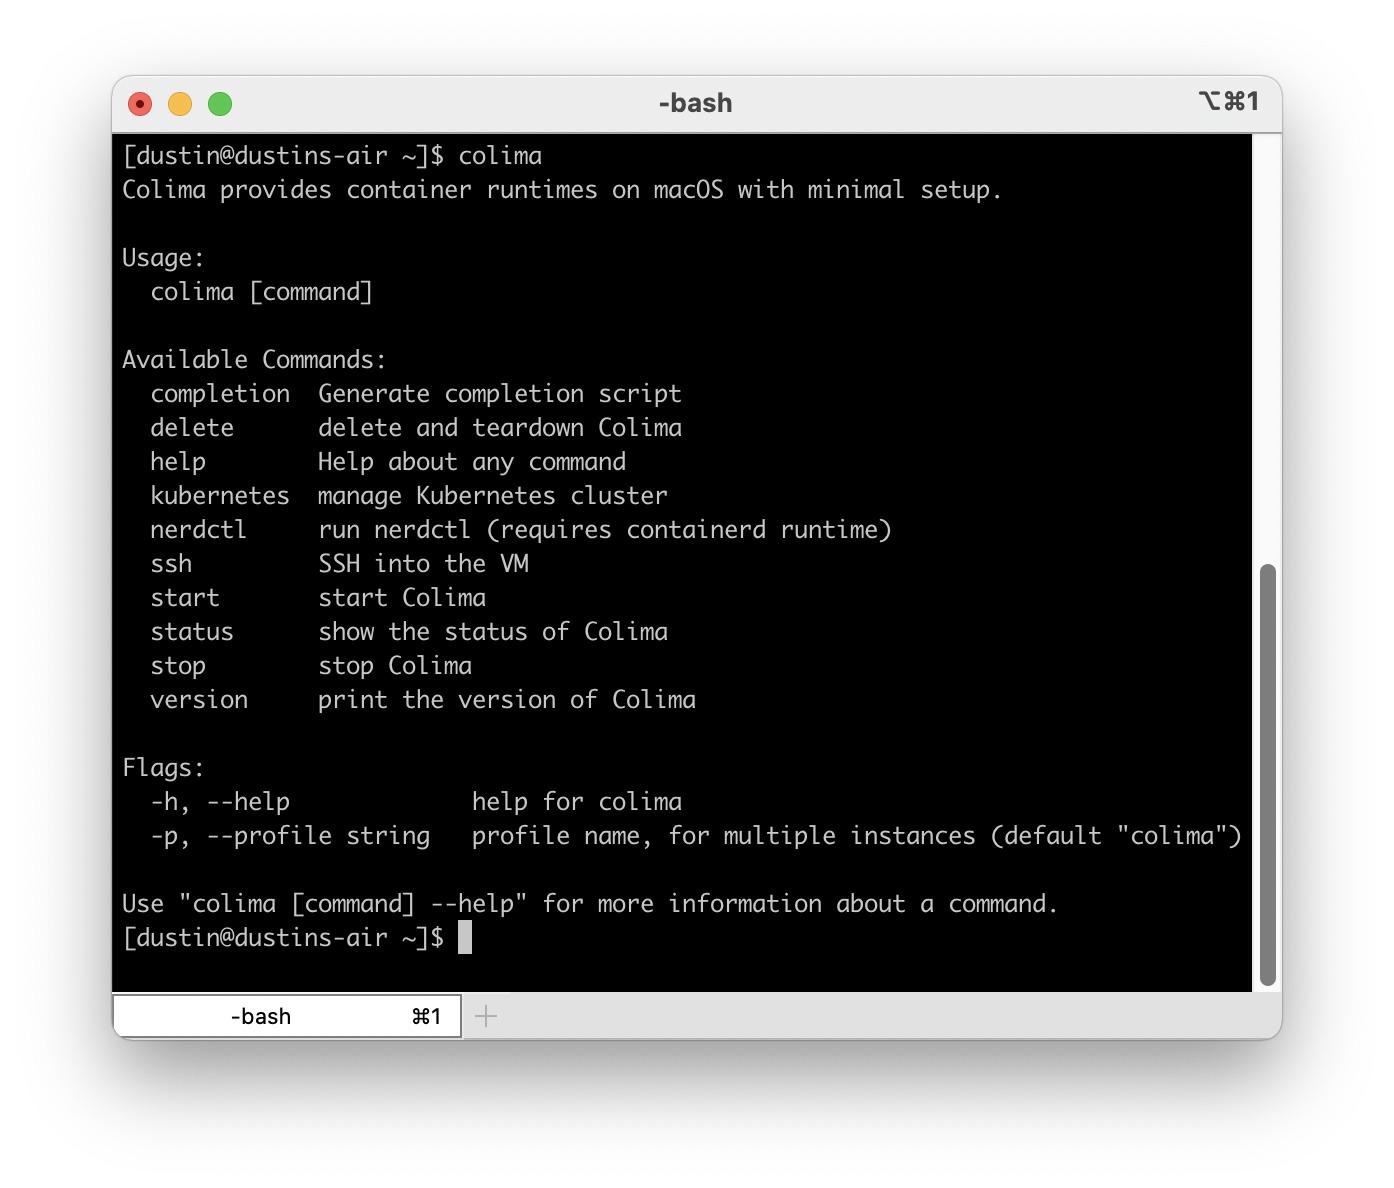
Base operating system on the HP is Proxmox 7. This excellent operating system is best describe as being similar to VMware ESXi. It allows you to host as many Virtual Machines as your hardware will support, can be clustered and even migrate VMs between cluster nodes. Proxmox is definitely a happy medium between having a single system and being a full on cloud like OpenStack. I can effectively achieve a lot of a cloud stack would provide but with greater simplicity. Although I can create VMs and manually install operating systems, I have created a number of templates to make creating VMs quicker and easier. The code for building the templates is at https://github.com/dustinrue/proxmox-packer.

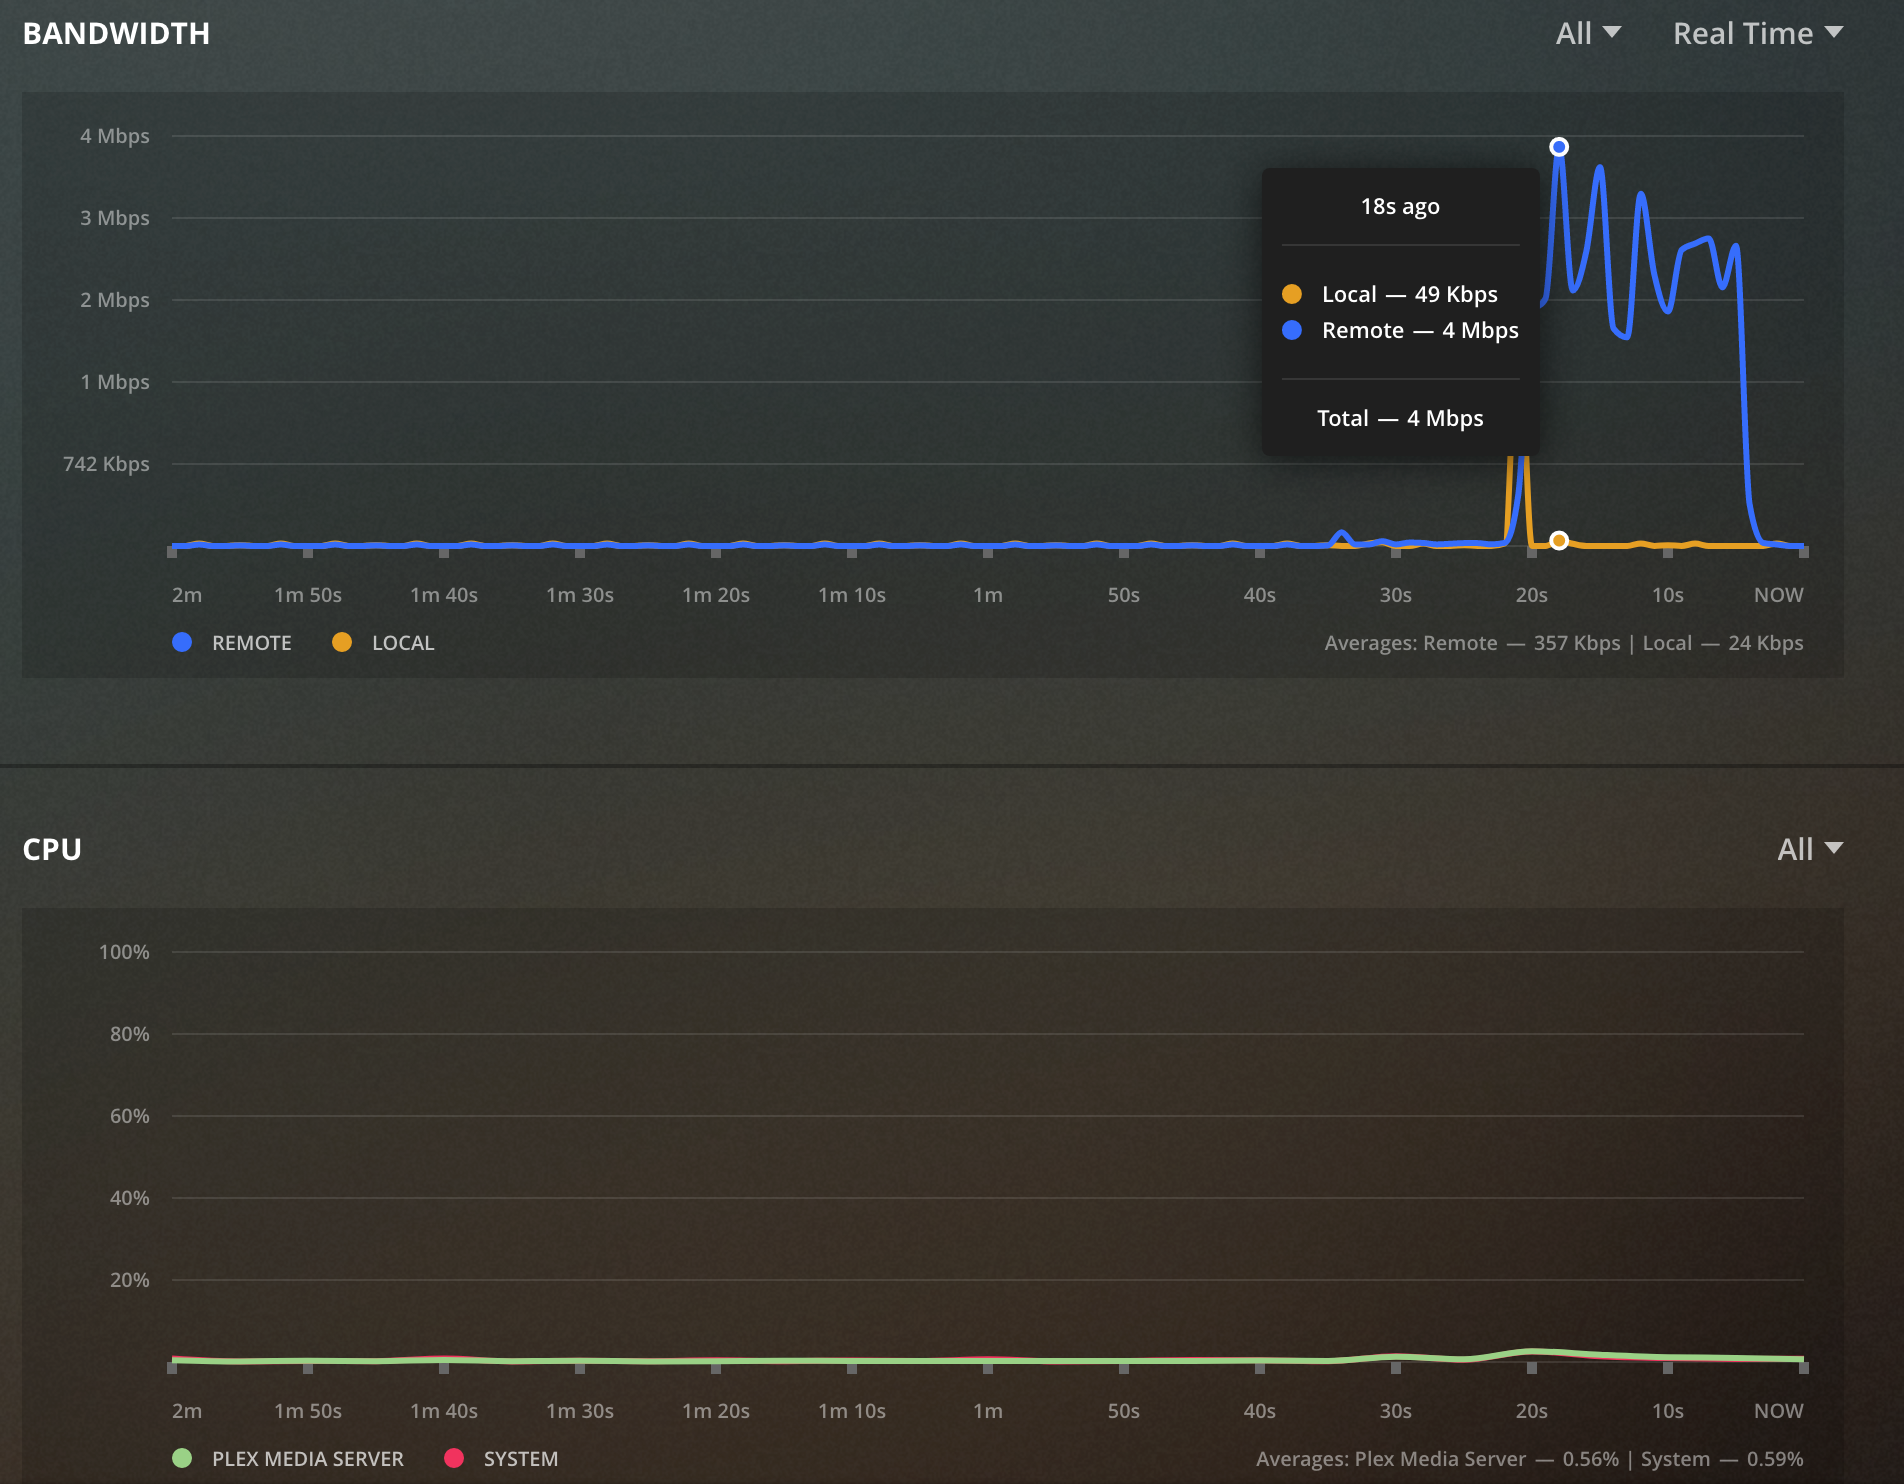
On the Intel i5-3470 based system is TrueNAS Core. This system acts as a Samba based file store for the entire home network including remote Apple Time Machine support, NFS for Proxmox and iSCSI for Kubernetes. TrueNAS Core is an excellent choice for creating a NAS. Although it is capable of more, I stick just to just the basic file serving functionality and don’t get into any of the extra plugins or services it can provide.

The Raspberry Pi 4 is running the 64bit version of Pi OS. Although it is a beta release it has proven to work well enough.

Software and Services

The Proxmox system hosts a number of virtual machines. These virtual machines provide:

Kubernetes

On top of Proxmox I also run k3s to provide Kubernetes. Kubernetes allows me to run software and test Helm charts that I’m working on. My Kubernetes cluster consists of a single amd64 based VM running on Proxmox and the Pi4 to give me a true arm64 node. In Kubernetes I have installed:

  • cert-manager for SSL certifications. This is configured against my DNS provider to validate certificates.
  • ingress-nginx for ingress. I do not deploy Traefik on k3s but prefer to use ingress-nginx. I’m more familiar with its configuration and have good luck with it.
  • democratic-csi for storage. This package is able to provide on demand storage for pods that ask for it using iSCSI to the TrueNAS system. It is able to automatically create new storage pools and share them using iSCSI.
  • gitlab-runner for Gitlab runner. This provides my Gitlab server with the ability to do CI/CD work.

I don’t currently use Kubernetes at home for anything other than short term testing of software and Helm charts. Of everything in my home lab Kubernetes is the most “lab” part of it where I do most of my development of Helm charts and do basic testing of software. Having a Pi4 in the cluster really helps with ensuring charts are targeting operating systems and architectures properly. It also helps me validate that Docker images I am building do work properly across different architectures.

Personal Workstation

My daily driver is currently an i7 Mac mini. This is, of course, running macOS and includes all of the usual tools and utilities I need. I detailed some time ago the software I use at https://dustinrue.com/2020/03/whats-on-my-computer-march-2020-edition/.

Finishing Up

As you can see, I have a fairly modest home lab setup but it provides me with exactly what I need to provide the services I actually use on a daily basis as well as provide a place to test software and try things out. Although there is a limited set of items I run continuously I can easily use this for testing more advanced setups if I need to.

Chris Wiegman asks, what are you building? I thought this would be a fun question to answer today. Like a lot of people I have a number of things in flight but I’ll try to limit myself to just a few them.

PiPlex

I have run Plex in my house for a few years to serve up my music collection. In 2021 I also started paying for Plex Pass which gives me additional features. One of my favorite features or add-ons is PlexAmp which gives me a similar to Spotify like experience but for music I own.

Although I’m very happy with the Plex server I have I wondered if it would be feasible to run Plex on a Raspberry Pi. I also wanted to learn how Pi OS images were generated using pi-gen. With that in mind I set out to create a Pi OS image that preinstalls Plex along with some additional tools like Samba to make it easy to get up and running with a Plex server. I named the project PiPlex. I don’t necessarily plan on replacing my existing Plex server with a Pi based solution but the project did serve its intended goal. I learned a bit about how Pi OS images are created and I discovered that it is quite possible to create a Pi based Plex server.

ProxySQL Helm Chart

One of the most exciting things I’ve learned in the past two years or so is Kubernetes. While it is complex it is also good answer to some equally complex challenges in hosting and scaling some apps. My preferred way of managing apps on Kubernetes is Helm.

One app I want install and manage is ProxySQL. I couldn’t find a good Helm chart to get this done so I wrote one and it is available at https://github.com/dustinrue/proxysql-kubernetes. To make this Helm chart I first had to take the existing ProxySQL Docker image and rebuild it so it was built for x86_64 as well as arm64. Next I created the Helm chart so that it installs ProxySQL as a cluster and does the initial configuration.

Site Hosting

I’ve run my blog on WordPress since 2008 and the site has been hosted on Digital Ocean since 2013. During most of that time I have also used Cloudflare as the CDN. Through the years I have swapped the droplets (VMs) that host the site, changed the operating system and expanded the number of servers from one to two in order to support some additional software. The last OS change was done about three years ago and was done to swap from Ubuntu to CentOS 7.

CentOS 7 has served me well but it is time to upgrade it to a more recent release. With the CentOS 8 controversy last year I’ve decided to give one of the new forks a try. Digital Ocean offers Rocky Linux 8 and my plan is to replace the two instances I am currently running with a single instance running Rocky Linux. I no longer have a need for two separate servers and if I can get away with hosting the site on a single instance I will. Back in 2000 it was easy to run a full LAMP setup (and more) on 1GB of memory but it’s much more of a challenge today. That said, I plan to use a single $5 instance with 1 vCPU and 1GB memory to run a LEMP stack.

Cloudflare

Speaking of Cloudflare, did you know that Cloudflare does not cache anything it deems “dynamic”? PHP based apps are considered dynamic content and HTML output by software like WordPress is not cached. To counter this, I created some page rules a few years ago that forces Cloudflare to cache pages, but not the admin area. Combined with the Cloudflare plug-in this solution has worked well enough.

In the past year, however, Cloudflare introduced their automatic platform optimization option that targets WordPress. This feature enables the perfect mix of default rules (without using your limited set of rules) for caching a WordPress site properly while breaking the cache when you are signed in. This is also by far the cheapest and most worry free way to get the perfect caching setup for WordPress and I highly recommend using the feature. It works so well I went ahead and enabled it for this site.

Multi-Architecture Docker Images

Ever since getting a Raspberry Pi 4, and when rumors of an Arm powered Mac were swirling, I’ve been interested in creating multi-architecture Docker images. I started with a number of images I use at work so they are available for both x86_64 and arm64. In the coming weeks I’d like to expand a bit on how to build multi-architecture images and how to replace Docker Desktop with a free alternative.

Finishing Up

This is just a few of the things I’m working on. Hopefully in a future post I can discuss some of the other stuff I’m up to. What are you building?

In late August of 2021 the company behind Docker Desktop announced their plans to change the licensing model of their popular Docker solution for Mac and Windows. This announcement means many companies who have been using Docker Desktop would now need to pay for the privilege. Thankfully, the open source community is working to create a replacement.

For those not aware, Docker doesn’t run natively on Mac. The Docker Desktop system is actually a small Linux VM running real Docker inside of it and then Docker Desktop does a bunch of magic to make it look and feel like it is running natively on your system. It is for this reason that Docker Desktop users get to enjoy abysmal volume mount performance, the process of shuffling files (especially small ones) requires too much metadata passing to be efficient. Any solution for running Docker on a Mac will need to behave the same way and will inherit the same limitations.

Colima is a command line tool that builds on top of lima to provide a more convenient and complete feeling Docker Desktop replacement and it already shows a lot of promise. Getting started with colima is very simple as long as you already have brew and Xcode command line tools installed. Simply run brew install colima docker kubectl and wait for the process to finish. You don’t need Docker Desktop installed, in fact you should not have it running. Once it is complete you can start it with:

colima start

This will launch a default VM with the docker runtime enabled and configure docker for you. Once it completes you will then have a working installation. That’s literally it! Commands like docker run --rm -ti hello-world will work without issue. You can also build and push images. It’s can do anything you used Docker Desktop for in the past.

Mounting Volumes

Out of the box colima will mount your entire home directory as a read only volume within the colima VM which makes it easily accessible to Docker. Colima is not immune, however, to the performance issues that Docker Desktop struggled with but the read only option does seem to provide reasonable performance.

If, for any reason, you need to have the volumes you mount as read/write you can do that when you start colima. Add --mount <path on the host>:<path visible to Docker>[:w]. For example:

colima start --mount $HOME/project:/project:w

This will mount $HOME/project as /project within the Docker container and it will be writeable. As of this writing the ability to mount a directory read/write is considered alpha quality so you are discouraged from mounting important directories like, your home directory.

In my testing I found that mounting volumes read/write was in fact very slow. This is definitely an area that I hope some magic solution can be found to bring it closer to what Docker Desktop was able to achieve which still wasn’t great for large projects.

Running Kubernetes

Colima also supports k3s based Kubernetes. To get it started issue colima stop and then colima start --with-kubernetes. This will launch colima’s virtual machine, start k3s and then configure kubectl to work against your new, local k3s cluster (this may fail if you have an advanced kubeconfig arrangement).

With Kubernetes running locally you are now free to install apps however you like.

Customizing the VM

You may find the default VM to be a bit on the small side, especially if you decide to run Kubernetes as well. To give your VM more resources stop colima and then start it again with colima start --cpu 6 --memory 6. This will dedicate 6 CPU cores to your colima VM as well as 6GB of memory. You can get a full list of options by simply running colima and pressing enter.

What to expect

This is a very young project that already shows great potential. A lot is changing and currently in the code base is the ability to create additional colima VMs that run under different architectures. For example, you can run arm64 Docker images on your amd64 based Mac or vice versa.

Conclusion

Colima is a young but promising project that can be used to easily replace Docker Desktop and if you are a Docker user I highly recommend giving it a try and providing feedback if you are so inclined. It has the ability to run Docker containers, docker-compose based apps, Kubernetes and build images. With some effort you can also do multi-arch builds (which I’ll cover in a later post). You will find the project at https://github.com/abiosoft/colima.

Wanted to take a moment to expand on something that Chris Wiegman wrote over on his site about how to use parameters in a make target. This post expands on a previous post of his called, “Automating WordPress Development with Make.” I was really excited about his initial post because make is a tool that I love putting to use. While Make is an older build chain tool, originally release back in 1976, it is just as useful today as ever.

In addition to the method described by Chris, there exists another method that feels a touch more natural than using ENV vars to pass parameters. It looks like this:

# If the first argument is good pass the rest of the line to the target
ifeq (good,$(firstword $(MAKECMDGOALS)))
  # use the rest as arguments for "good"
  RUN_ARGS := $(wordlist 2,$(words $(MAKECMDGOALS)),$(MAKECMDGOALS))
  # ...and turn them into do-nothing targets
  $(eval $(RUN_ARGS):;@:)
endif

.PHONY: bad good

bad:
        @echo "$(MAKECMDGOALS)"

good:
        @echo "$(RUN_ARGS)"

In this example, if we run make bad hello world you will get an error that looks like this:

make bad hello world
bad hello world
make: *** No rule to make target 'hello'.  Stop.

However, if we run make good hello world then the extra parameters are simply passed to the the command in the target. The output looks like this:

make good hello world
hello world

The magic is, of course, coming from the ifeq section of the Makefile. It checks to see if the first word of the Make command goals is the target keyword. If it is, then it removes all of the trailing words and turns them into do-nothing targets allowing them to be used elsewhere in the file.

For reference, I found this trick on https://stackoverflow.com/a/14061796 awhile back and have put it to use in some internal tools where I want to wrap some command with additional steps.

Makefiles are a great tool partly because they allow you to create documentation that remains similar across projects yet allows you to customize what is actually happening behind the scenes. This makes your project much more approachable for new people since you can simply document “run make” and take care of the difficult stuff for them. Advanced users can still get into the Makefile to see what is going on or even customize it.

I hope you find this tip useful!

While building multi-arch images I noticed that it was really unreliable when done in my CI/CD pipelines. After a bit of research, I found that the buildx and the Qemu emulation system aren’t quite stable when used with Docker in Docker. Although I can retry the job until it finishes I decided to look into other ways of doing multi-arch builds with buildx.

Continue reading

For ages, I’ve had an issue with my Mac mini where it wouldn’t shut down properly after some unknown “event” occurs. Either it was running for a certain period of time, I connected to some network share or something else. Whatever it was I could never figure out the exact cause.

What felt like every month or so I’d do a search to see if any body had figured out the issue yet and recently I found this https://apple.stackexchange.com/a/412649. Incredibly the outlined solution seems to have solved the shut down issues I was having. As it turns out, a few years ago I had implemented a “fix” for slow cli apps that was caused by the code signing subsystem of macOS. This fix, in newer releases, caused some kind of issue that prevented the system from shutting down properly. By removing terminal as described my Mac mini has been able to reboot and shut down without issue.

In the post is a link to this site explaining the issue a bit more deeply – https://sigpipe.macromates.com/2020/macos-catalina-slow-by-design/.

If you run Plex at home and access it externally you may want to limit the amount of bandwidth remote access is allowed to use. Not limiting the bandwidth Plex uses will affect other users on the same Internet connection and those playing online games or doing video conferencing will be affected the most. The reason for this is Plex is going to utilize your upload bandwidth, and all of it if you allow it to. Most households have asynchronous connections meaning one direction is slower than the other and typically it is the upload speeds that are drastically slower. This makes sense as most people download content rather than push it to the Internet. Plex, however, turns that around and does push data to the Internet. Since uploads speeds are usually slower than the download speed outside your home you will quickly use up, or saturate, your upload speed. Once the upload capacity from your home is at its limits everything else will suffer in some way. Online video games will get laggy, drop packets, and will feel awful. Video conferencing will become glitchy and even downloads speeds can drop.

Luckily, Plex offers two ways to limit how much bandwidth it will use (though you probably only need to tap into one of them). The first way, and the way you can probably skip, is to set the Plex client itself to be a good citizen in “Quality” section of the settings screen. It looks like this:

Set the “Internet Streaming” video quality to Maximum unless your system can’t handle full quality

Most of the time you can leave this to “Maximum”. If you find your player is still stuttering you can modify this. This is will usually happen if the download speed of your connection is slow or if you just want to save bandwidth.

The more beneficial setting is located in the server settings section under “Remote Access”. The settings on this page will affect your Plex server globally, to all clients. In my home, my upload speed is about 11mbit. To ensure that others in the home have adequate upload capacity I set my upload speed and video quality to 4Mbit, as you can see here:

Set the Internet upload speed to some fraction of your total upload speed

By configuring Plex with a lower value than your total upload you will force the entire server to use less than your total upload speed, regardless of how many streams are coming off of it. This will leave room for other applications on your network if they need it.

Keep in mind that the limit does apply to all remote streams, and if there are enough of them, the setting could be too low and cause stuttering on their side as they need to pause and buffer the content. The setting also applies to downloads so even if someone downloads content to offline it in high quality they will be limited to whatever value you put here.

Working from home doesn’t mean I’m always working from home. Sometimes I am out and about with my laptop. However, I’m also a person who just prefers to use to use a desktop whenever possible. I find the process of disconnecting or reconnecting all the external devices I use tedious so I avoid it as much as possible. This is why my main system is a personal Mac mini from late 2018 and my portable system is a company-provided MacBook Pro from 2015. Since the mini is my primary system, most of what I’m working with is located on that system and I will either ssh into the mini from the portable to run some commands or use SMB to mount the files (over a VPN of course) so I can edit them using VS Code.

One tool I make heavy use of is aws-vault. This tool, which I’ve written about previously, allows you to put your AWS credentials into macOS’s keychain system. Using macOS’s keychain keeps the information off of the file system as plain text and allows me to sync the data between Macs (and iPhone). When sitting at a Mac your keychain will be unlocked when you enter your password. However, when accessing a Mac remotely using ssh the keychain will remain locked which makes using aws-vault and some other tools a bit more difficult to use. Luckily, there is a way to unlock the keychain so you can use it properly.

Once you have a remote shell into your Mac you can issue security list to view the keychains that can be unlocked. In my case, I want to unlock the aws-vault keychain. To do so I issue security unlock /Users/dustin/Library/Keychains/aws-vault.keychain-db. After pressing enter you are asked for your system password. Enter this, press enter again and the keychain will be unlocked. To unlock your default keychain simply issue security unlock.

With your keychain unlocked tools that depend on keychain will begin to work properly.

Back in 2008, I bought my second Mac, a unibody MacBook, to give me a more capable and portable system than my existing Mac mini. The mini was a great little introduction to the Mac world but wasn’t portable. The MacBook got used for several years until software got too heavy for it. Rather than getting rid of it, I kept the machine around to run Linux. Eventually, I introduced it as part of my home lab. In my home lab, I use Proxmox as a virtualization system. Proxmox can be set up as a cluster with shared storage so VMs and LXC containers can be migrated between physical hosts as needed. For a while I had Linux installed onto the MacBook and it was part of the Proxmox setup just so I could play around with VM migration.

Eventually, though, the limitations of the hardware were making the hassle of keeping the system running and updated less worthwhile and I removed it from the cluster. Still not wanting to get rid of it, I decided to introduce it into my HiFi system as a way to play music using its built-in optical out (a feature that has been removed from recent Macs) to my receiver. Using optical into the receiver allows me to utilize the DAC that is present in the receiver rather than whatever my current solution is using. In theory, it should sound better. Anyway, this started my adventure in getting macOS running on an older Mac again, which was harder than I had anticipated.

Usually, installing macOS on a Mac is a straight forward affair, at least when the hardware is new. When using older hardware there are a few extra steps you may need to take to get things going. Installing El Capitan on my old MacBook required the following:

  • External USB drive to install macOS onto
  • USB flash drive to hold the installer files
  • Carbon Copy Cloner
  • Another Mac
  • Install ISO
  • Patience

The first issue I ran into is how to actually get an older version of macOS that runs on the machine. I no longer have the restore CD/DVD for the system, normally I keep these but for some reason, I’m missing the disc for this particular system. Since I had previous experience installing El Capitan on this Mac I knew there would be issued I’d need to overcome. To make it easier on myself I installed an even older version that I could then upgrade from. I also installed the OS onto an external drive so that I could complete a portion of the install using a different machine.

It is generally agreed upon that Mountain Lion was the last version of macOS (then called OS X) that was not intended to be installed on SSD based systems. Mountain Lion also not signed in a way that prevents it from being installed in 2020, an important issue as you’ll later see. After some searching, I found this as a source for the ISO file I needed to install Mountain Lion. Keep in mind that I am installing on a system with a blank hard drive, I needed to download the fully bootable ISO. The file I downloaded is specifically this one – https://sundryfiles.com/31KE. After downloading the file and using Etcher to copy the ISO to a USB flash drive, I was able to install Mountain Lion without any issues. With a fully working, if outdated, system up and running I moved on to tackling the El Capitan installation.

With the system running I took the necessary steps to get signed into the App Store. This alone is a small challenge because the App Store installed with Mountain Lion doesn’t know how to natively deal with the extra account protections Apple has introduced in recent years. Pay attention to the messaging on screen and it’ll tell you how to login (it amounts to putting your password plus the security code that appears on your phone or second Mac). Once logged in I downloaded the El Capitan installer to the disk.

After getting the installer I had to deal with the first issue. Which is, the installer will fail if there is no battery installed! The battery in my MacBook has been removed because it was beginning to swell. To be safe I removed it so it could be recycled rather than allow it to become a spicy pillow and burn down my house. If you attempt to install El Capitan to a Mac laptop with a battery installed you’ll get a cryptic error about a missing or invalid node. To fix this I removed the external drive from the machine and attached it to another Mac laptop I have that does have a battery. For safety, I also disconnected the internal hard drive prior to finishing the upgrade process.

The next issue I had to deal with was the fact that, while El Capitan is the newest version of macOS that will run on a 2008 MacBook, it is still from 2015. Being fully signed, it will fail to install in 2020 because the certificate used to sign the packages has since expired! To deal with this issue I followed the steps outlined at https://techsparx.com/computer-hardware/apple/macosx/install-osx-when-you-cant.html. Setting the date back worked great and I was able to finish the upgrade using the second Mac. Once the upgrade was done I moved to the external drive back to my 2008 MacBook and performed the final step.

The final step of the process is to move the installation from the external drive to the internal drive. My MacBook still has the original 256GB HD that was included with the system. It is very slow by today’s standards but will be just fine for its new use case. For this task, I turned to the excellent Carbon Copy Cloner. After cloning the external drive to the internal drive my installation of El Capitan was complete. I was then able to connect the laptop to my receiver using an optical cable and enjoy music!

Do a Google search for “2018 mac mini bluetooth issues” and you’ll get a lot of hits. The Bluetooth issues with the 2018 Mac mini are well documented. What isn’t as well documented is how to work around the issue. I say work around because I have yet to find a proper solution to the issue.

To be fair, the issue isn’t unique to the Mac mini itself. The system just seems to suffer from it more easily than others. As it turns out, USB 3 will cause interference in the 2.4-2.5Ghz frequencies. This is the same frequency that Bluetooth operates.

Let’s take a look at how the issue manifests itself. If you are using Bluetooth devices like a wireless mouse, keyboard, AirPods or any combination thereof and you are using the type A USB 3 ports on the back of the system, you will most likely experience periods of missed keystrokes, poor mouse tracking or stuttering audio.

To work around the issue I found a few references in my Google searches referencing the USB 3 ports. As it turns out, not using the USB 3 ports really is the key to avoiding the issue. Instead, get yourself a USB-C based hub that features USB 3 ports or simply an adapter to convert USB-C to type A USB 3 connector. With this in place, I have eliminated all of the connectivity issues I had been having.

This is an unfortunate hack that removes an otherwise useful feature of the Mac mini. While you can still get full speed using a USB-C adapter it would be better if you didn’t have to lose functionality or ports in order to work around what is an unfortunate coincidence between USB 3 and Bluetooth. There are potentially other ways to solve this using properly shielded cables or ferrite cores. I’d like to test these options in the future and if I do I’ll try to report my findings.