Do a Google search for “2018 mac mini bluetooth issues” and you’ll get a lot of hits. The Bluetooth issues with the 2018 Mac mini are well documented. What isn’t as well documented is how to work around the issue. I say work around because I have yet to find a proper solution to the issue.
To be fair, the issue isn’t unique to the Mac mini itself. The system just seems to suffer from it more easily than others. As it turns out, USB 3 will cause interference in the 2.4-2.5Ghz frequencies. This is the same frequency that Bluetooth operates.
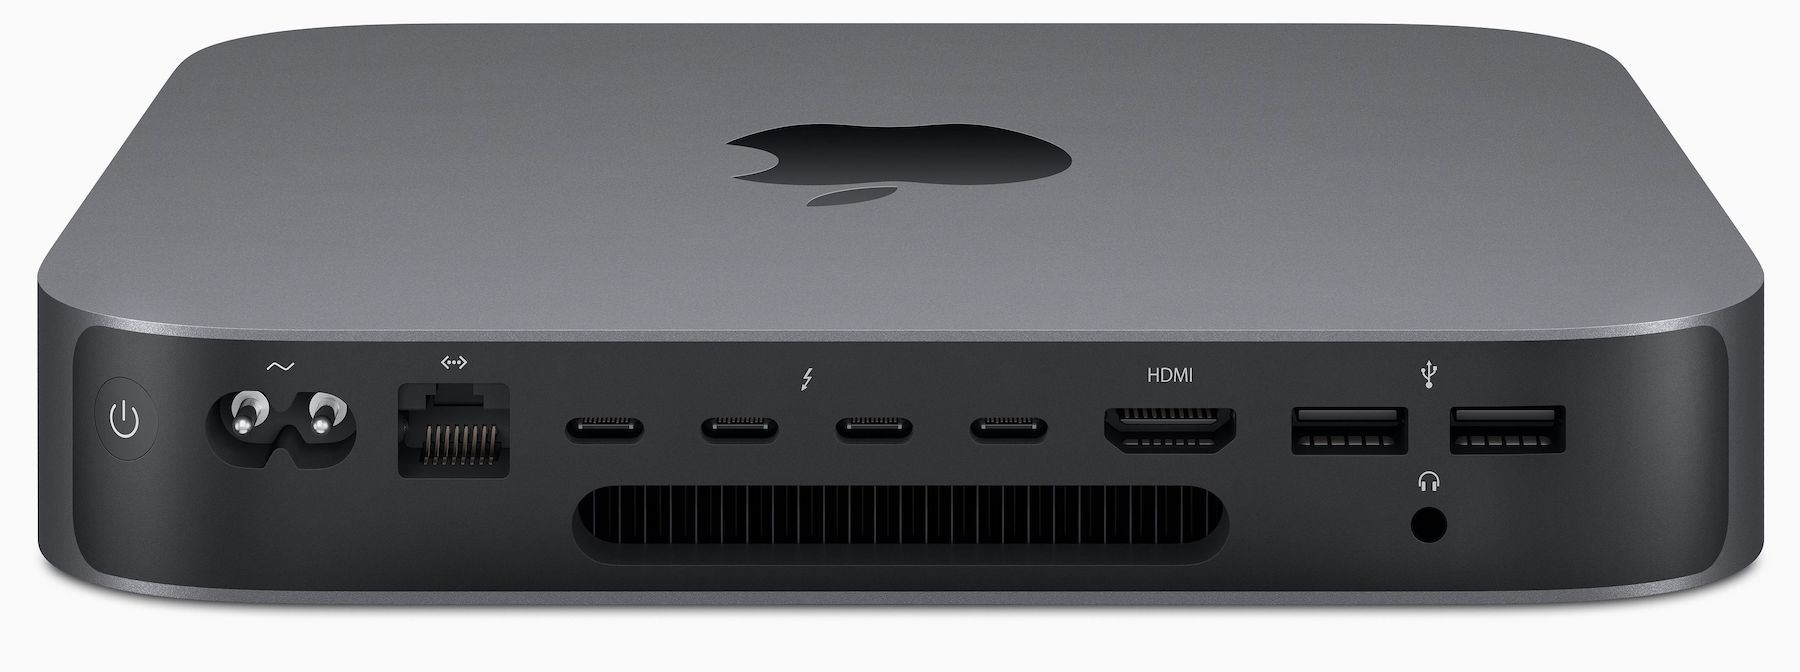
Let’s take a look at how the issue manifests itself. If you are using Bluetooth devices like a wireless mouse, keyboard, AirPods or any combination thereof and you are using the type A USB 3 ports on the back of the system, you will most likely experience periods of missed keystrokes, poor mouse tracking or stuttering audio.
To work around the issue I found a few references in my Google searches referencing the USB 3 ports. As it turns out, not using the USB 3 ports really is the key to avoiding the issue. Instead, get yourself a USB-C based hub that features USB 3 ports or simply an adapter to convert USB-C to type A USB 3 connector. With this in place, I have eliminated all of the connectivity issues I had been having.
This is an unfortunate hack that removes an otherwise useful feature of the Mac mini. While you can still get full speed using a USB-C adapter it would be better if you didn’t have to lose functionality or ports in order to work around what is an unfortunate coincidence between USB 3 and Bluetooth. There are potentially other ways to solve this using properly shielded cables or ferrite cores. I’d like to test these options in the future and if I do I’ll try to report my findings.
macOS Big Sur is set to change a lot about how the interface looks by, primarily, bringing in a lot of elements from iOS. Some changes include updates to notification windows, the inclusion of Control Center into the menu bar and an overall unification of the design language used for app icons and the dock. App icons now sport the same rounded square look that iOS has used for years and the dock itself is very similar to what you see on iPad. The changes help freshen up the look of macOS and bring a sort of familiarity and consistency that didn’t exist before between the two operating systems. Like a certain rug, it really ties things together.
Other changes, however, feel really off or don’t come across as well and I’m holding out hope that future iterations of the beta will adjust these items or even revert to the previous design before we see the full release of Big Sur.
Lets start with the menu bar:
The new menu bar design is now almost entirely transparent. Because of the transparency, the chosen background comes through loud and clear. So much so that dark backgrounds will make the traditionally black lettering of the menu bar impossible to see. To combat this, the text is rendered in white when the background crosses some threshold so that the text remains legible regardless if the background.
This has a couple of undesirable side effects.
For starters, the new design completely ignores your light versus dark mode preference. Got a dark background? Your menu bar now appears as if you’ve selected dark mode even though the rest of your display is set to light. Of course, the opposite applies if you pick a light background but prefer dark mode. While it possible to disable the transparency by selecting “Reduced transparency” in the Accessibility options the option also affects the otherwise excellent looking dock.
Less serious an issue, the lack of any delineation between where your apps live and where the menu bar starts creates a general sense of awkwardness where you just have this floating text. In the previous (and long-standing) design the menu bar was an obvious feature of the overall desktop. Now, it’s just some floating stuff that doesn’t match my light versus dark mode preference.
Jumping over to Notification Center we’re greeted with additional changes. To be honest, it’s not immediately clear to me why notifications are changing as they’ve been nearly perfect in the past two revisions of the OS. The changes don’t really feel in any way connected to their iOS counterparts and how could they be made to be when macOS lacks the contextual swipe options that iOS has? Anyway, the changes really feel like change for the sake of change and they offer horrible UX for the end-user.
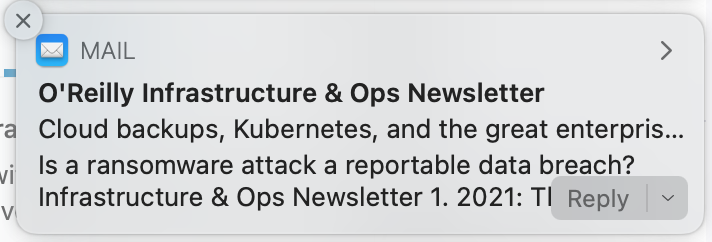
Take the following screenshot taken when the mouse is over the notification:
When the mouse is over the notification you get additional ways to interact with it. This is similar to previous versions of macOS except now some of your options are hidden away in a small submenu. This small submenu, unlike the previous buttons, is much more difficult to interact with quickly. In the previous design, the right side of the notification was split into two parts that were easy to hit with the mouse with little though. The new design requires a bit more finesse in order to hit the intended target. Not impossible, of course, but something that can take you out of “the zone” and gets annoying if you interact with notifications often. The little menu also interferes with the text of the notification in a way that feels sloppy.
The operating system itself is not the only thing seeing changes to look more like iOS. Many, if not all, of the core Apple apps are also receiving modifications to make the apps look more like they might if they were on iOS. Safari and Mail, for example, both look much more like their iOS counterparts than ever before. All of them also lost nearly all contrast making everything blend together. This makes some tasks that were once easy, like determining which tab was active in Safari, nearly impossible without really paying attention:
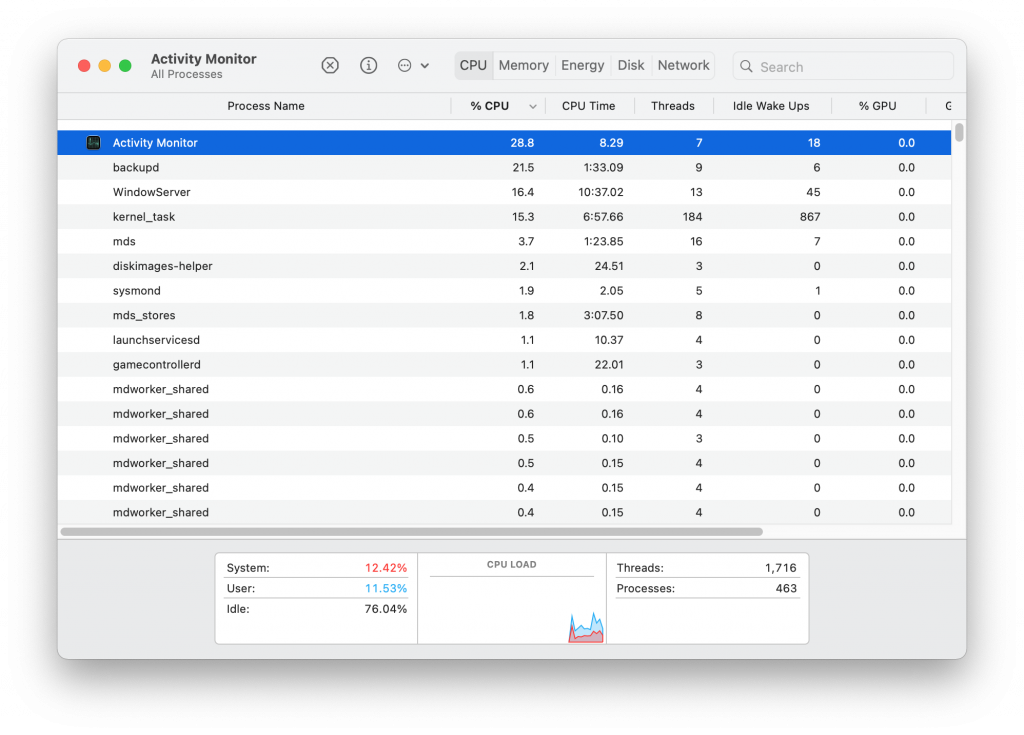
Activity monitor just never looks like anything is active, that everything is either not available or somehow not active at all:
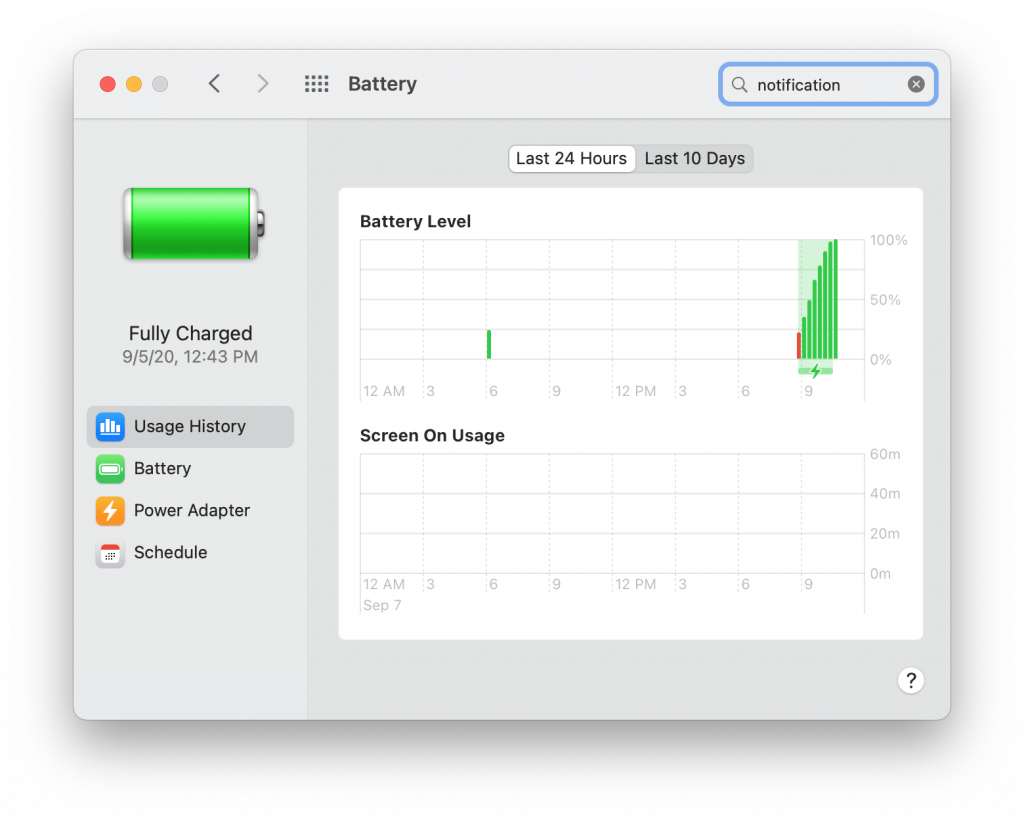
Especially when compared to the battery preferences window:
It’s entirely fair to say that Big Sur is still in beta and a lot of this could still change before to the full release. I sincerely hope that changes do happen to at least the elements I’ve featured here as they are the most glaring items I’ve seen so far. They are also items you interact with on a daily basis so they have to be right. Apple has always been about sweating the details and nailing the user experience. It is a huge reason I’ve been running macOS since they switched to the Intel platform years ago but Big Sur really feels like a step in the wrong direction. There are a lot of things to like about Big Sur but they can easily be negated by missing the mark on the bits we interact with the most.
Whatever your use case may be, it is possible on at least macOS 10.15+ to modify the number of CPU cores that are currently online or available in realtime. The available CPU core count can be modified using a utility called cpuctl.
To get a list of currently active CPU cores issue sudo cpuctl list. This will output which cores are currently active. Here is the output on my two core, four thread MBP:
Keep in mind you should not offline the CPU marked as “master”, doing so will cause your system to become unresponsive even if you leave others running.
For detailed information take a look at the man page for it (man cpuctl).
From the draft archives. This is a post I started over ten years ago but never got around to finishing. It discusses my reaction to someone telling me the web was dead and that mobile was taking over. Their argument was that apps would replace websites. I disagreed. I have left the majority untouched, cleaning up the language a bit. I left some final thoughts at the end.
Someone told me recent that the web is dead and that the future is mobile. What they really meant was that browsing the web with a traditional web browser is dead. But they’re wrong, all that has really happened is that mobile devices have just now become viable options for accessing the vast amount of information and resources available on the Internet. The web isn’t dead, mobile devices just don’t suck anymore.
Thanks to the iPhone there has been a major shift in how people think about the web and how mobile devices fit in. The mobile web experience is no longer limited to a simple list of links and no images. It’s fuller and more capable. It’s rich with images, audio and even video. People care about ensuring their information is fully accessible to people on the go and looks great while using small devices. And if a site can’t be massaged to work with the iPhone then a specialized app can be created to ensure the end user has a great experience.
Of course, Apple is no longer the only vendor out there trying to create a great end user experience. The most notable competitor to iPhone is nearly any Android based phone. Android is incredibly young as far as mobile OSs go but already it’s a worthy competitor to Apple’s iOS. Either device is capable of providing a full web experience.
Mobile devices won’t replace the web experience we all know today. They simply extend it. They are extensions to our desktop computers, devices we can use while on the go to keep up on all of the information available to us. The key is to ensure that end users are able to access the information they want in a convenient manner. If that means creating a template for your site or even creating a specific app.
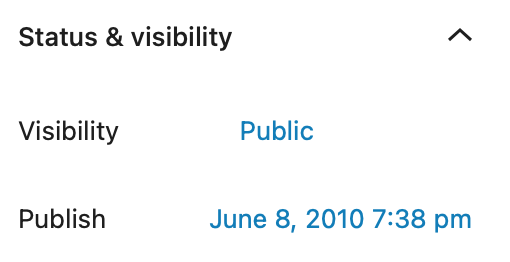
My original post from June 8, 2010
While I don’t believe (and continue to not to believe in 2020) mobile devices will completely replace computers, I do think they will become the primary device for a lot of people.
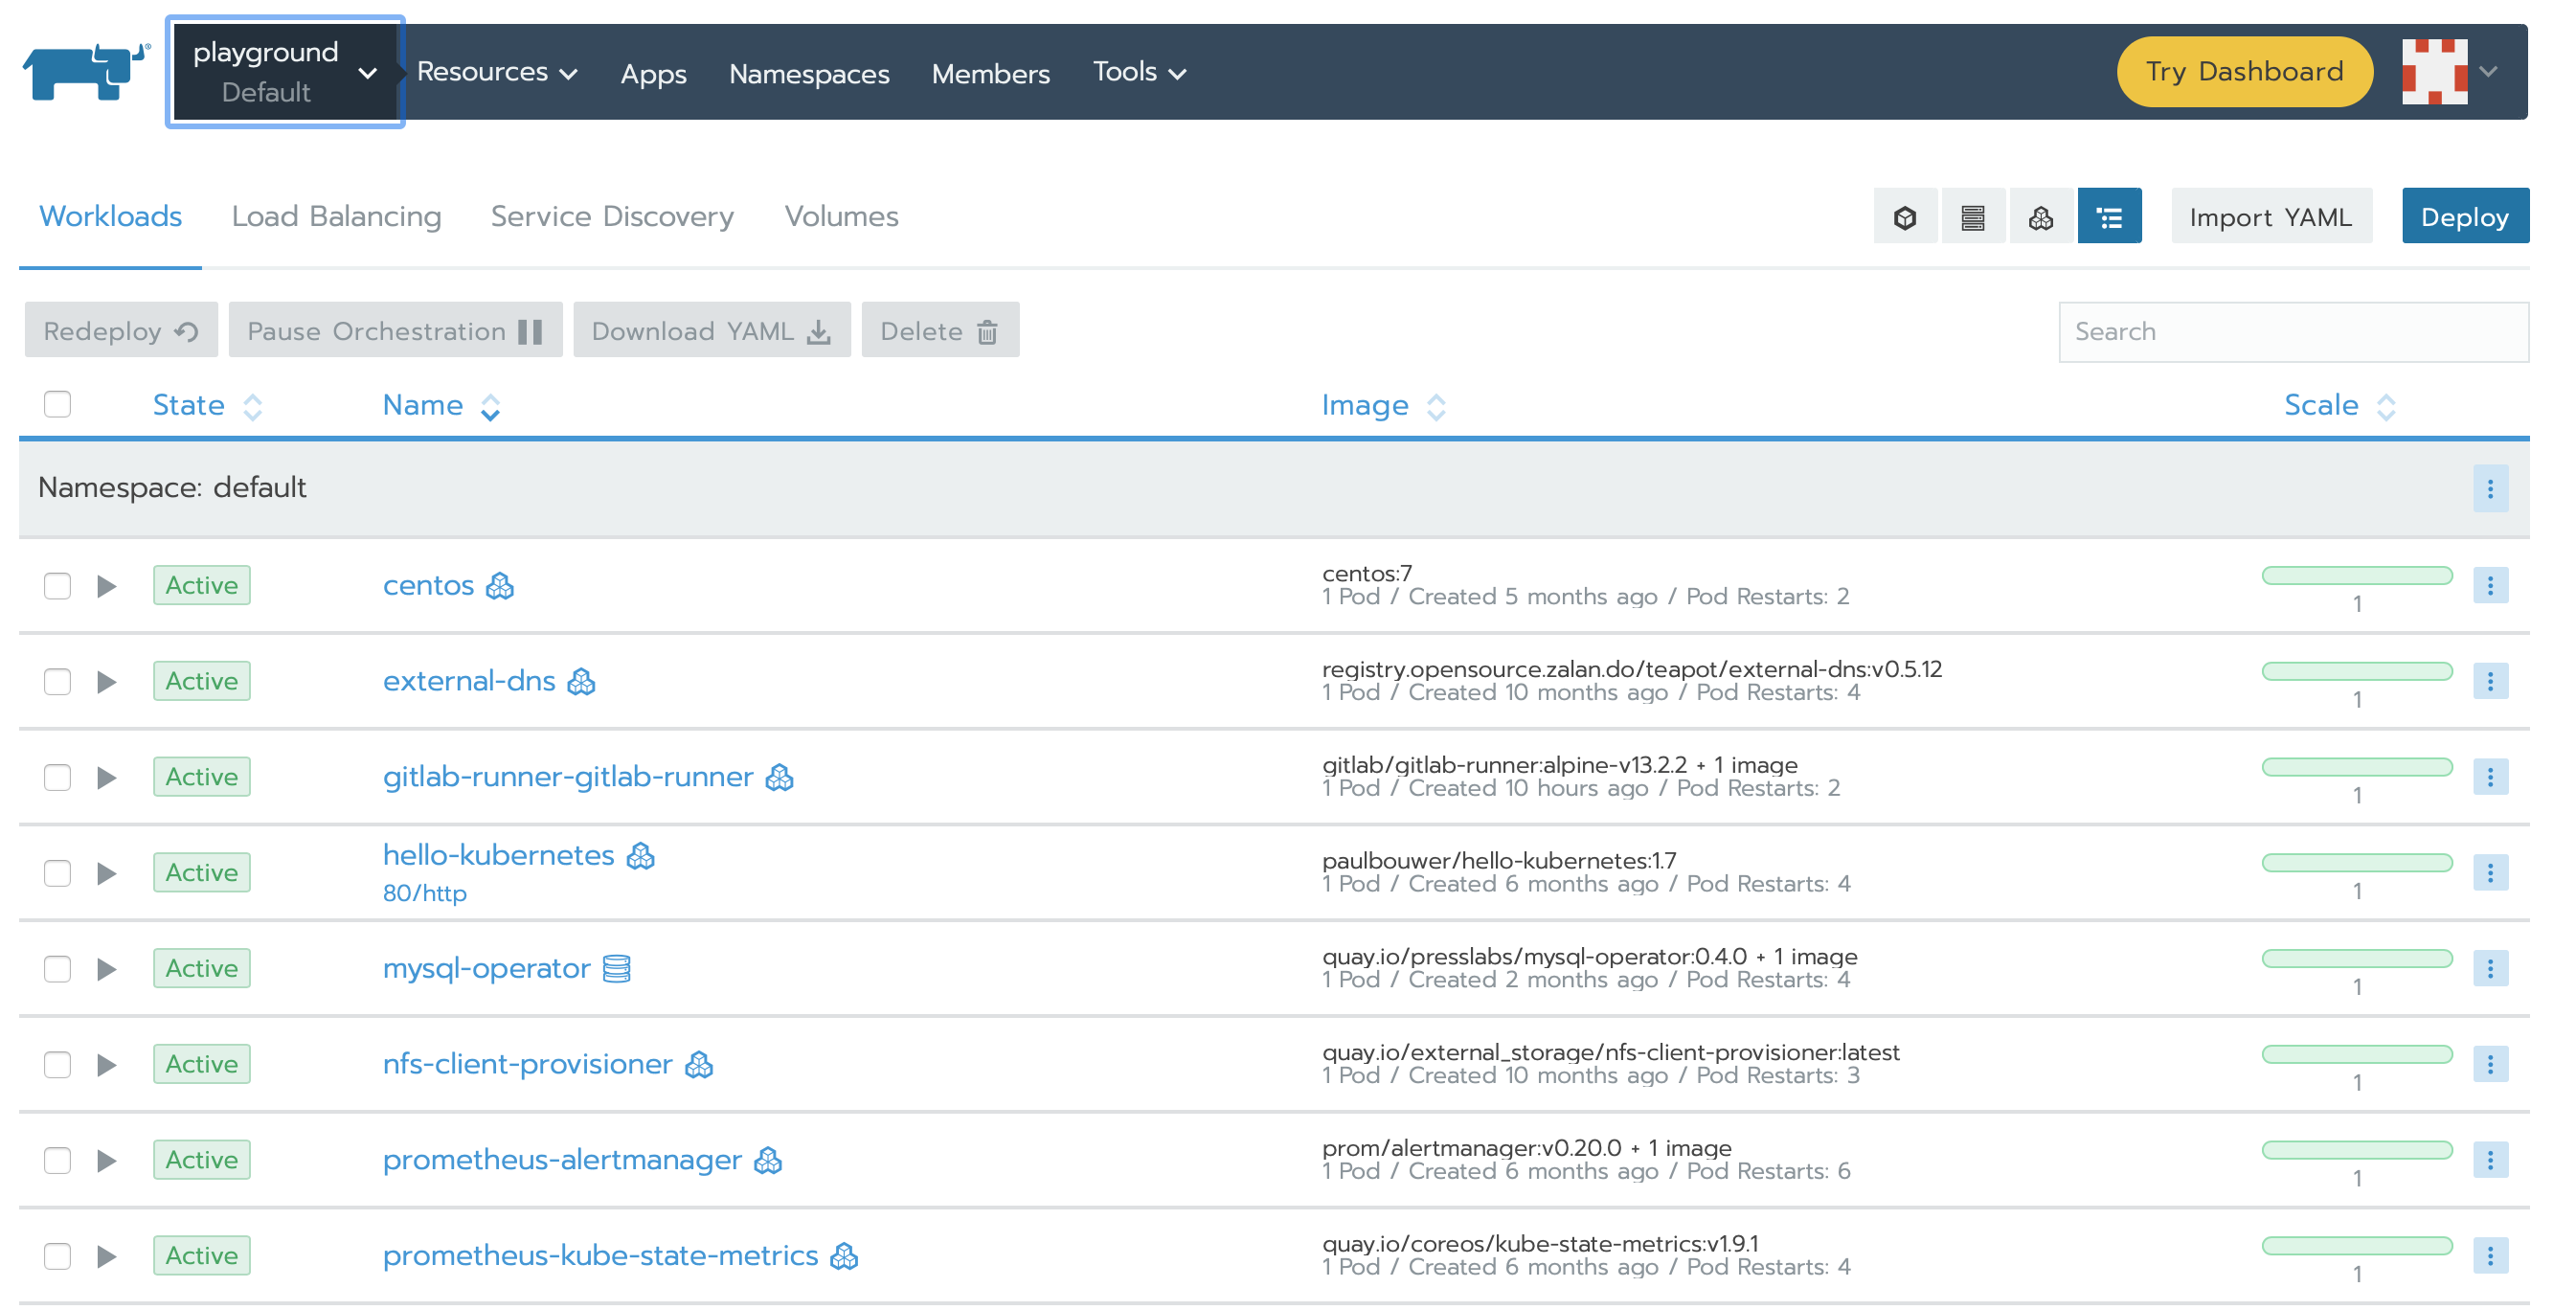
As I continue to mess around with various ways of installing and running Kubernetes in my home lab using Rancher I keep coming up with different ways to solve similar problems. Each time I set it up using different host OSs I learn a bit more which my primary goal. The latest iteration uses CentOS 8 and allows for iSCSI based persistent storage to work properly. I want to use CentOS 8 because it includes a newer kernel required for doing buildx based multi-arch builds. In this post, I’d like to go through the process of setting up CentOS 8 with Docker and what utilities to install to support NFS and iSCSI based persistent storage so that it works properly with Rancher.
I keep doing more multi-architecture builds using buildx and continue to find good information out there to help refine the process. Here is a post I found I thought I’d share that discusses how to build multi-architecture using AWS Graviton2 based instances which are ARM based. https://www.smartling.com/resources/product/building-multi-architecture-docker-images-on-arm-64-bit-aws-graviton2/. I haven’t officially tried this yet but the same process should also work on a Pi4 with the 64bit PiOS installed.
Under some conditions, you may find that your Docker in Docker builds will hang our stall out, especially when you combine DIND based builds and Kubernetes. The fix for this isn’t always obvious because it doesn’t exactly announce itself. After a bit of searching, I came across a post that described the issue in great detail located at https://medium.com/@liejuntao001/fix-docker-in-docker-network-issue-in-kubernetes-cc18c229d9e5.
As described, the issue is actually due to the MTU the DIND service uses when it starts. By default, it uses 1500. Unfortunately, a lot of Kubernetes overlay networks will set a smaller MTU of around 1450. Since DIND is a service running on an overlay network it needs to use an MTU equal to or smaller than the overlay network in order to work properly. If your build process happens to download a file that is larger than the Maximum Transmission Unit then it will wait indefinitely for data that will never arrive. This is because DIND, and the app using it, thinks the MTU is 1500 when it is actually 1450.
Anyway, this isn’t about what MTU is or how it works, it’s about how to configure a Gitlab based job that is using the DIND service with a smaller MTU. Thankfully it’s easy to do.
In your .gitlab-ci.yml file where you enable the dind service add a command or parameter to pass to Gitlab, like this:
This example shown will work if you are using a Kubernetes based Gitlab Runner. With this added, you should find that your build stalls go away and everything works as expected.
Updated Feb 2023 to remove the use of the incubator chart which has gone dead and replace it with something else. It also updates information about the persistent storage CSI I am using.
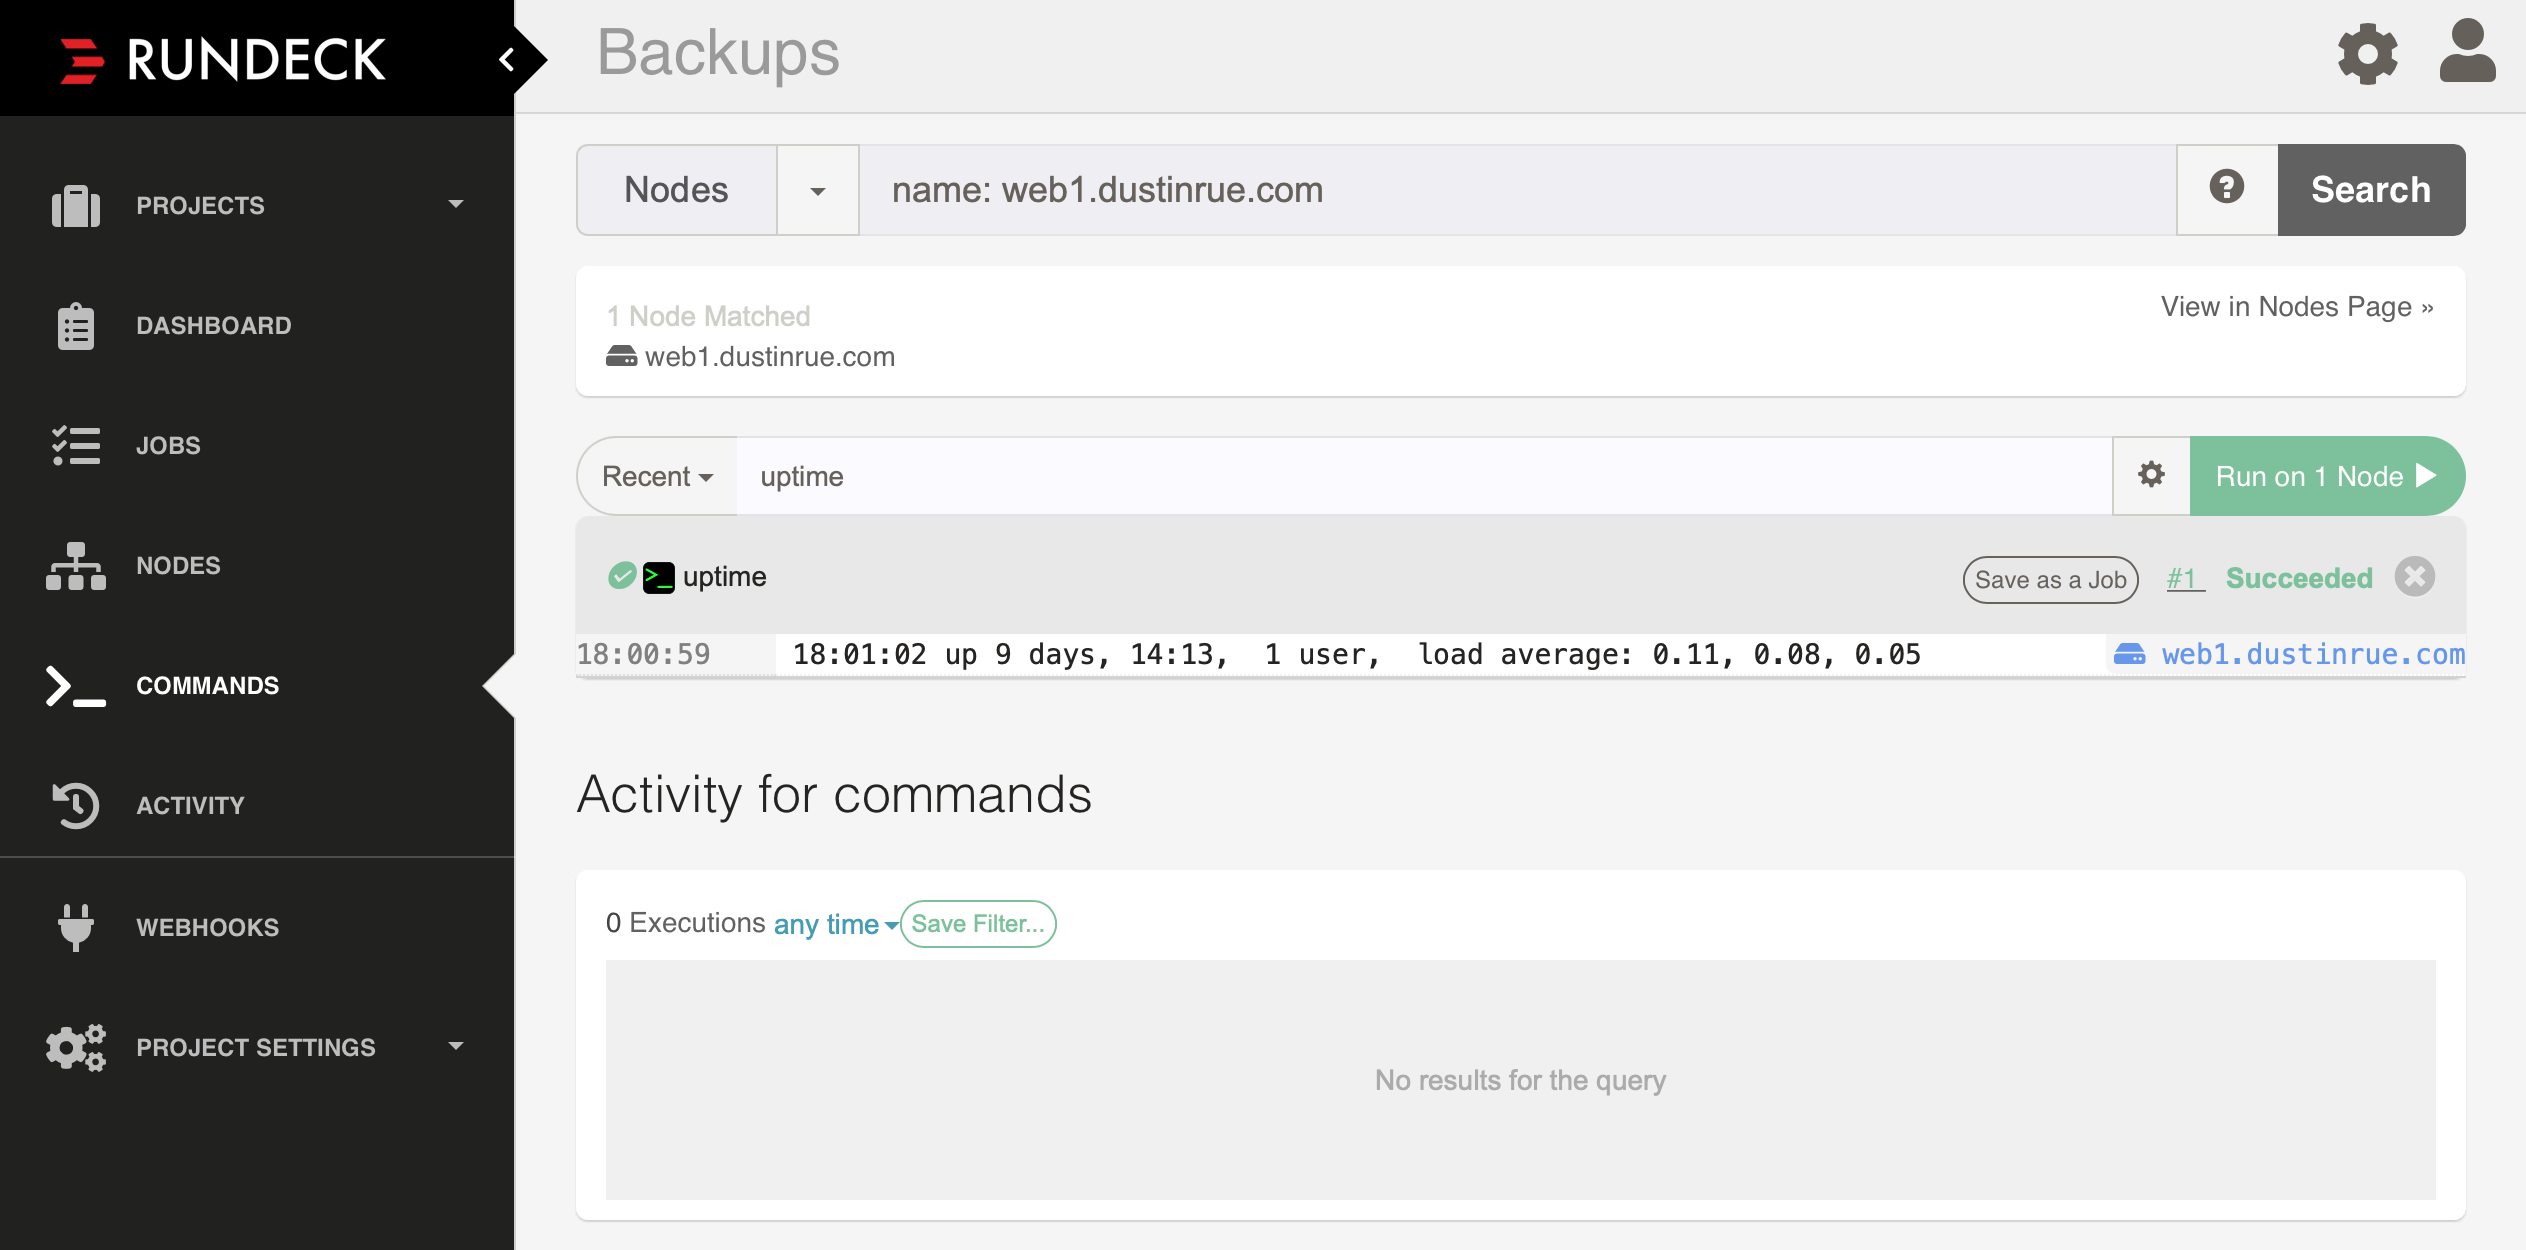
In this post I’m going to review how I installed Rundeck on Kubernetes and then configured a node source. I’ll cover the installation of Rundeck using an available helm chart, configuration of persistent storage, ingress, node definitions and key storage. In a later post I’ll discuss how I setup a backup job to perform a backup of the server hosting this site.
For this to work you must have a Kubernetes cluster that allows for ingress and persistent storage. In my cluster I am using nginx-ingress-controller for ingress and democratic-csi. The democratic-csi-iscsi is connected to my TrueNAS Core server and creates iSCSI based storage volumes. It is set as my default storage class. You will also need helm 3 installed.
With the prerequisites out of the way we can get started. First, add the helm chart repository by following the directions on located at https://github.com/EugenMayer/helm-charts/tree/main/charts/rundeck. Once added, perform the following to get the values file so we can edit it:
helm show values eugenmayer/rundeck > rundeck.yaml
Came across this blog post by Corey Quinn over on lastweekinaws.com discussing the topic of vendor lock-in, specifically cloud vendors. Corey made some really excellent points but how you are probably already locked in without realizing it. The post reminded me that when I started using AWS after a job change that I was also in the camp of avoiding vendor lock in. Over time I realized, however, that there are some things you must embrace when it comes to a given cloud provider but that doesn’t mean you can’t smartly pick the services you use so that you might leverage some tools that are cloud provider agnostic.
Lets first talk about some additional ways that vendor lock in is inevitable. For starters, if you are not leveraging some of your cloud providers most integral features (speaking purely in AWS terms) like IAM policies and security groups you are almost certainly doing it wrong. Not using IAM policies for configuring an ec2 instance or allowing a CloudFront distribution to access an S3 bucket is usually the wrong way to go about things. You’re much better off just embracing these AWS only techniques in order to build a cleaner, more robust solution. These are the kinds of vendor specific things you should embrace.
However, there are times when you might want to stop and evaluate other options before moving forward. For example, AWS Systems Manager is a tool for managing your systems. Unlike IAM roles, policies and security groups there are other tools out there that provider similar functionality that may be better suited to your needs. Or, maybe you have configuration management that can build and assist in maintaining a database cluster on any provider.
Or maybe you’ve developed your own backup solution that works on any setup. In this case you might want to avoid using RDS unless you really need or want the ease of use that RDS can provide. Maybe the value of having the same tools that you are maintaining work across any cloud provider outweighs the benefits of RDS.
Services like RDS are much easier to cut ties with because your data is actually portable within reasonable limits. Given a normal MySQL RDS instance you can copy the data out and import into some other MySQL system. In these cases I don’t really see RDS as true vendor lock in the sense that you would need to rethink how your software works if you were to move it but rather that if the tooling you’ve built around it is AWS specific that’s where you can get into trouble.
Other services are certainly not that simple and this is where you must carefully consider the services that you use, what your sensitivity to being “locked-in” is and the value that the specific service offers. True vendor lock-in, in my mind, is all about the actual data. Lets say you are considering a video transcoding service that once the videos are transcoded cannot be transferred out or played with out a specific player. This is a great example of a service I would avoid if at all possible and go with some other service that simply accepted an input and provided you with some output to do with as you please.
At the end of the day, avoiding vendor lock-in is a game of determining if what you are looking at is true lock-in or an opportunity to use a platform well and correctly. Avoiding every cloud provider specific tool is almost always a mistake.
Arm processors, used in Raspberry Pi’s and maybe even in a future Mac, are gaining in popularity due to their reduced cost and improved power efficiency over more traditional x86 offerings. As Arm processor adoption accelerates the need for Docker images that support both x86 and Arm will become more and more a necessity. Luckily, recent releases of Docker are capable of building images for multiple architectures. In this post I will cover one way to achieve this by combining a recent release of Gitlab (12+), k3s and the buildx plugin for Docker.
I assume you already have a working installation of Gitlab with the container registry configured. Optionally, you can use Docker Hub but I won’t cover that in detail. Using Docker Hub involves changing the repository URL and then logging into Docker Hub. You will also need some system available capable of running k3s that is using at least Linux 4.15+. For this you can use either Ubuntu 18.04+ or CentOS 8. There may be other options but I know these two will work. The kernel version is a hard requirement and is something that caused me some headache. If I had just RTFM I could have saved myself some time. For my setup I installed k3s onto a CentOS 8 VM and then connected it to Gitlab. For information on how to setup k3s and connecting it to Gitlab please see this post.
Once you are running k3s on a system with a supported kernel you can start building multi-arch images using buildx. I have created an example project available at https://github.com/dustinrue/buildx-example that you can import into Gitlab to get you started. This example project targets a runner tagged as kubernetes to perform the build. Here is a breakdown of what the .gitlab-ci.yml file is doing:
Installs buildx from GitHub (https://github.com/docker/buildx) as a Docker cli plugin
Registers qemu binaries to emulate whatever platform you request
Builds the images for the requested platforms
Pushes resulting images up to the Gitlab Docker Registry
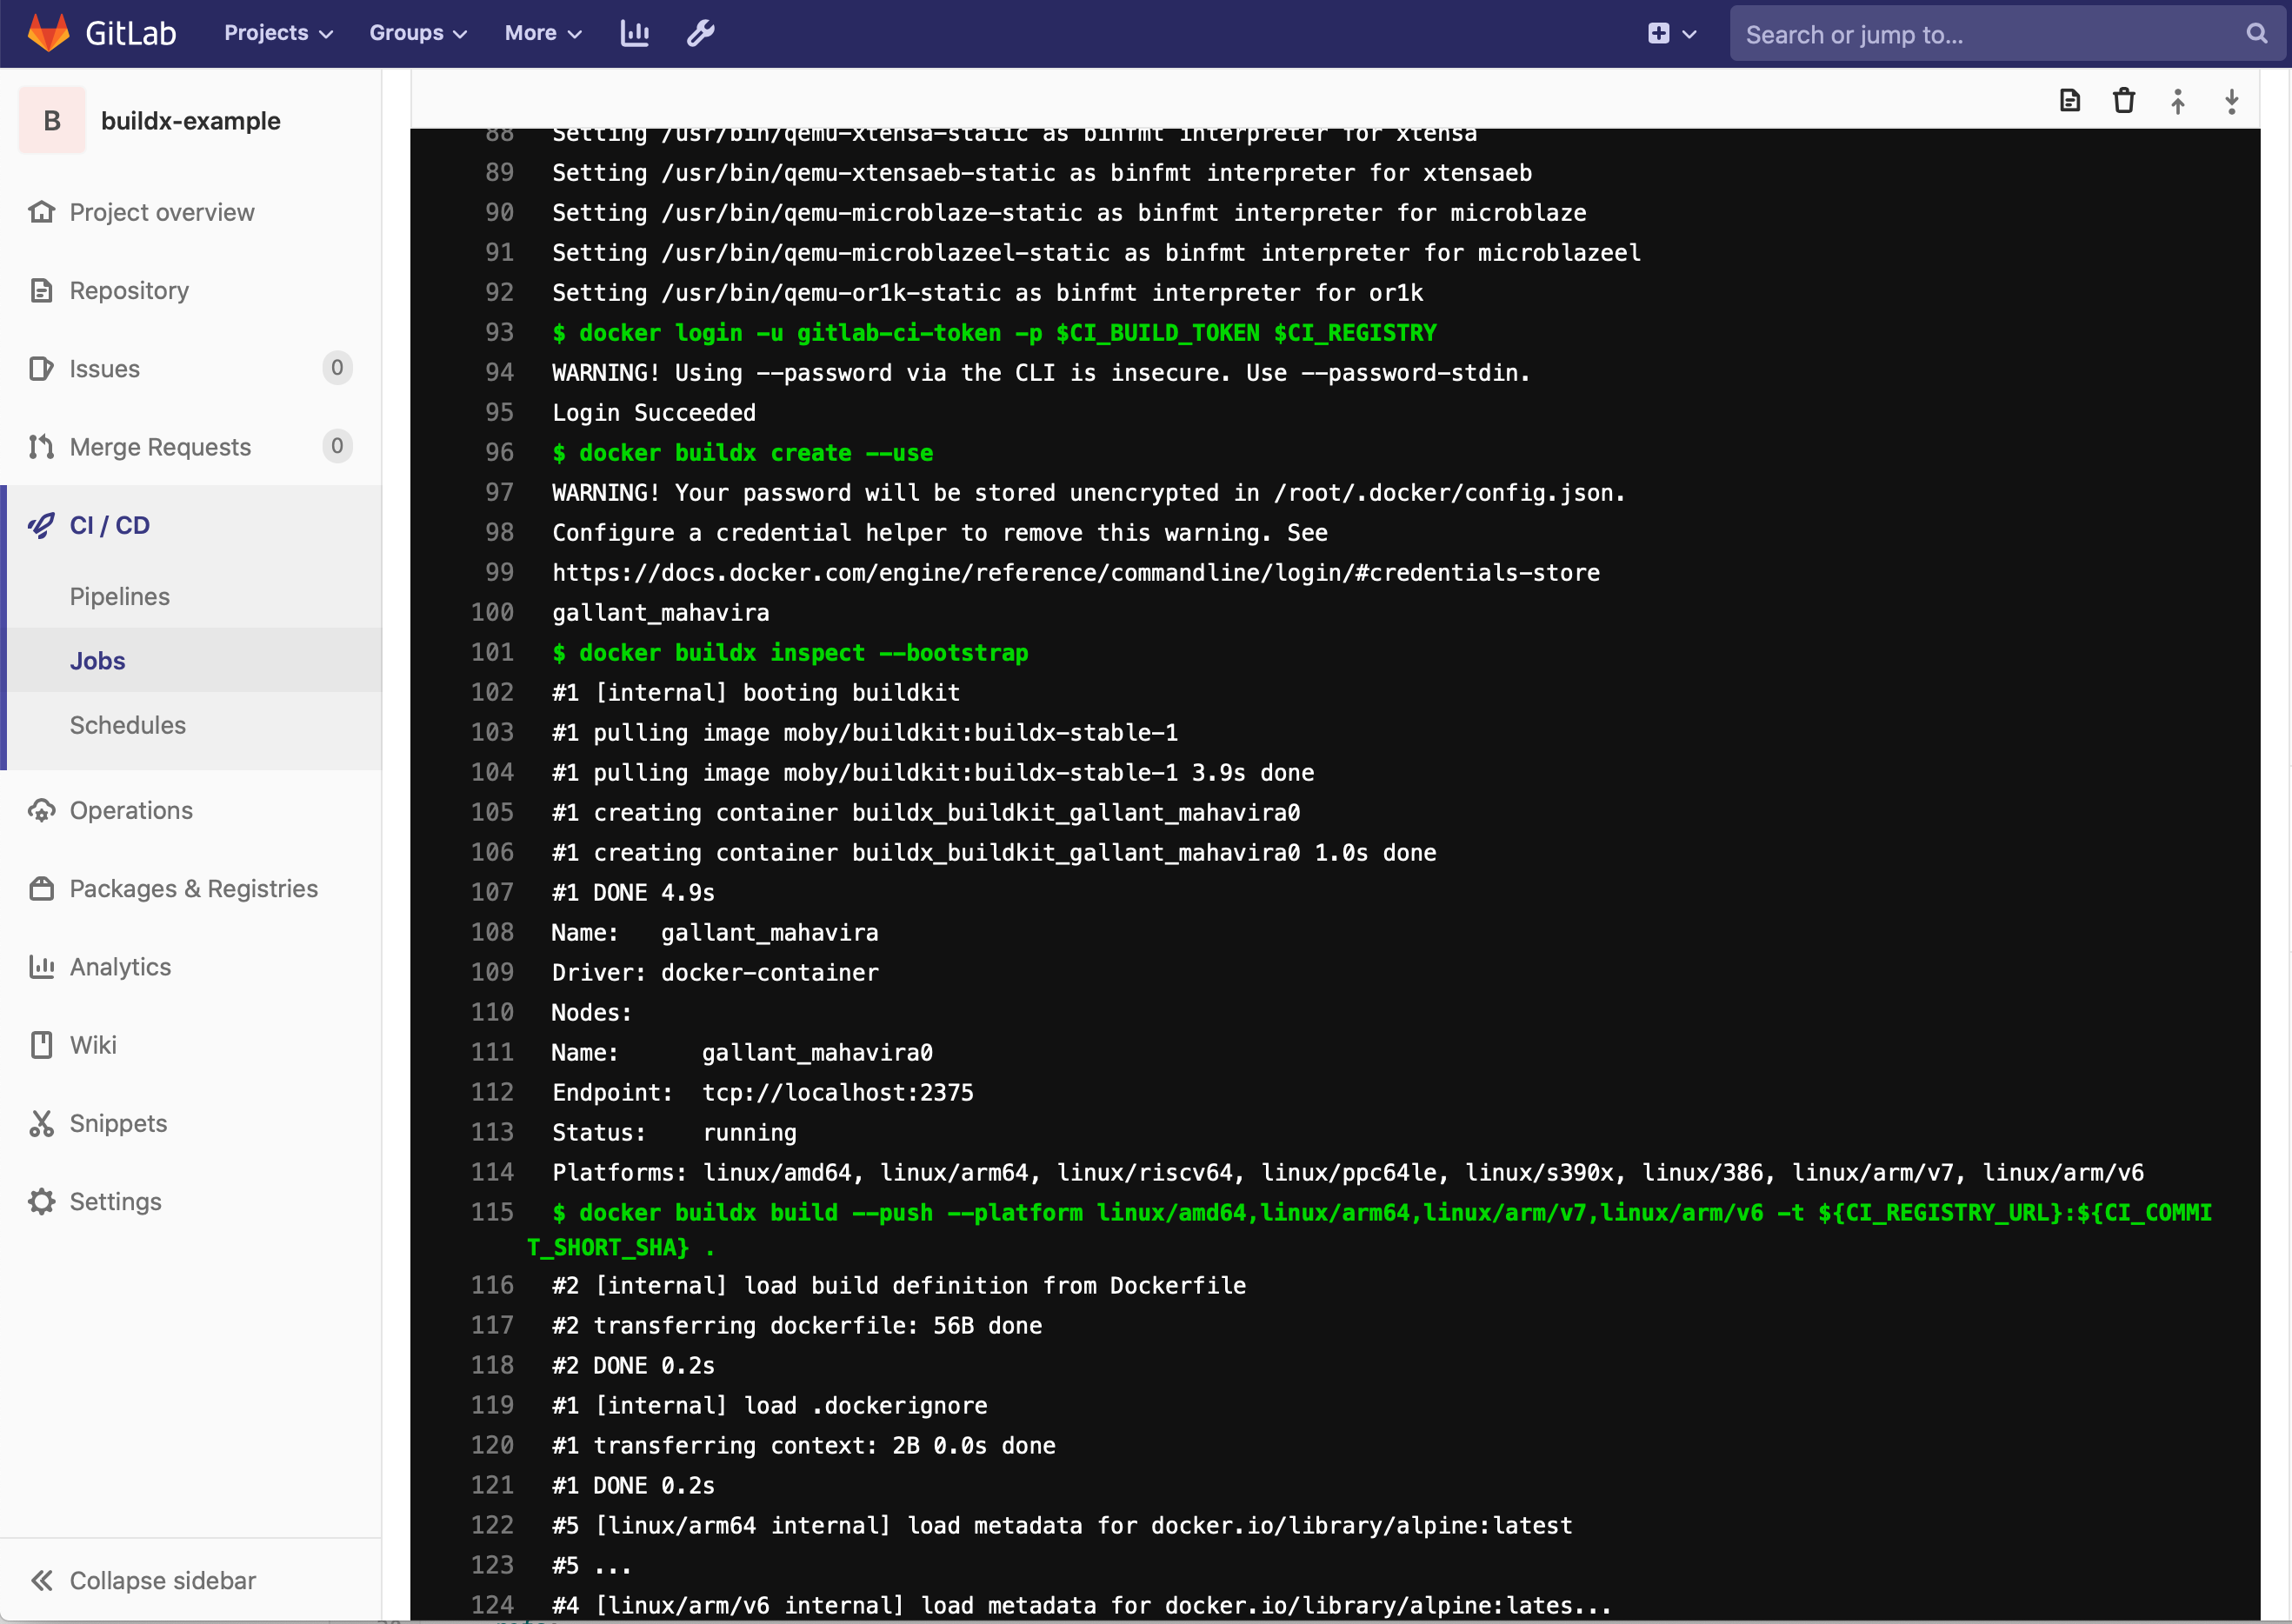
Unlike the linked to posts I also had to add in a docker buildx inspect --bootstrap to make things work properly. Without this the new context was never active and the builds would fail.
The example .gitlab-ci.yml builds multiple architectures. You can request what architectures to build using the --platform flag. This command, docker buildx build --push --platform linux/amd64,linux/arm64,linux/arm/v7,linux/arm/v6 -t ${CI_REGISTRY_URL}:${CI_COMMIT_SHORT_SHA} . will cause images to be build for the listed architectures. If you need a list of available architectures you can target you can add docker buildx ls right before the build command to see a list of supported architectures.
Once the build has completed you can validate everything using docker manifest inspect. Most likely you will need to enable experimental features for your client. Your command will look similar to this DOCKER_CLI_EXPERIMENTAL=enabled docker manifest inspect <REGISTRY_URL>/drue/buildx-example:9ae6e4fb. Be sure to replace the path to the image with your image. Your output will look similar to this if everything worked properly:
I hope this is enough to get you up and running building multi-arch Docker images. If you have any questions please open an issue on Github and I’ll try to get it answered.